Hey There!
Thanks for stopping by the MPS Blog. Here you'll find all the nitty gritty, behind-the-scenes details of the projects you see on my Instagram. Grab a cup of coffee and take a look around. Happy DIYing!
I'm Jennifer Gizzi.
Browse by Category
design
sourcing
diy TutorialS
moodboards
SHOP OUR HOUSE
gift guides
Search the Blog
RevoTile Installation: The Full Tutorial
September 15, 2020
This post in in partnership with Daltile.
The most requested tutorial is here! I’ve installed Daltile’s new RevoTile now 3x and I can’t say enough good things about it. The installation is so easy compared to traditional tile AND you get the quality of premium porcelain tile. It’s the ultimate win-win for any DIYer!!
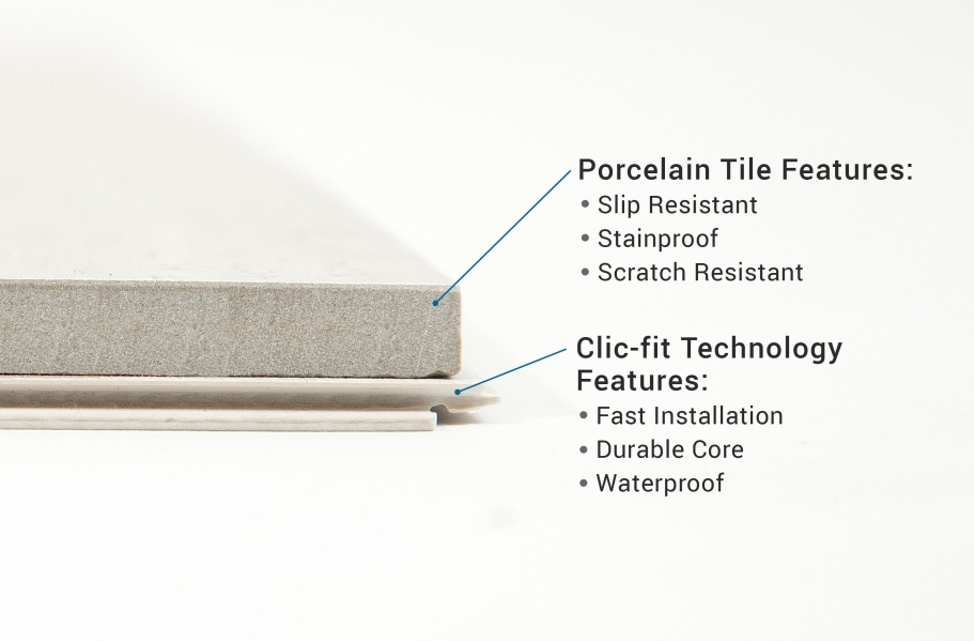
I am going to follow this post with a full Q&A – but for now… the main things to know are that YES, a beginner DIYer can tackle this installation and YES, this is regular porcelain tile. The difference is that it has ClicFit Technology that allows for seamless installation WITHOUT mortar…. yes you heard me correctly. This tile acts as a floating floor and doesn’t require mortar.
Let’s get down to the details!

The RevoTile installation kit comes with everything you need for installation, including expansion spacers, a tapered pull bar, and a heavy-duty tapping block. You will also need to purchase the RapidPrep Underlayment for your project. Each pack covers 100 SF. Use Daltile’s F.A.S.T. Underlayment Tape to fasten sheets together at the joints.
RECOMMEND: RevoTile Mallet from Daltile.
The first step before this tiling project (or any tiling project), is to prepare the subfloor and ensure that the floor is level. You want to inspect the floor carefully for any rough spots and make sure it is completely clean of any debris.
RevoTile allows for a 3/16″ difference over a 10-foot area. My floor was pretty level but you can determine if your floor is level by running a string at a diameter across your entire floor and measuring the distance from the floor to the string. There are other ways to do this, but this method is pretty simple and doesn’t require any fancy tools.
Note: RevoTile can be installed over many existing floors including tile, hardwood, and LVT.


See above. You would measure this distance at different spots around the floor and ensure all of the measurements fall within 3/16″ of each other.

Underlayment comes with the installation kit. It’s a pretty cool accordion style that is very easy to lay down, and it comes with gridlines so it is really easy to cut accurately! You simply lay it down and connect the seams with underlayment tape without it overlapping (overlapping would cause humps). The step provides a moisture barrier and is sound dampening.While similar to another floating floor underlayment, it is specific to the RevoTile. I am laying mine down over a regular plywood subfloor.
Note: Underlayment must be used for installation for both proper function and to protect your warranty.

The first thing I do with any tiling project is to ‘dry lay’ the tile both in the first row and across the room or wall. I want to avoid any very small cuts anywhere in the room. For this room and layout (see above), I ended up cutting the first row to start so that it flowed the way I wanted it to across the room and equal tile cuts on both ends. More work to start, but ensures the best result!
I used a wet saw for this tile although you can use a “score & snap” tool. I will always use a wet saw if given the opportunity. I found the tile very easy to cut.

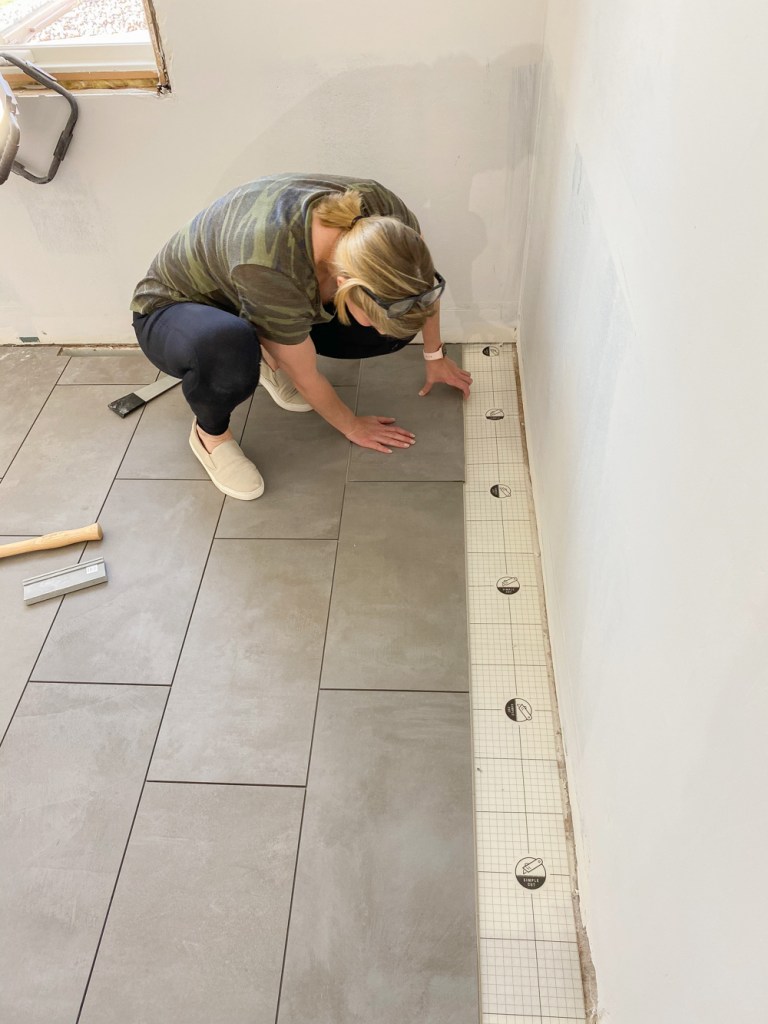
You will need spacers against the wall for the first row. The first and second rows are always the hardest with floor tile because you have to secure the tiles, but don’t want anything to shift. The spacers will help ensure the tile doesn’t sneak under the wall and it allows for material expansion.
You can see the lip on the tile in the photo above and a diagram of the structure of the tile below. It truly acts like a click and lock system which makes the spacing impossible to get wrong! (That might be my favorite part!)

Here’s a good resource below that I referenced before tackling this project.
https://www.daltile.com/how-to/how-to-install-tile/how-to-install-revotile
The short video above also gives some great tips for quick and easy installation! There is a short side and long side, a groove and tongue. You start at a 45-degree angle to lay the tile and then use a block and hammer to secure it into place.
RECOMMEND: ClicFit Install Kit from Daltile to install
As you start installing the tile, my best tip if it isn’t going in smoothly (most will) – is to step on both the tile you are installing and the tile you are joining it to.
Always stop at least one point in a room with flooring projects to make sure rows are staying straight. Measure from the opposite wall in at least 2 different area to make sure things are lining up and you have an equal distance to the wall in both areas. This will ensure the last row is nice and uniform!

Last row going in! Next up is grouting! It’s important to use the Rapid Grout that is designed for RevoTile. It is also worth noting that with this tiling system, you can tile and grout in the same day!
I used a paddle mixer to mix the grout and a regular grout float to apply it.
Sometimes grouting can be even more time-consuming… but large format tiles mean less grout lines! With this system, every tile is perfectly level so grouting is a breeze… not to mention instant gratification!
There is no science to grouting but I typically apply a large amount to area and move it around at different angles to fill the grout line evenly. Work in sections and take a very slightly damp sponge to remove as much grout residue as possible. This grout dries fast so it’s important to work in small sections and clean thoroughly as you go.
Pro Tip: Wet out the tile surface with a damp sponge before grouting. This helps with easy cleanup.

Down to the threshold. I went back and forth on how to handle the doorway and ended up running it tightly to the hallway floor with the same size grout line. You can also install a T-mold or some other transition piece.

Have I convinced you to try this new RevoTile? Drop your questions in the comments or head over to my Instagram where I have all the highlights saved!
WIFE, MAMA, DESIGNER, RENOVATOR, & PASSIONATE DIY EDUCATOR
I'm Jennifer Gizzi.
Let's create our dream homes together.
Navigate
home
about
blog
courses
shop
Social
Youtube
Legal
Terms & Conditions
Privacy Policy
© 2021 Making Pretty Spaces


Can you do a herringbone pattern with these tiles?
I don’t believe you can!