DIY Faux Wood Garage Door
Earlier this summer, we started tackling our exterior renovation. I knew I wanted to paint the brick, update exterior doors, replace lighting & look at getting new wood garage doors. The entire process took a little over 2 months and I’m over the moon with all the updates.
You can read a few planning posts here:
Painting Our Brick House: All The Exterior Design Plans!
Working With An Online Design Service To Visualize Our Exterior Renovation
20 Really Good Exterior Sconces
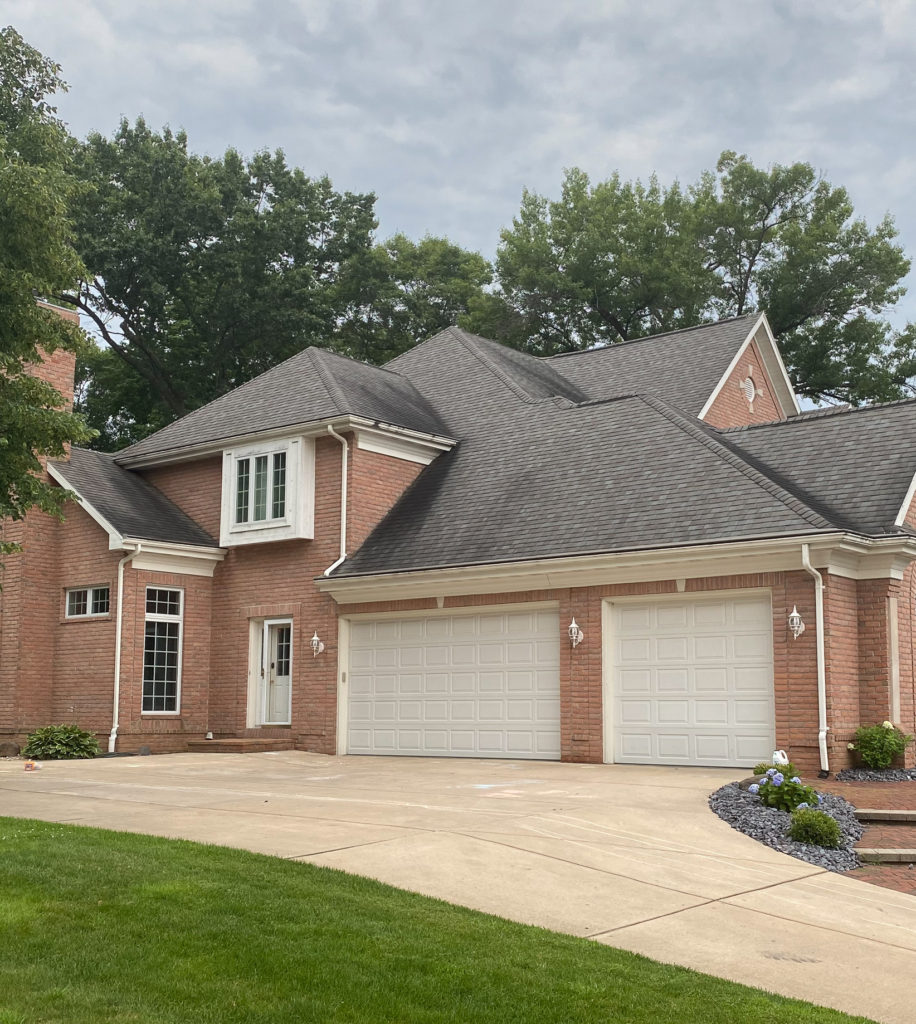

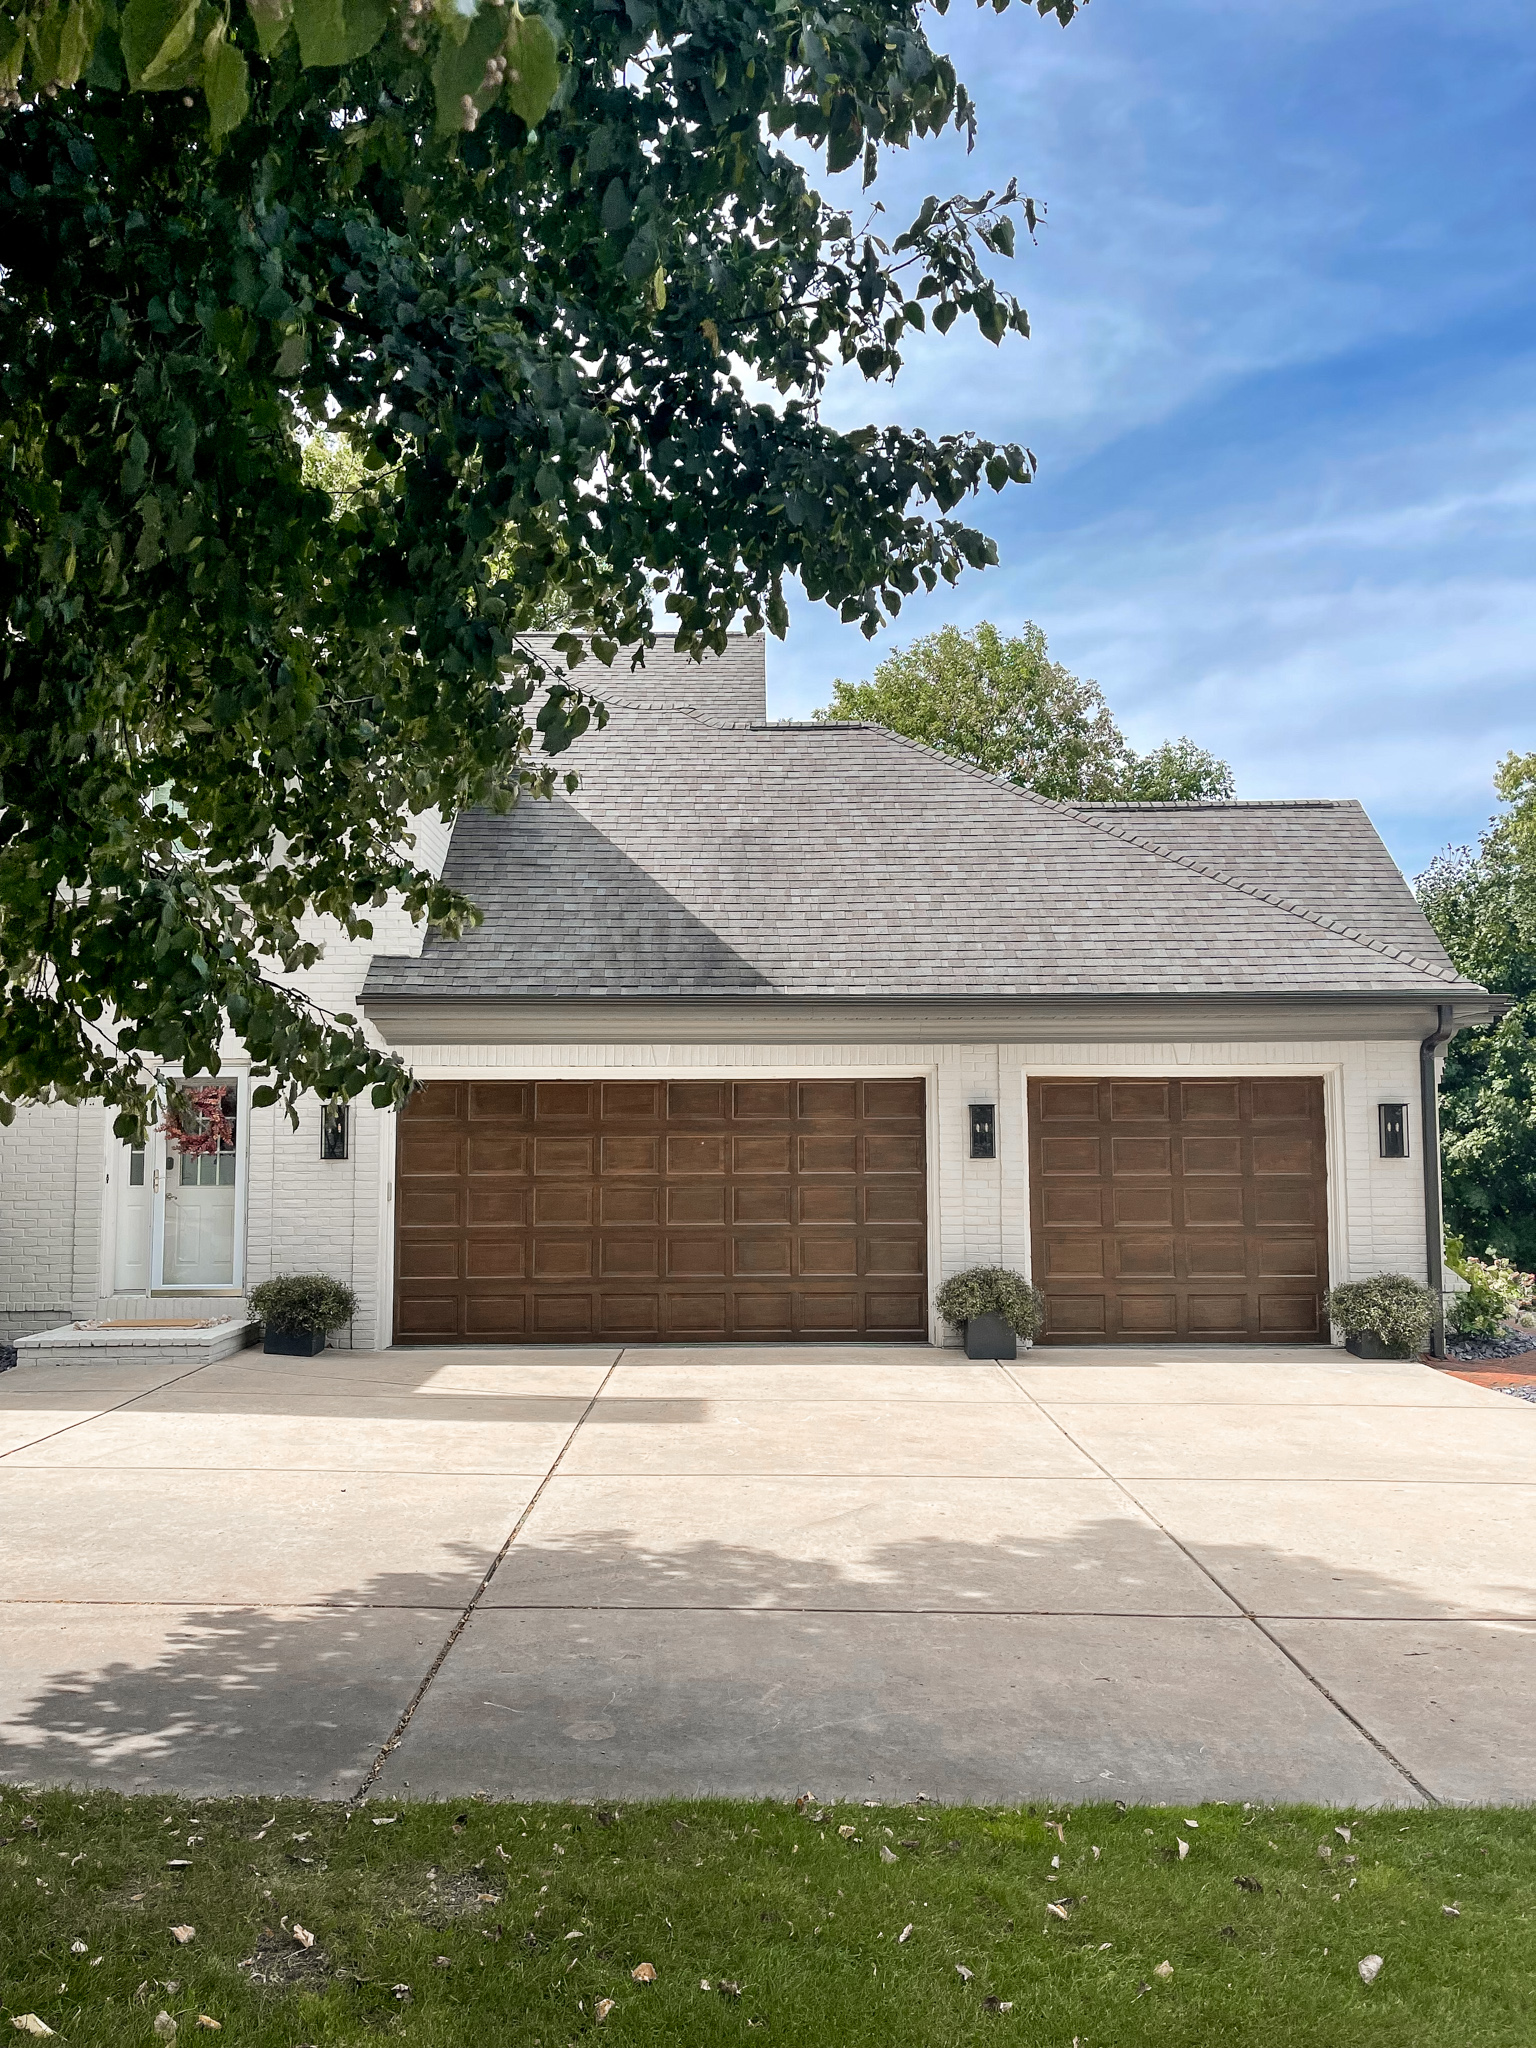
After the painting was complete, I knew the garage doors had to change to really elevate all the other work we put in. I contacted a few garage door companies and was quoted between $6,500-$10,000 for new wood garage doors. We were already a bit over our exterior renovation budget, so I started looking at other options. Even if the budget was there, the lead time was 3-5 months!
I remembered seeing a few projects where gel stain was used to create a faux wood look. I figured it was worth a little DIY sweat effort to see if it was a viable option.
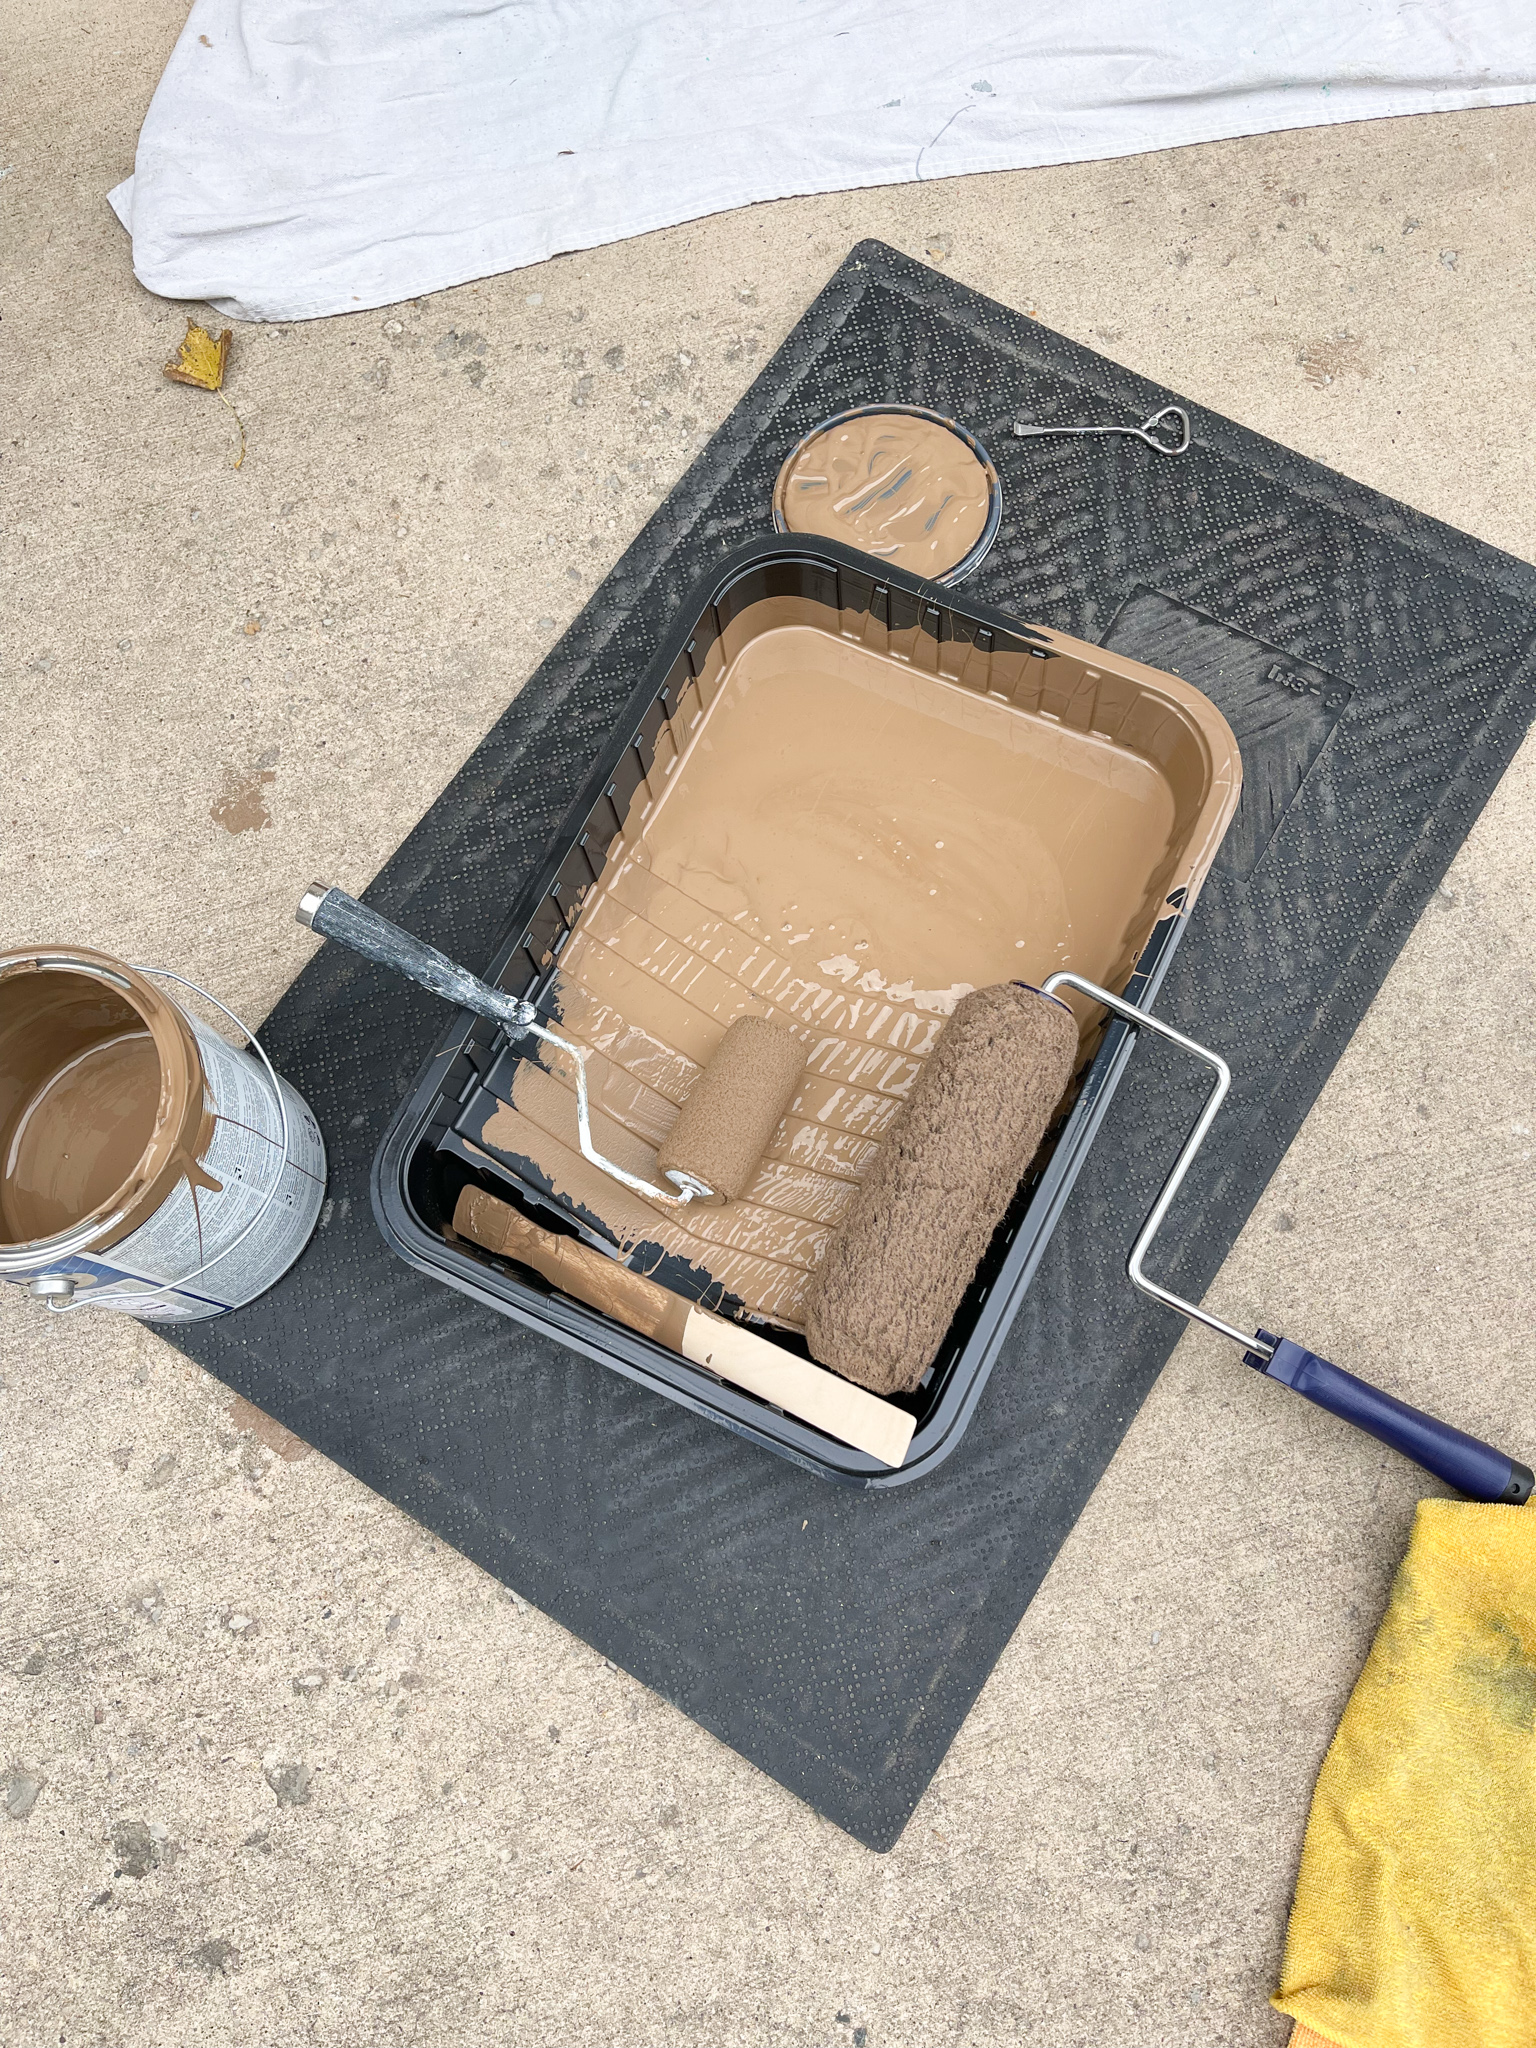
Project Supplies
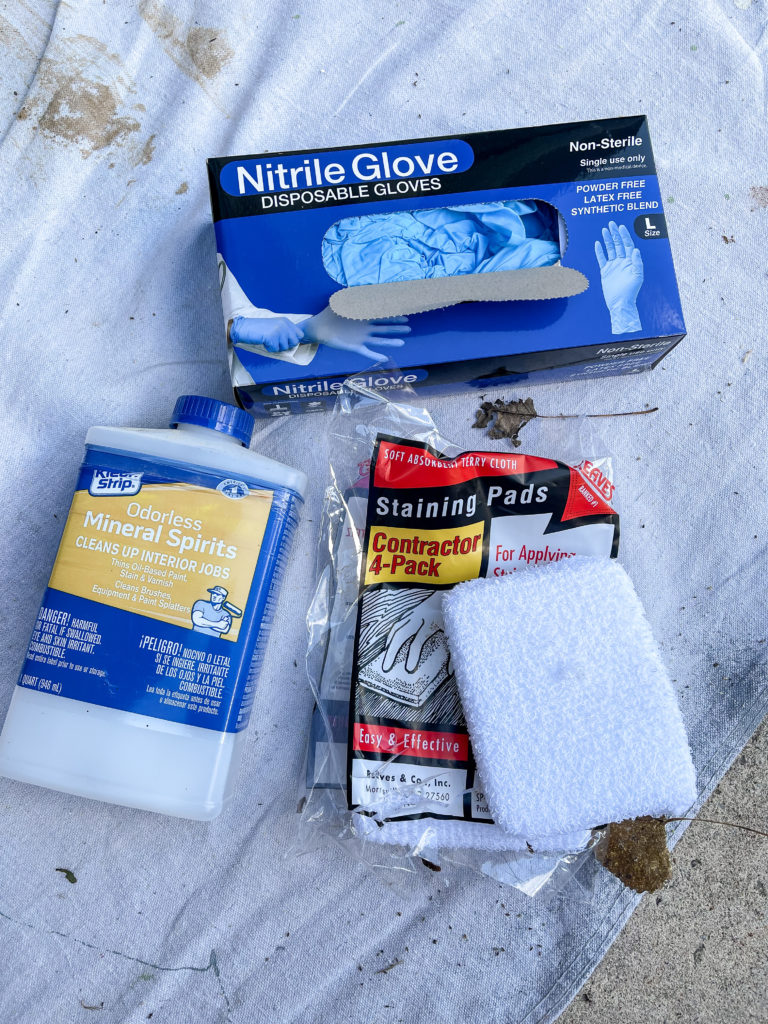
- Disposable Gloves
- Staining Pads
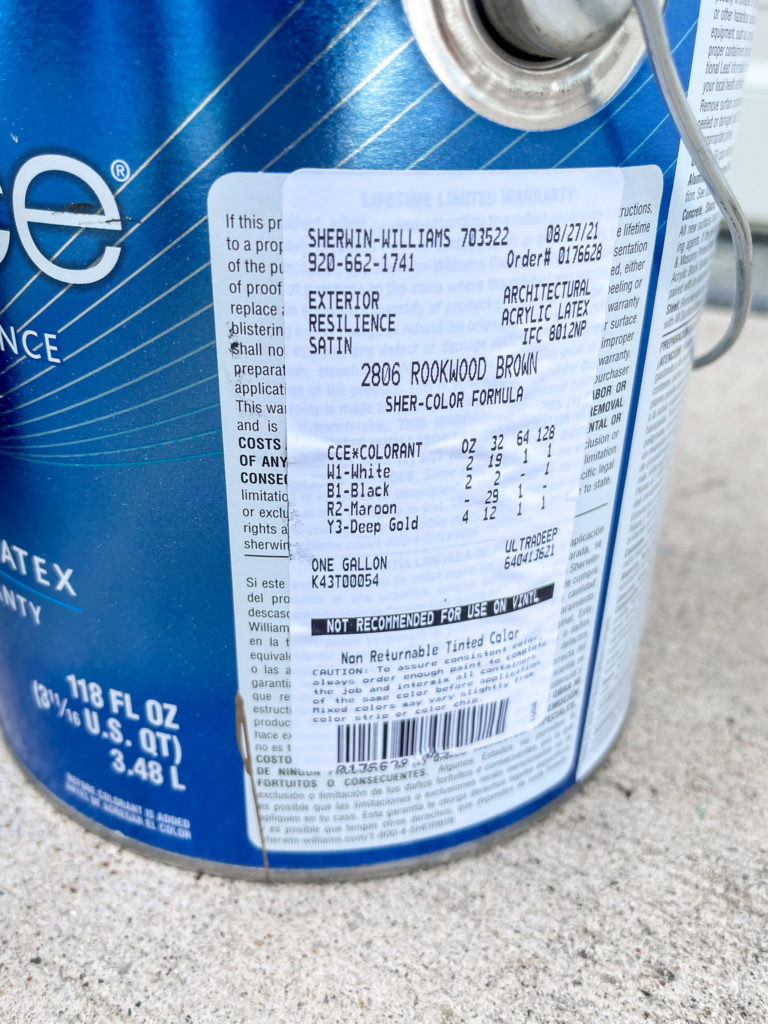
- Exterior Paint (I used SW Resilience in Rookwood Brown)
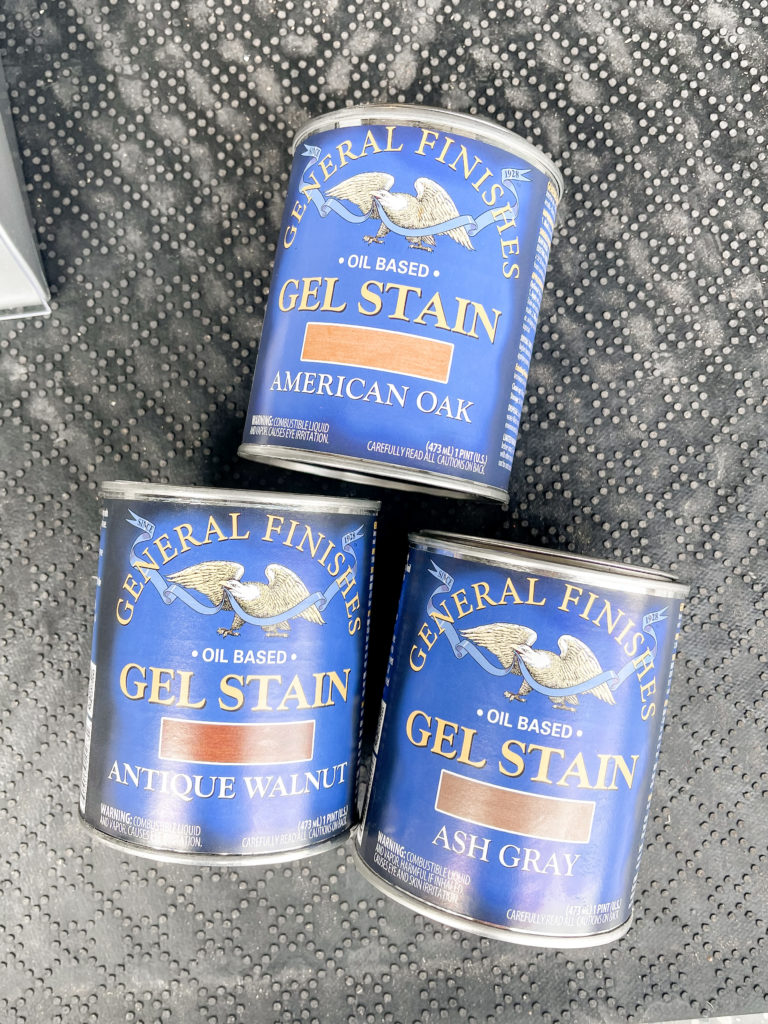
- Gel Stain (I used a mixture of General Finishes)
- Paint Roller
- Paint Tray
- Painters Tape
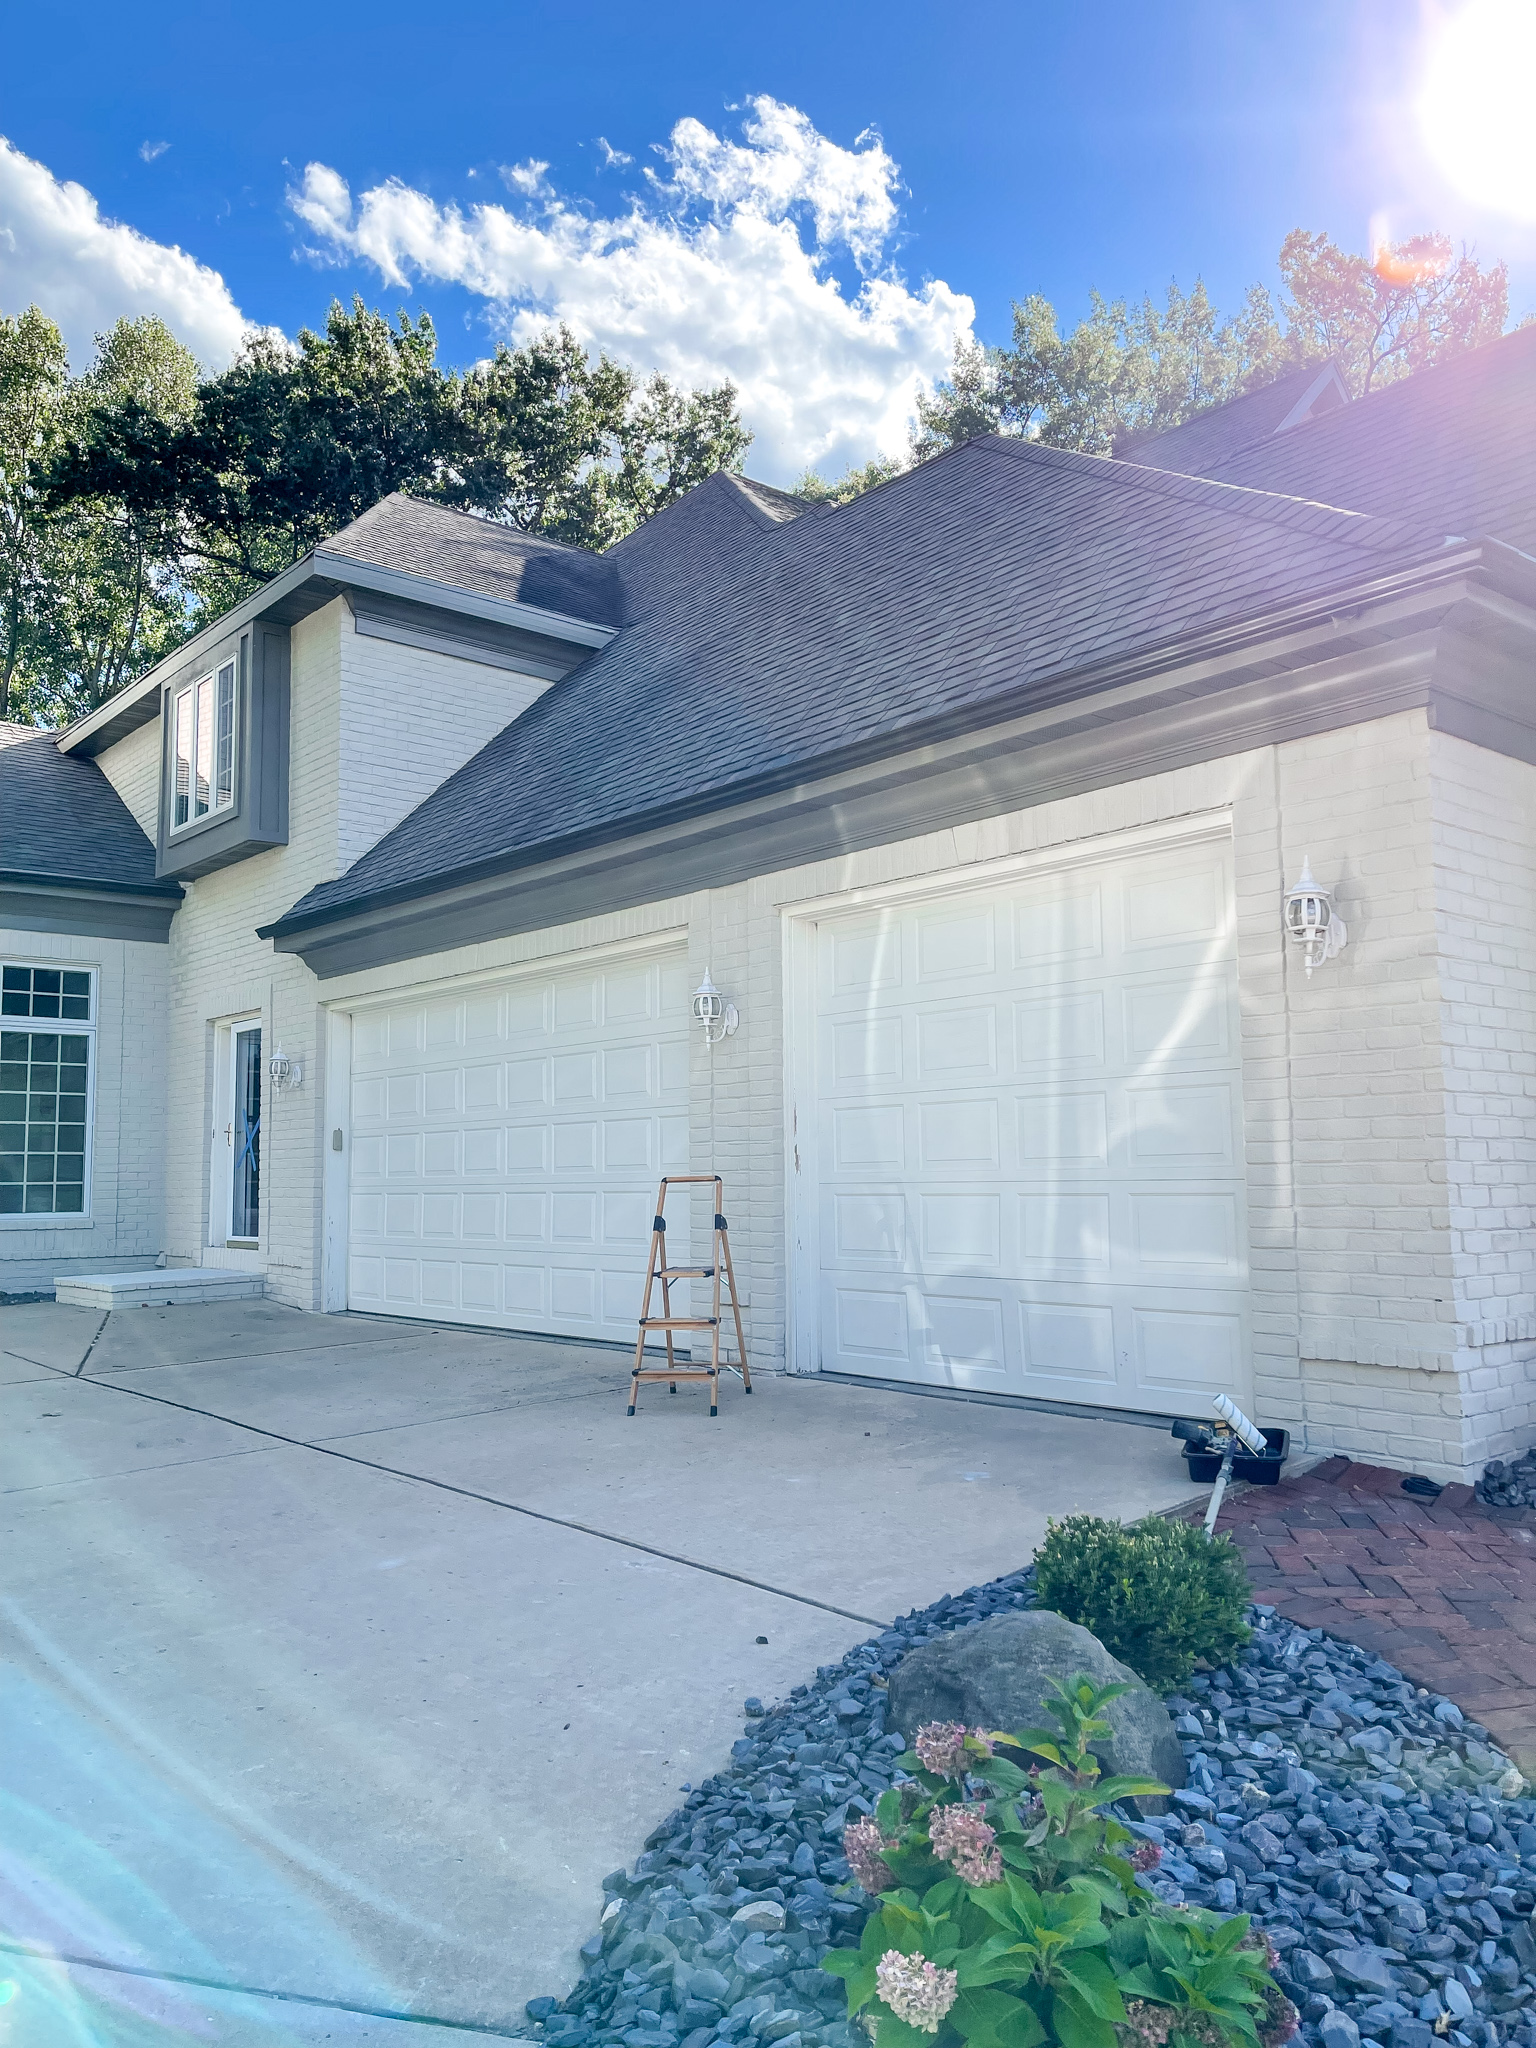
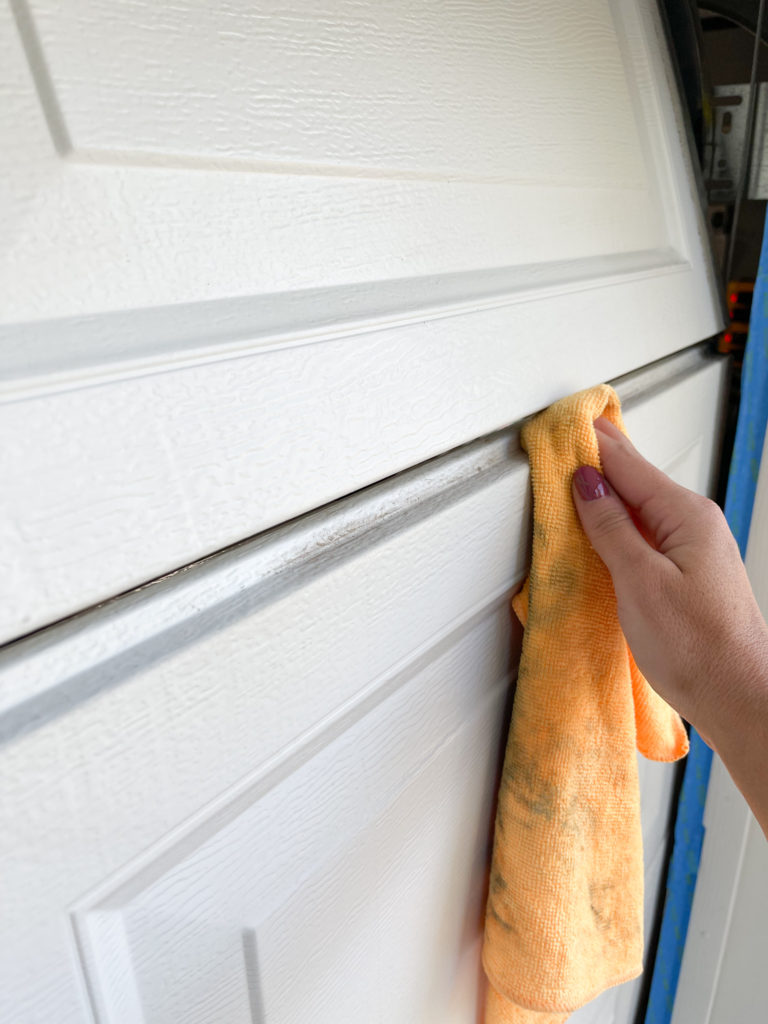
The first thing I did was cleaned each door thoroughly. I like to use a product called TSP to clean areas before painting but a combo of water and dish soap will work too!
I sanded the first door but I decided not to on the second one because I could detect small sand lines/swirls. It’s not noticeable but I decided sanding wasn’t quite necessary.
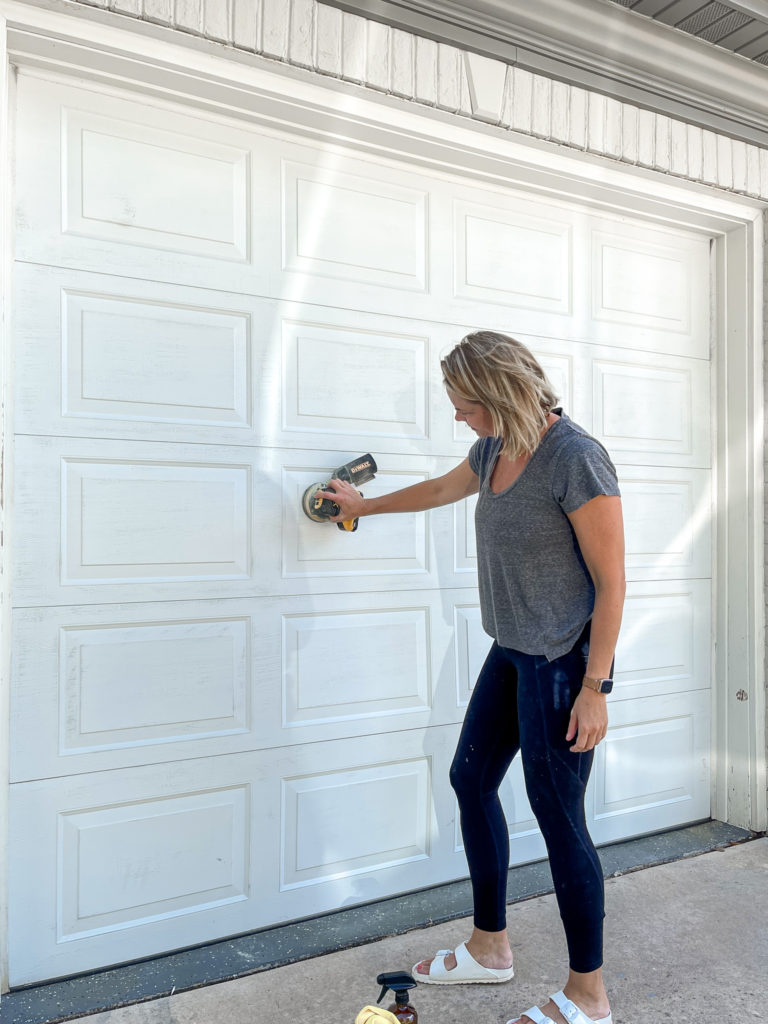
Make sure you clean in between each panel. I raised the door little by little so I could clean each area.
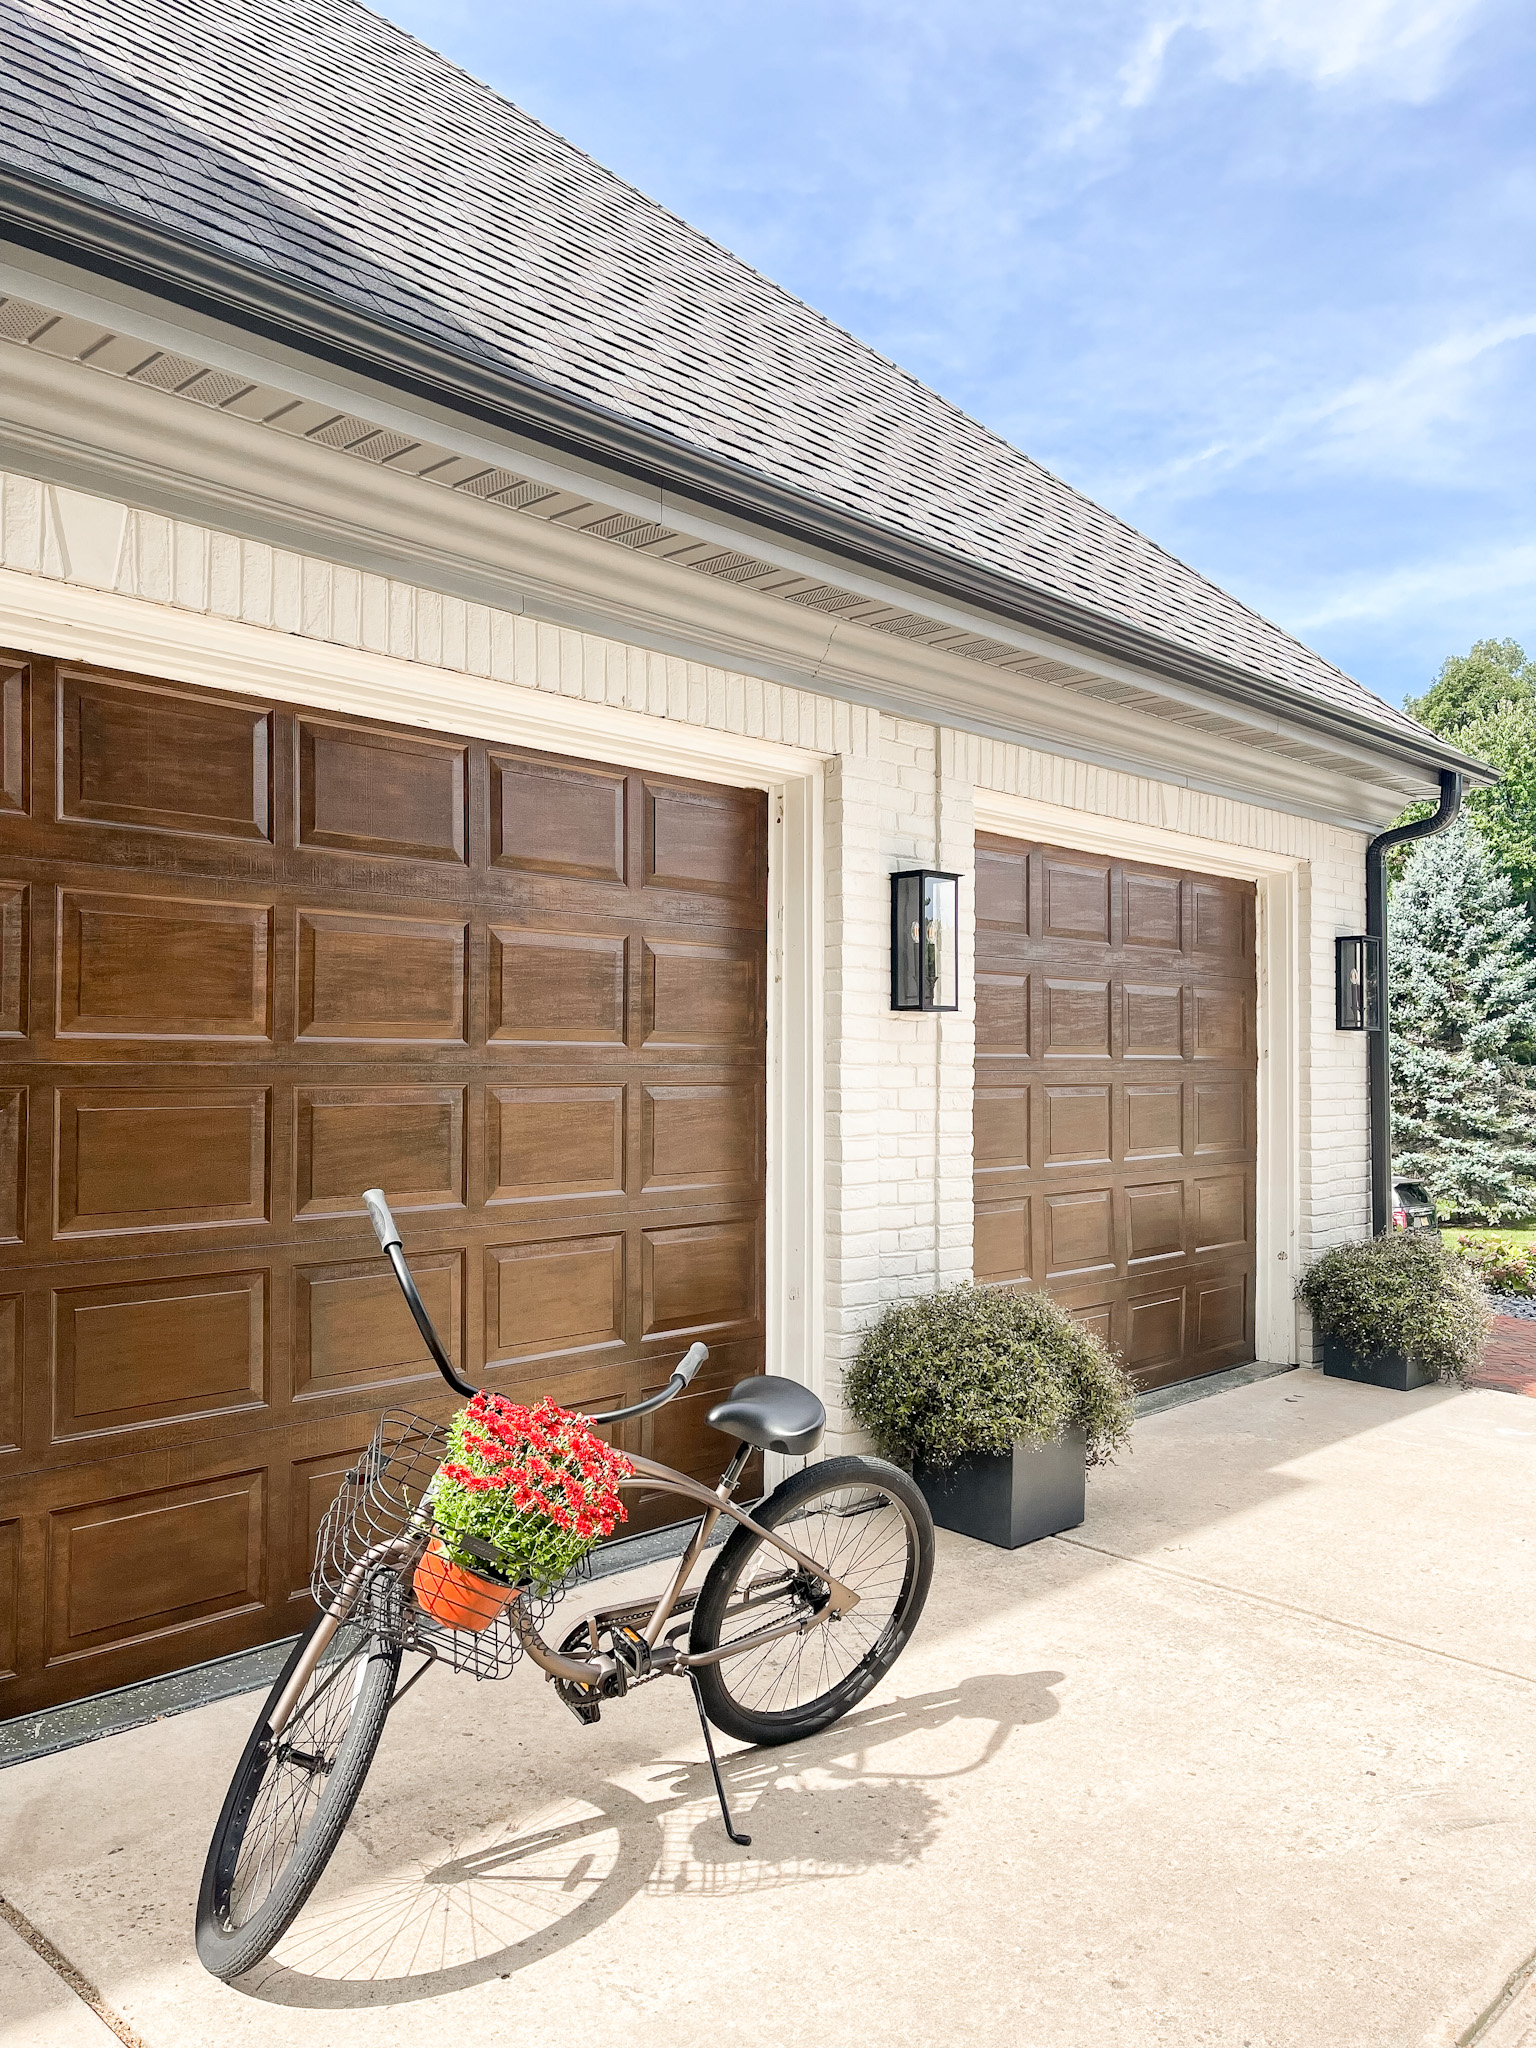
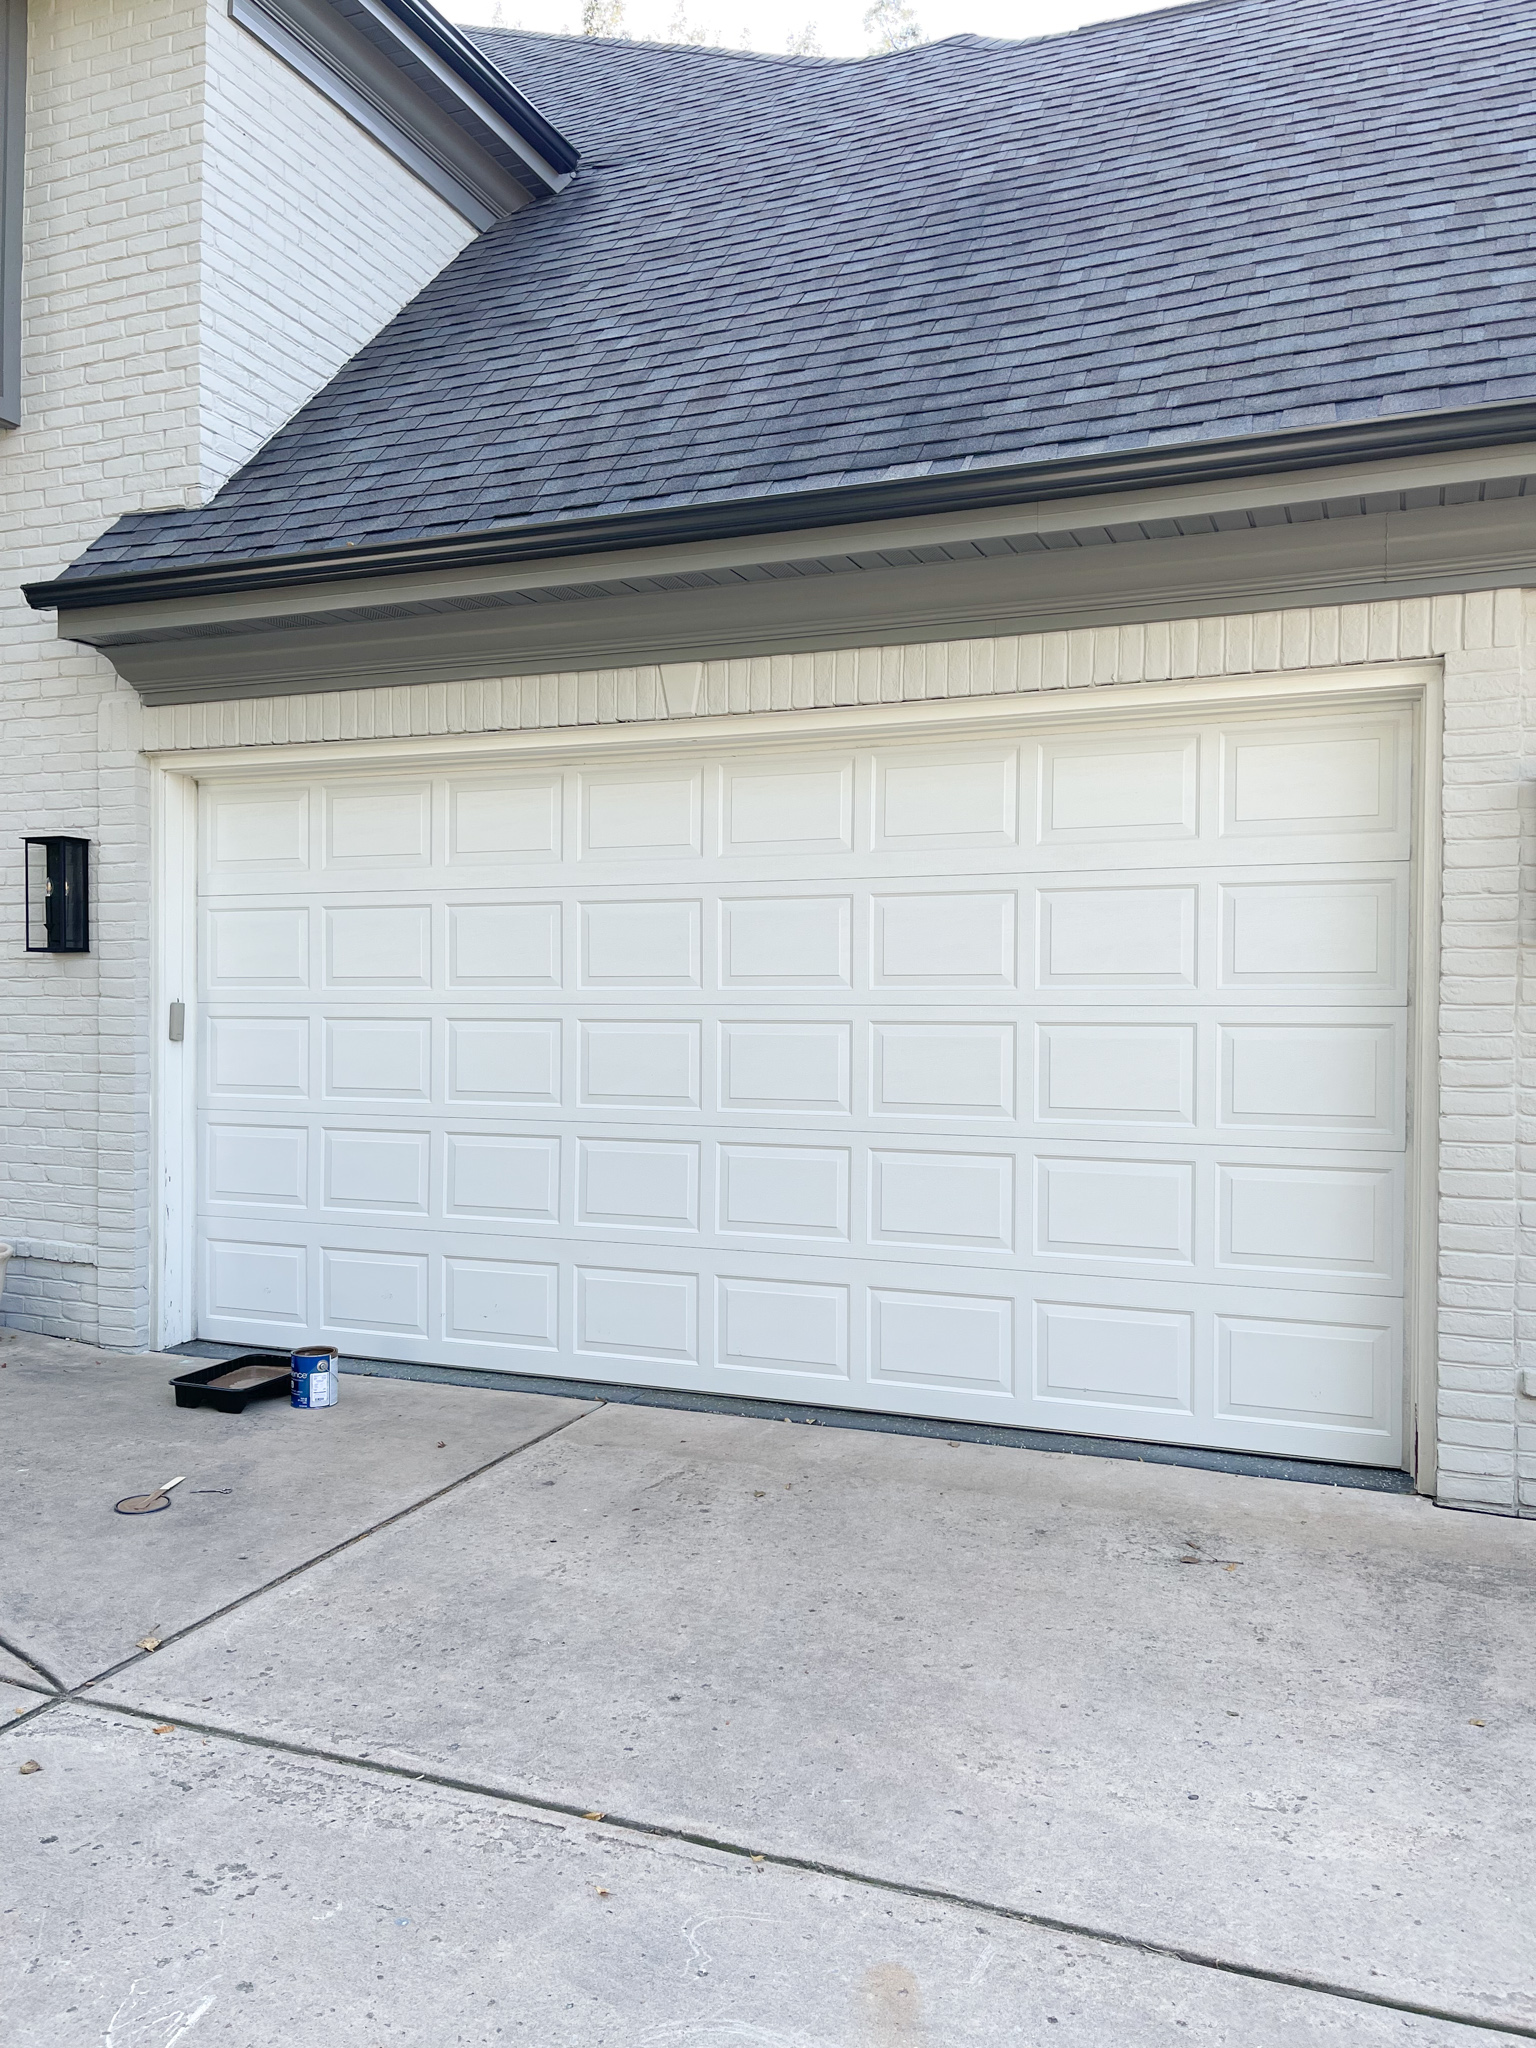
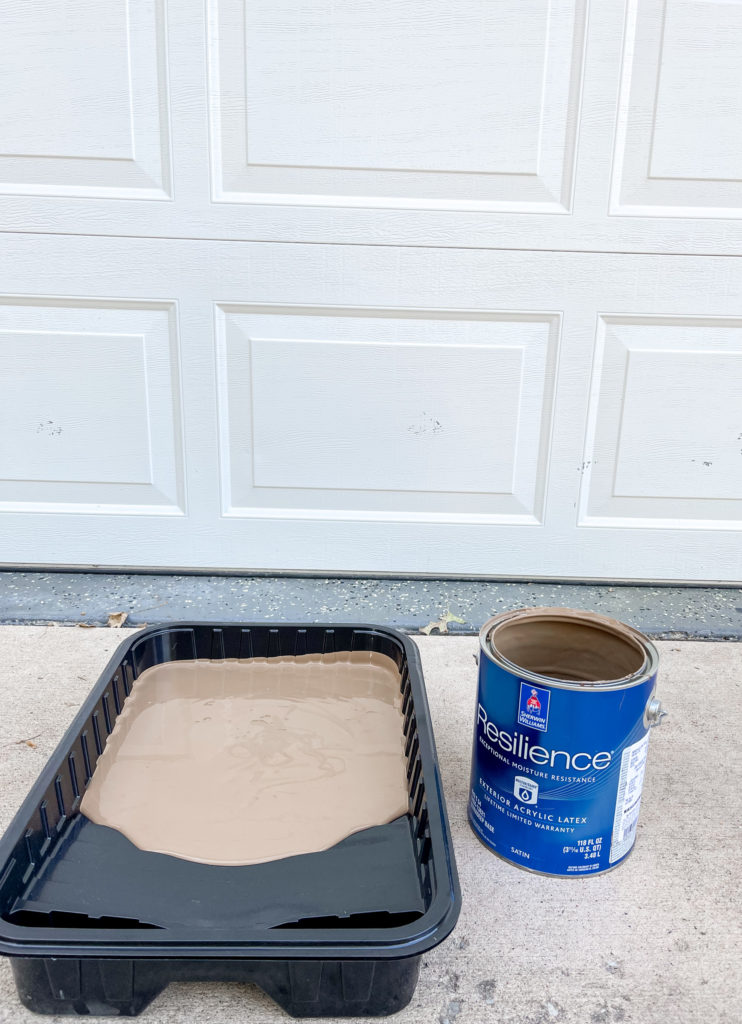
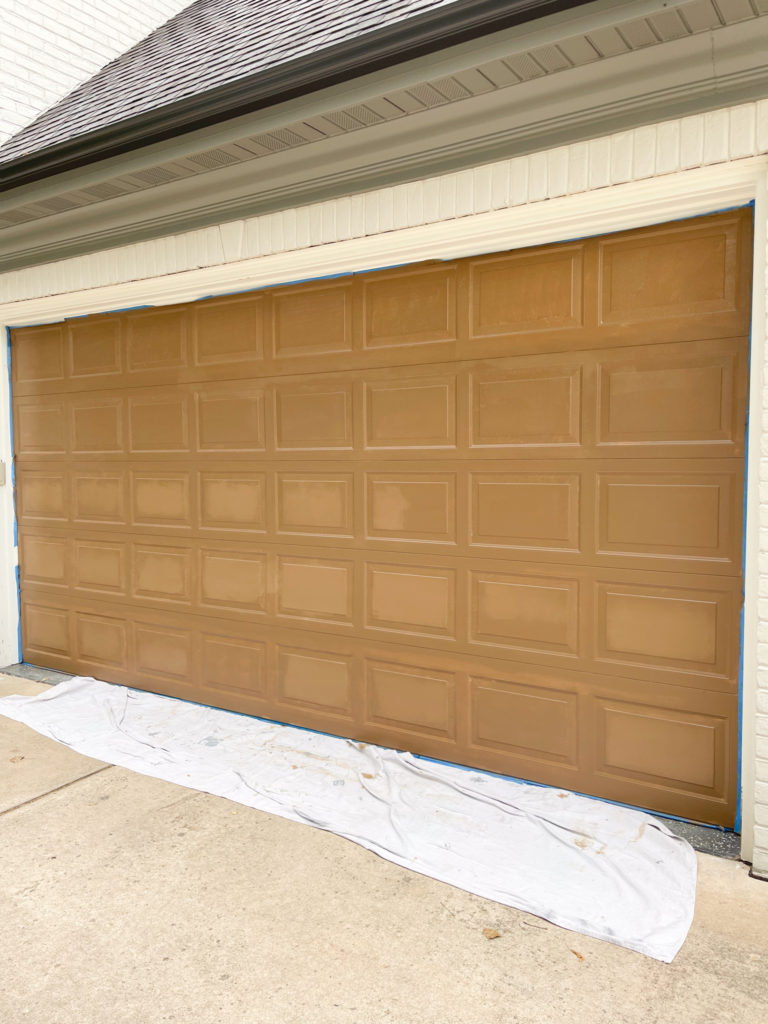
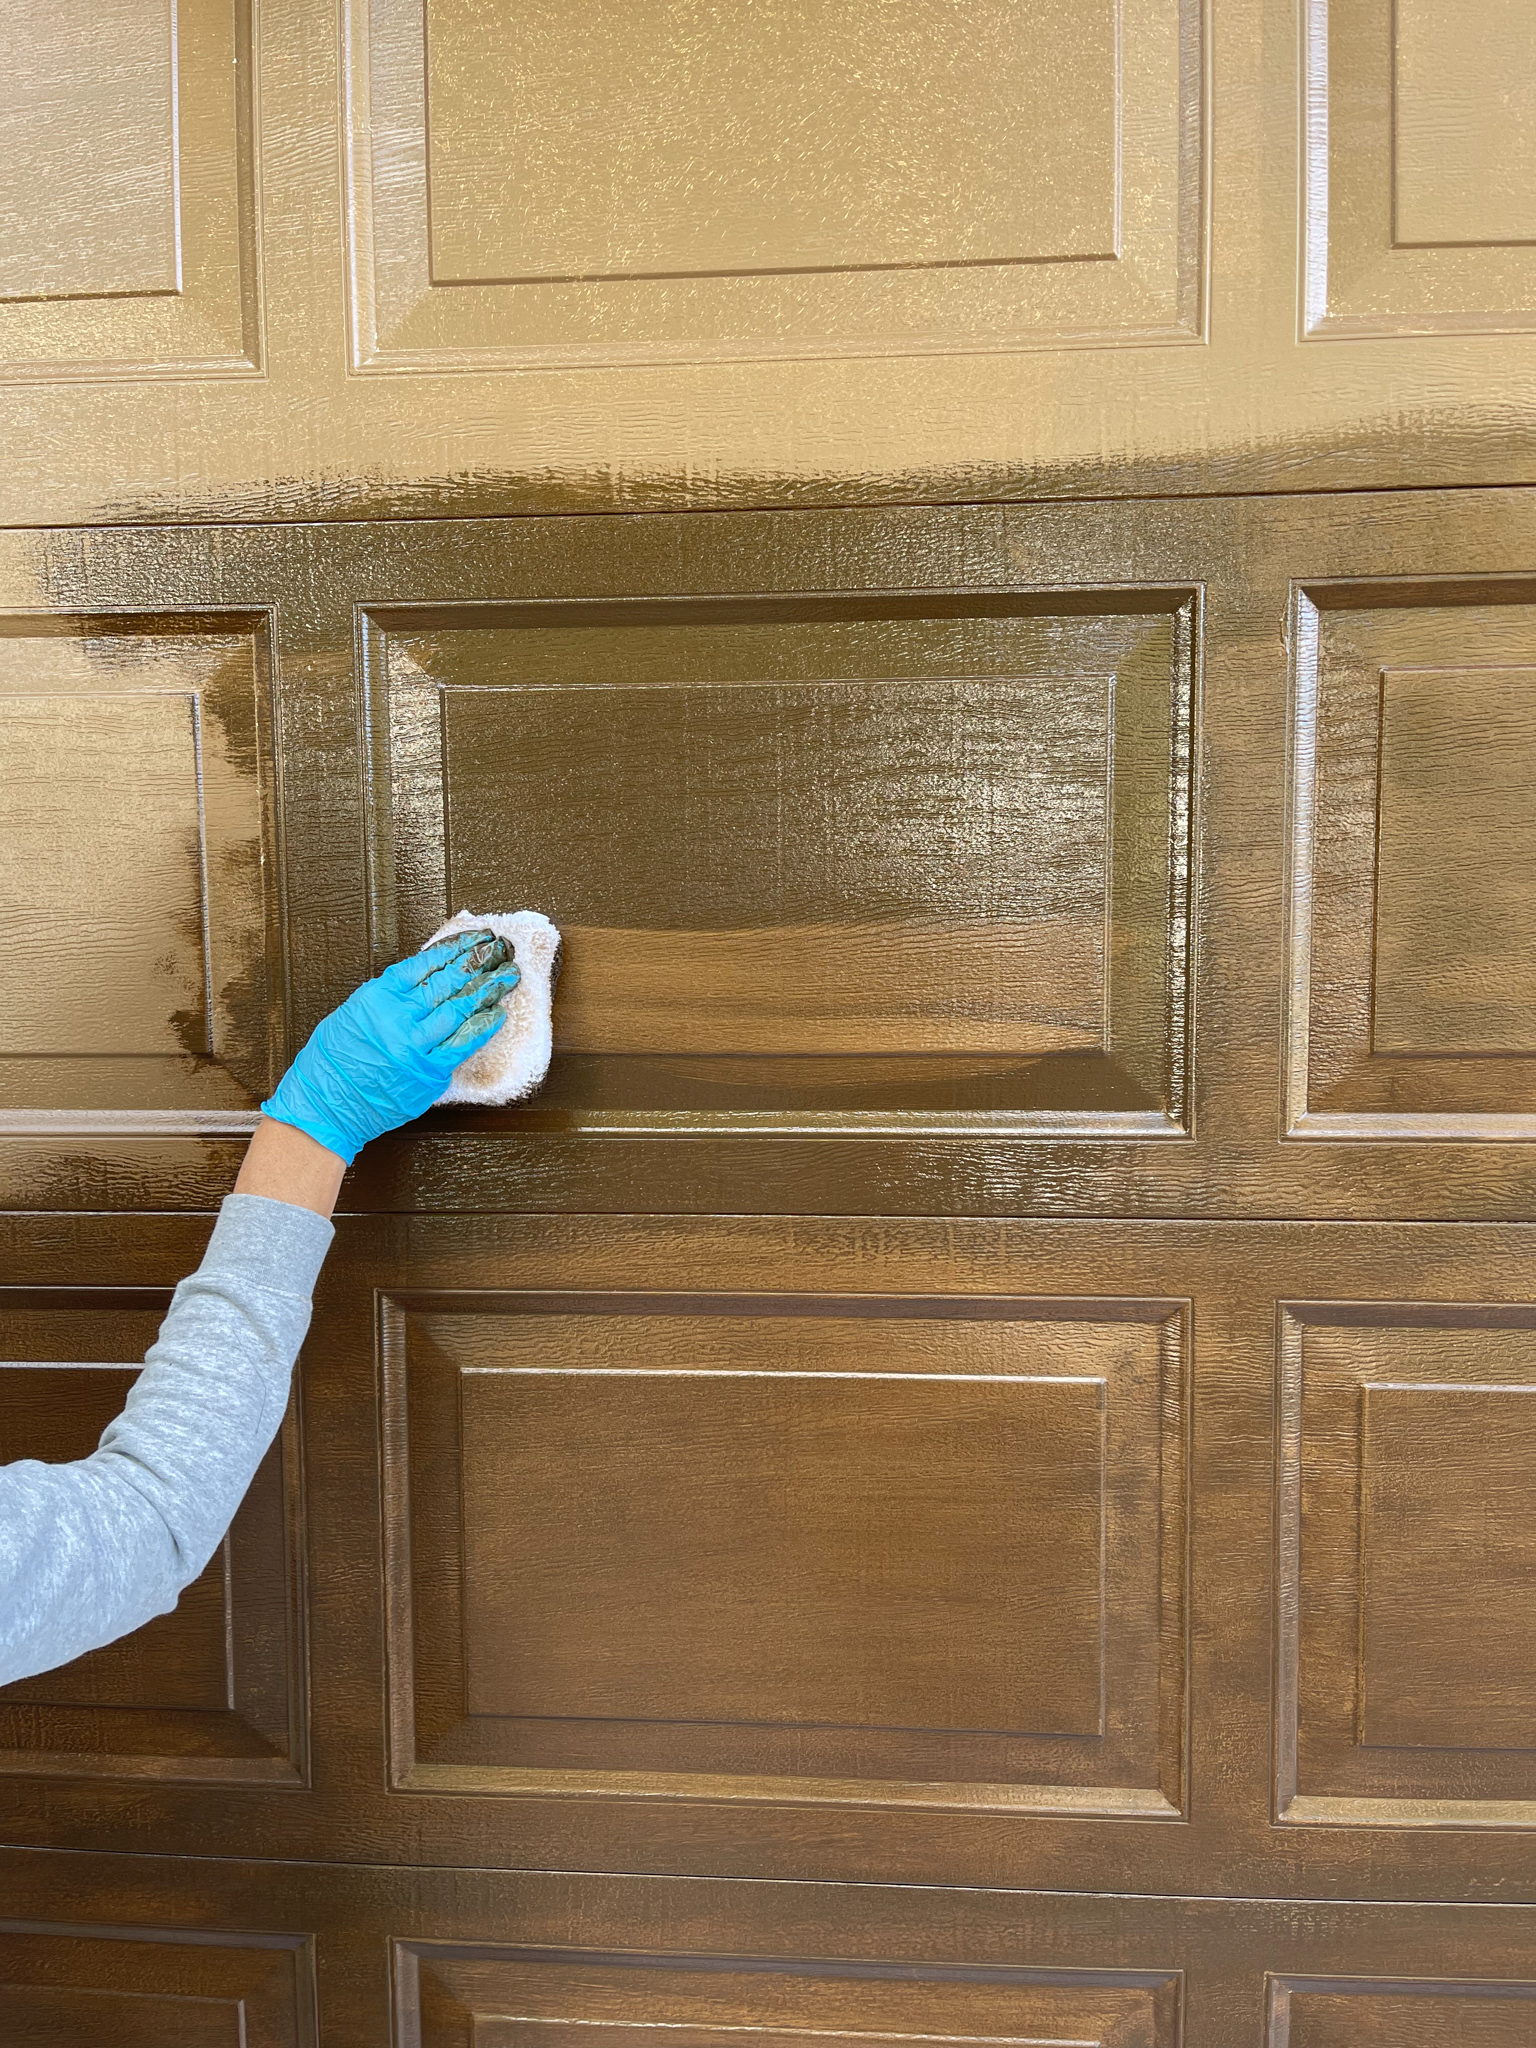
Decide on the color you want. I found a brown a few shades lighter than the color I wanted to coordinate with. This step is really important. If your base coat and gel coat are too far apart in shades, the final product will be very streaky.
This is the exact paint I used. I think there are a few products that could work for exterior use. Make sure it’s rated for the exterior!
I used a combination of a larger roller and a smaller roller. I also used a paint brush to get in some of the harder-to-reach places.
Just like most painting projects, I did the hard-to-reach places and trim first and then painted in the panels – this is always more efficient in my opinion!
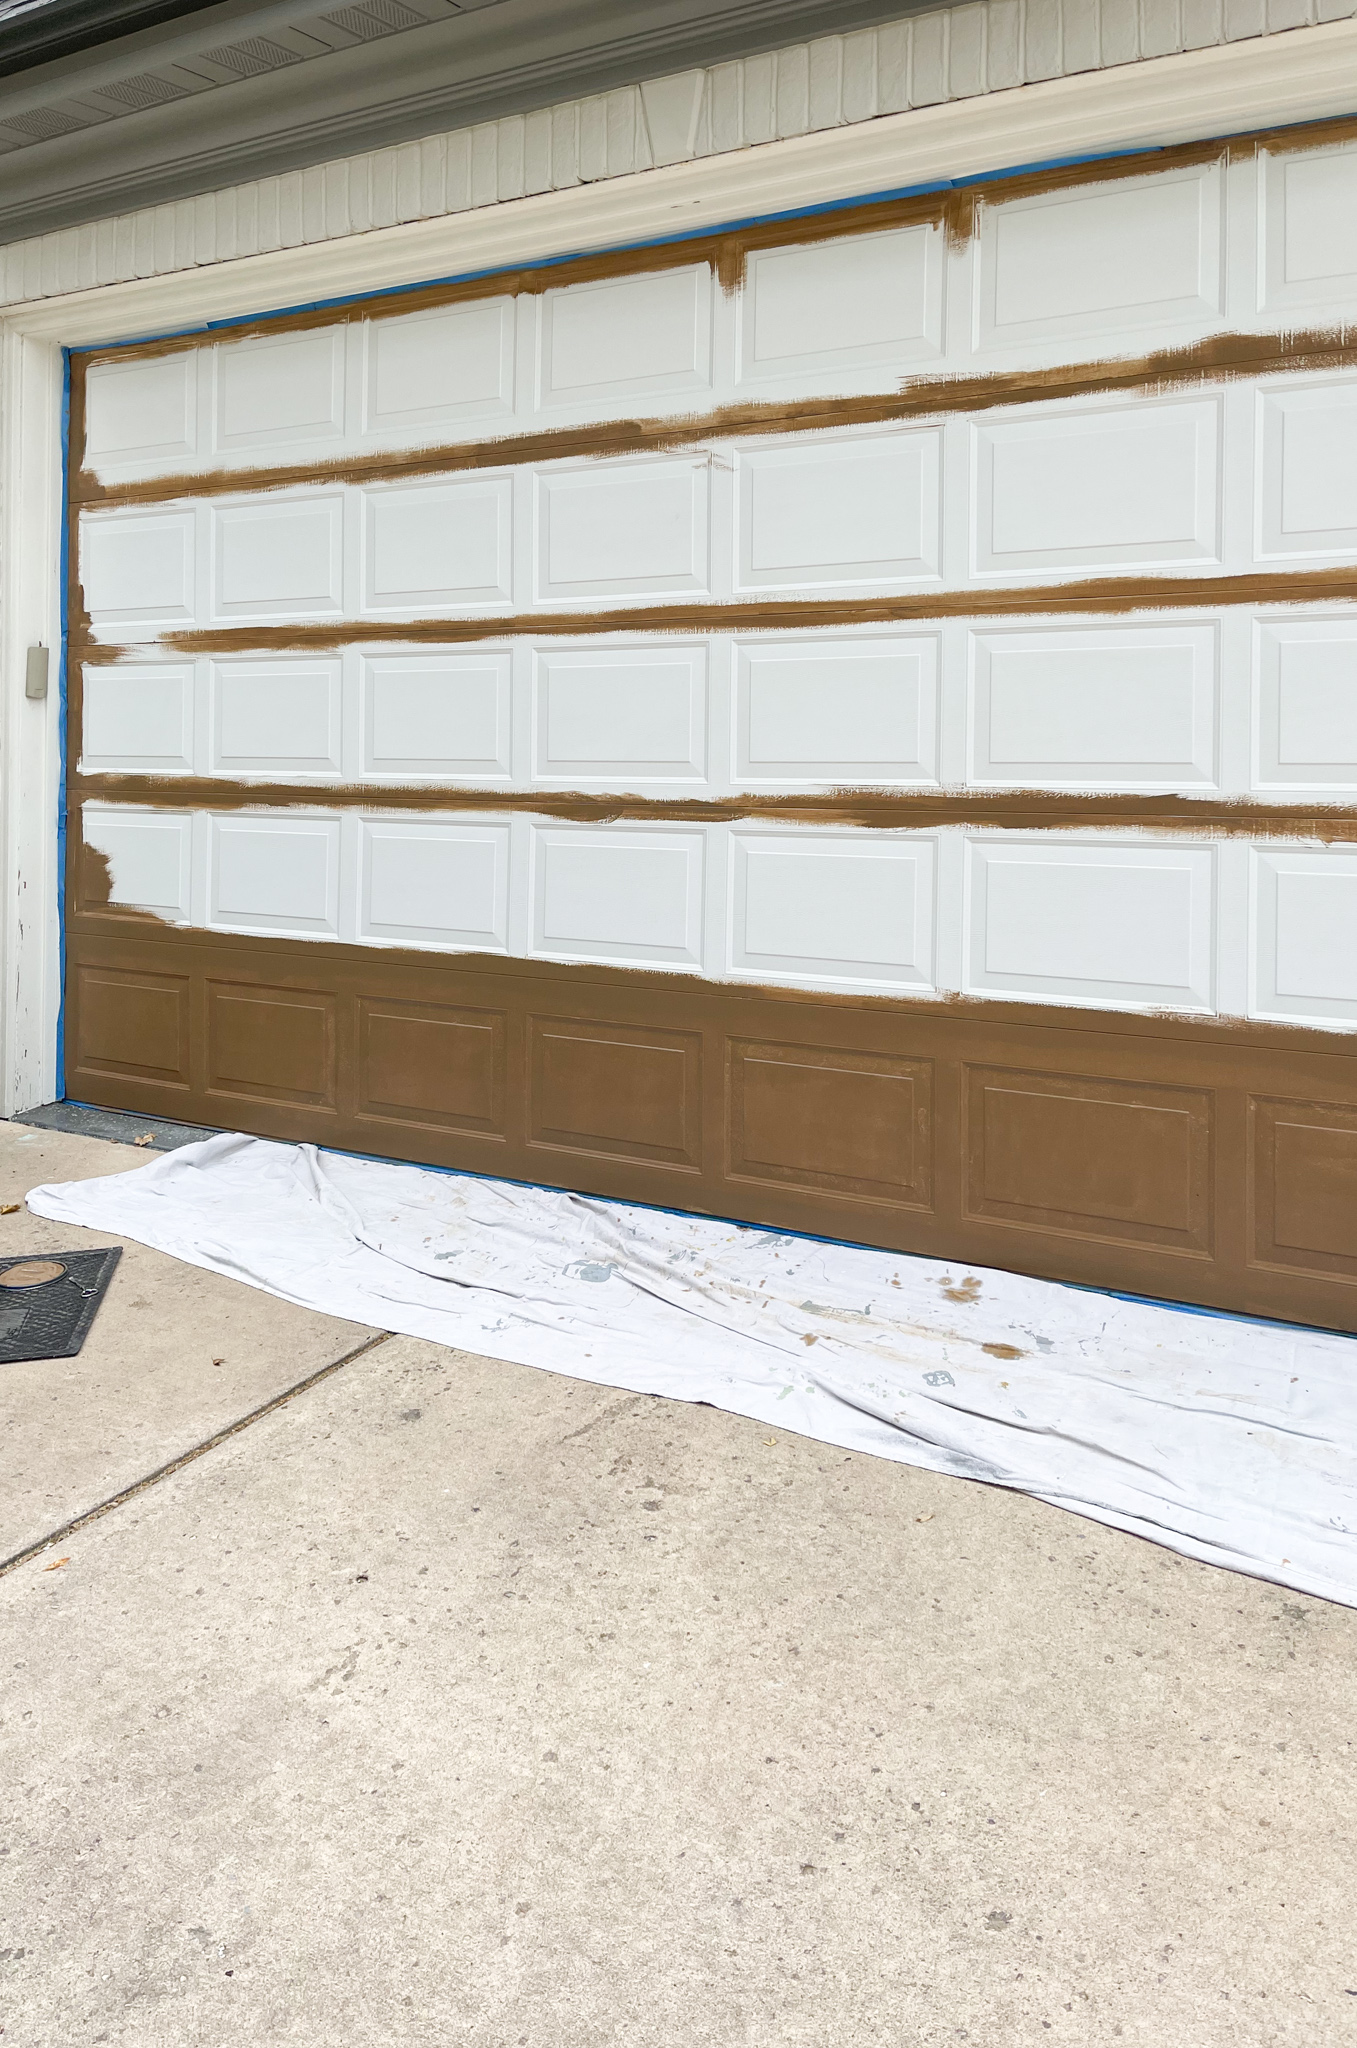
The finish of this is not as important. I would make sure that there are no unpainted areas, but you also don’t need full even coverage. The gel stain layer will cover anything that might be a little light or uneven.
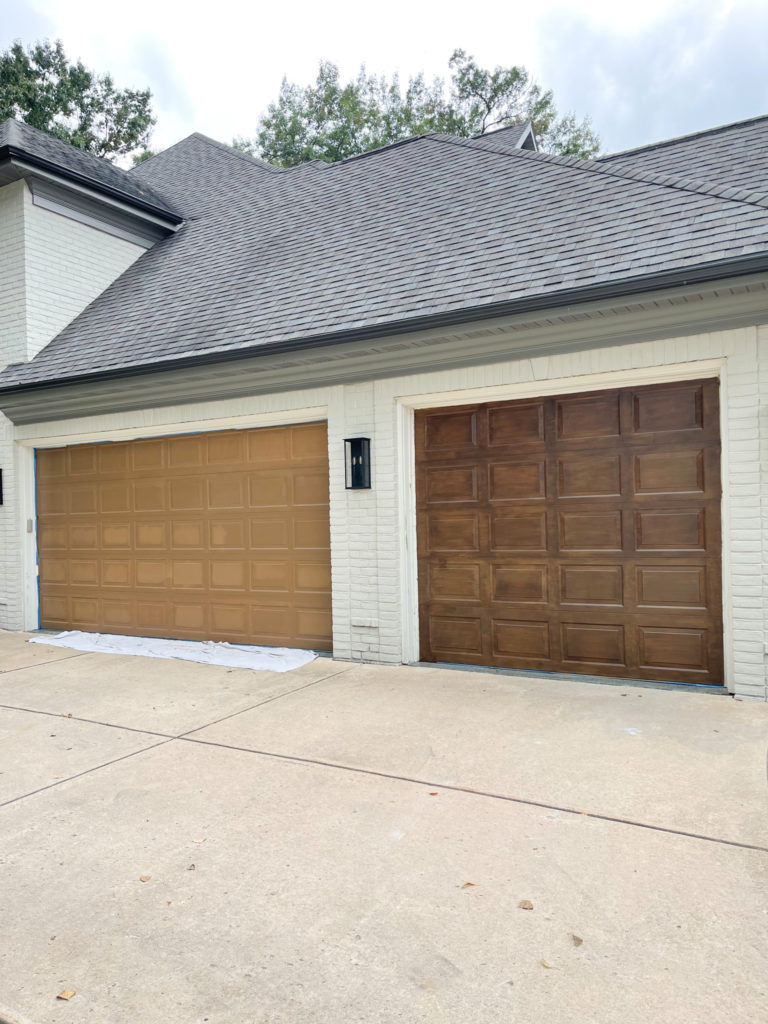
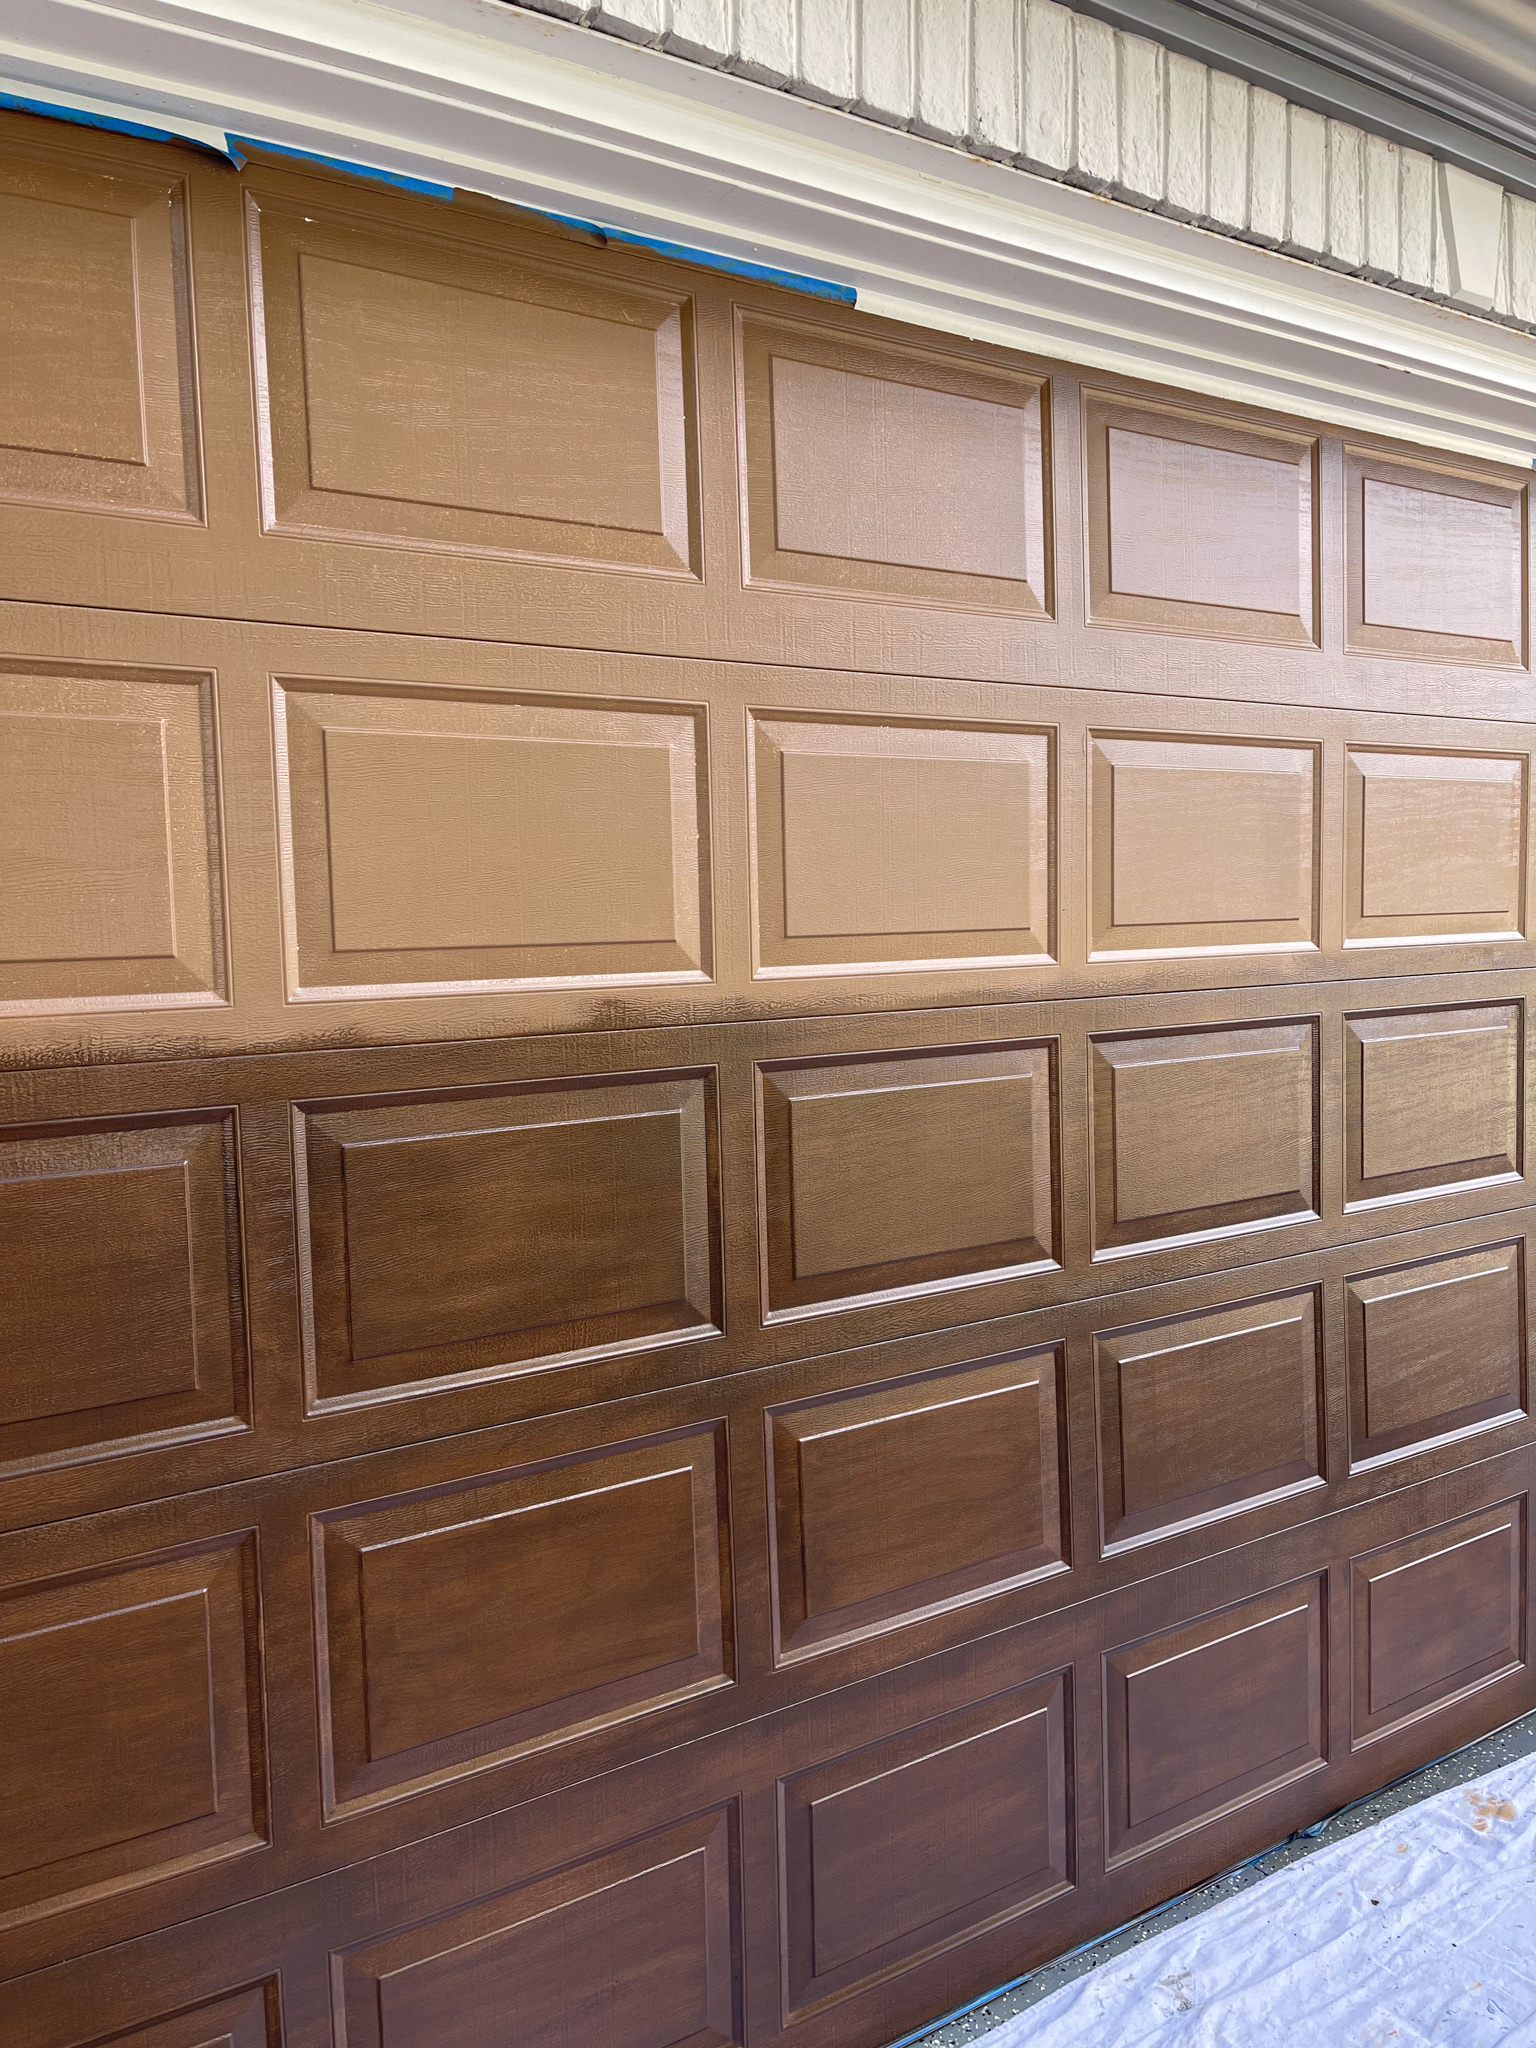
This is where most of my audience (and neighbors thought I was nuts!) The original brown color was not cute! However, as you can see from one door finished – the gel stain layer really brings it to life!
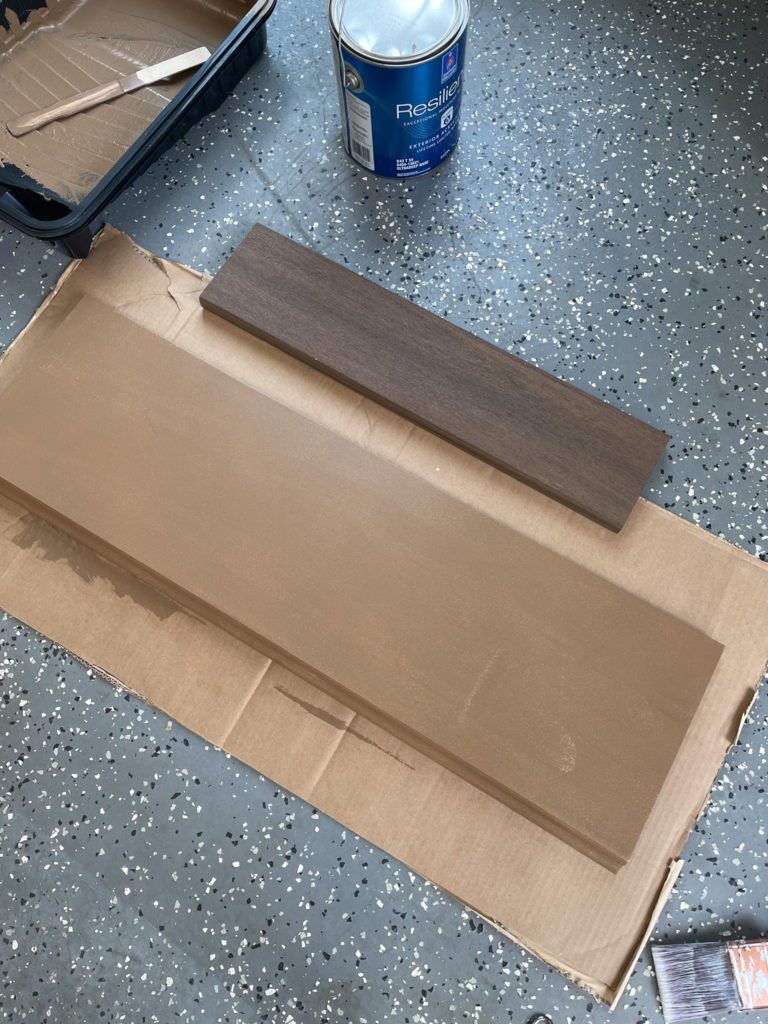
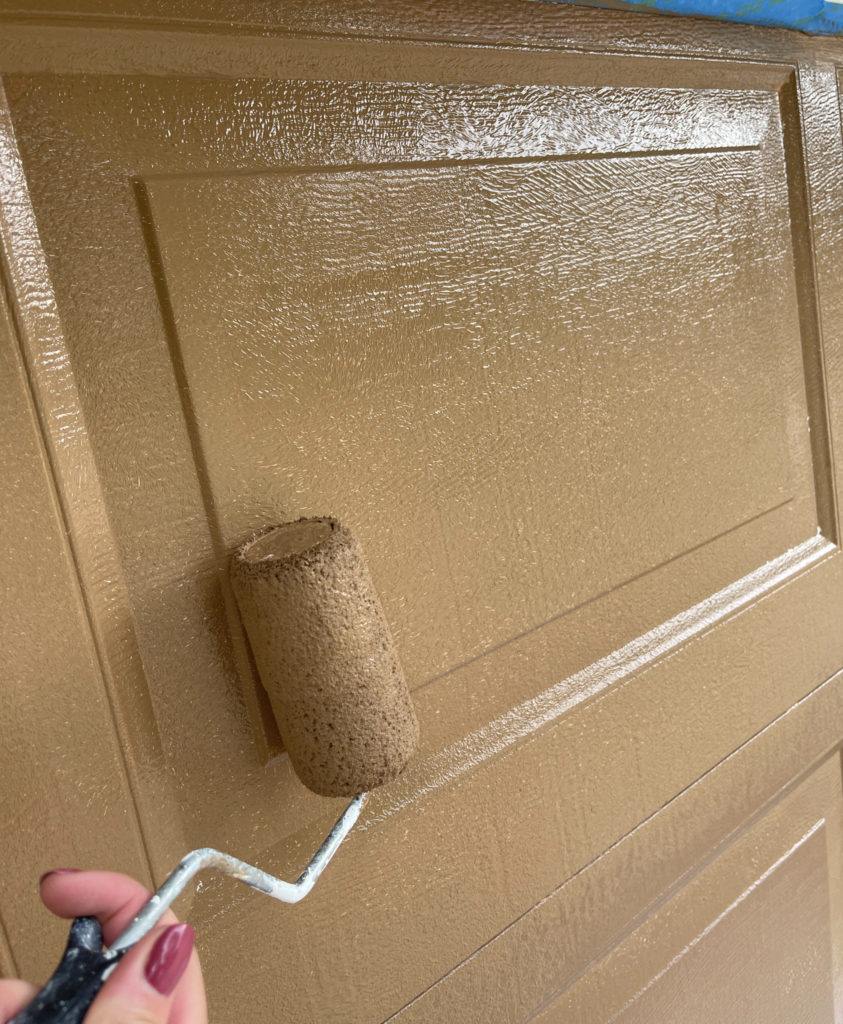
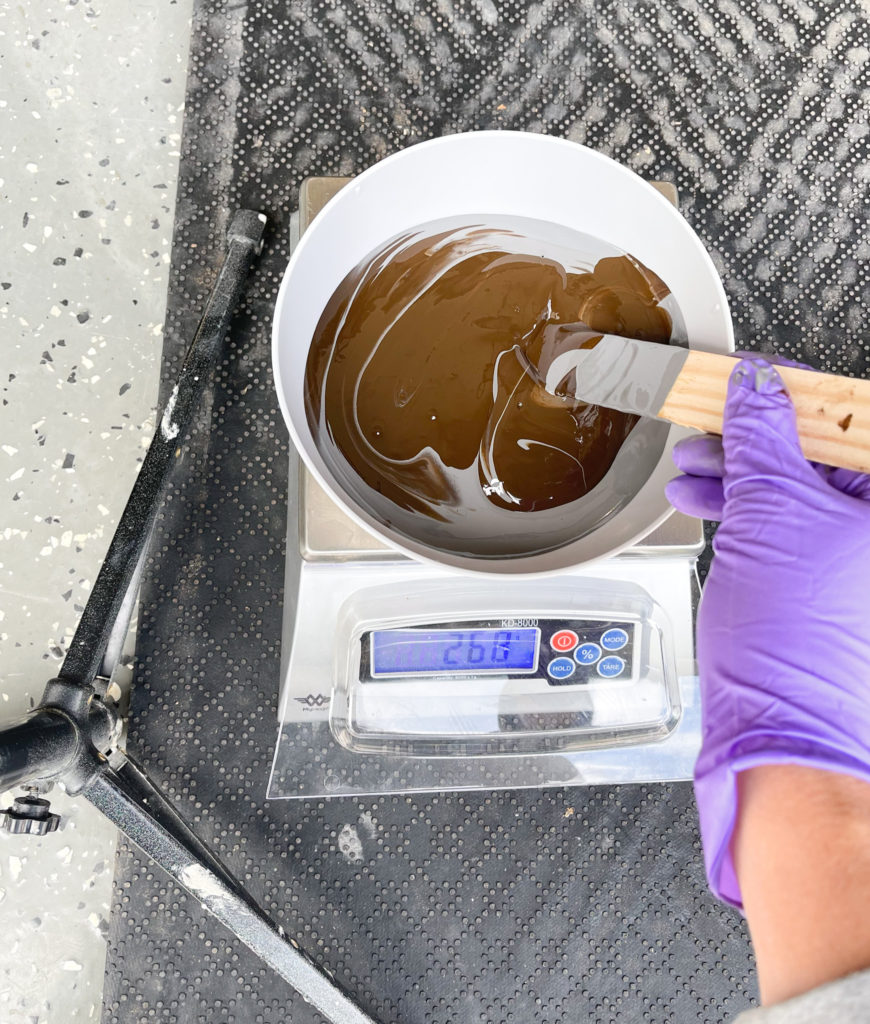
I chose a mixture of gel stain colors to get the shade I wanted.
- American Oak: 30g
- Ash Gray: 30g
- Antique Walnute: 200g
Mix the colors together and you’re ready to paint!
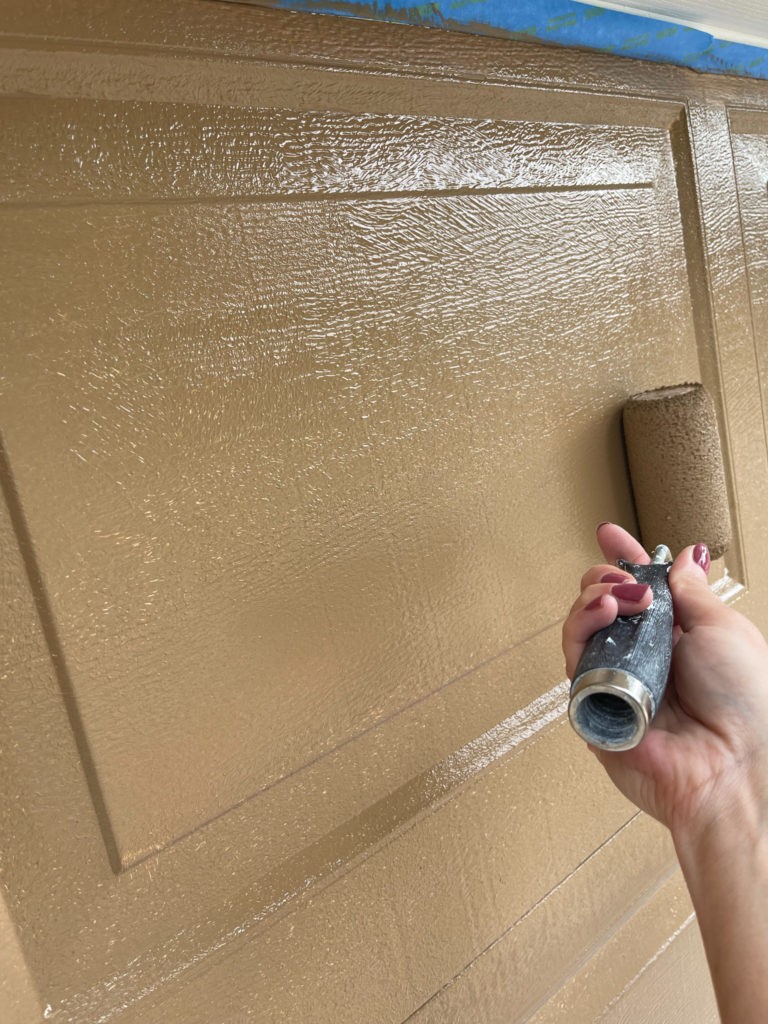
I used a paintbrush to paint on the gel in random strokes in the direction of the grain, making sure to not be too perfect. It’s important to work in small sections because gel stain dries quickly! I worked slowly, one panel at a time. As soon as I painted a panel, I used a staining pad to wipe away the stain until I got the desired look.
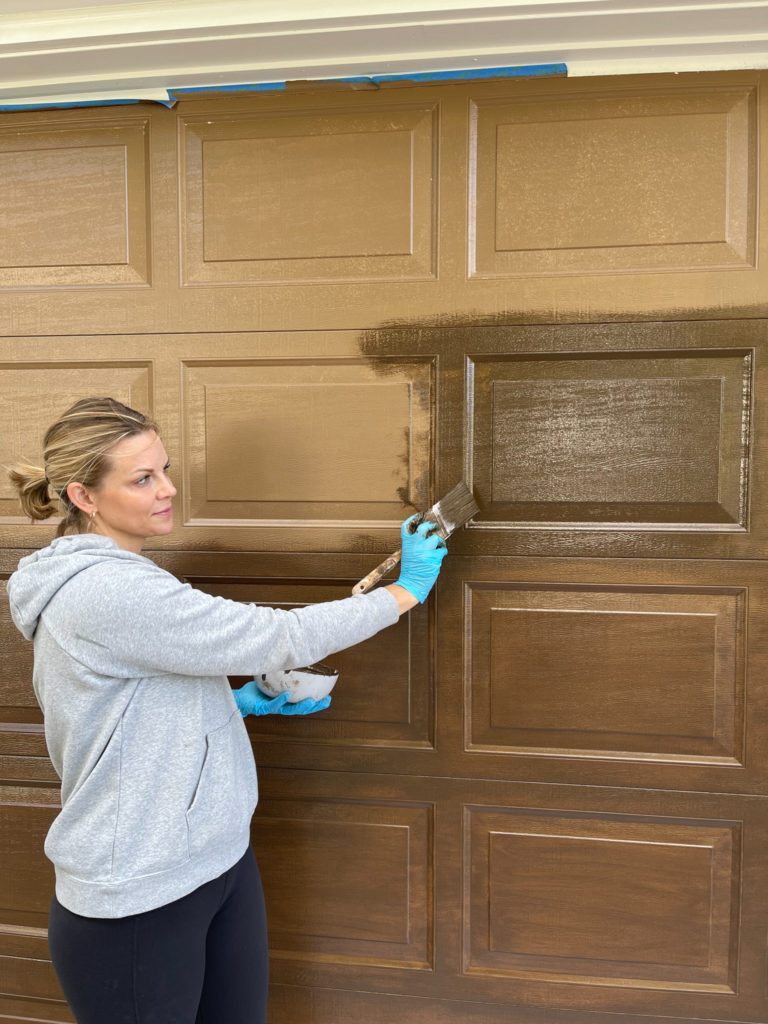
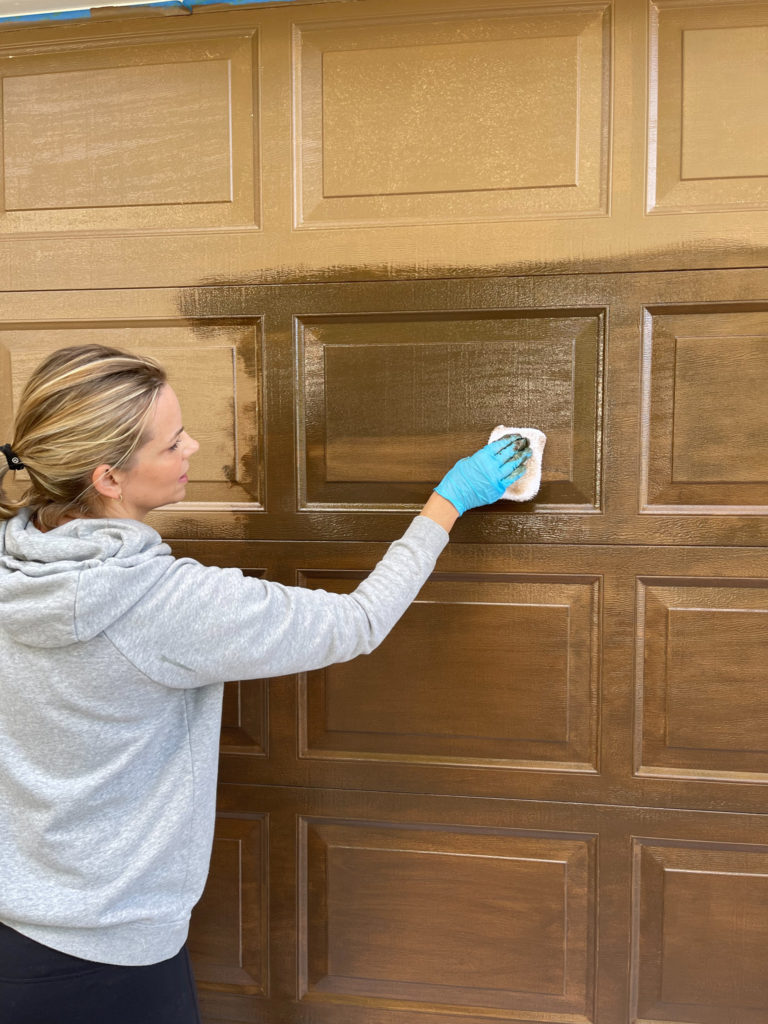
The good thing is you can always touch up areas later. You can add more to make it darker or use mineral spirits to wipe some of the gel stain to make it lighter. It really should be a stress-free application because you can easily make changes!
Can you believe what a difference this makes from one step to the next?!
And the final result. As of right now, I have not added a top coat. I was going to wait for some signs of distress before committing as an experiment. It’s been about 2 months and I’ve had zero issues so I will share updates here!
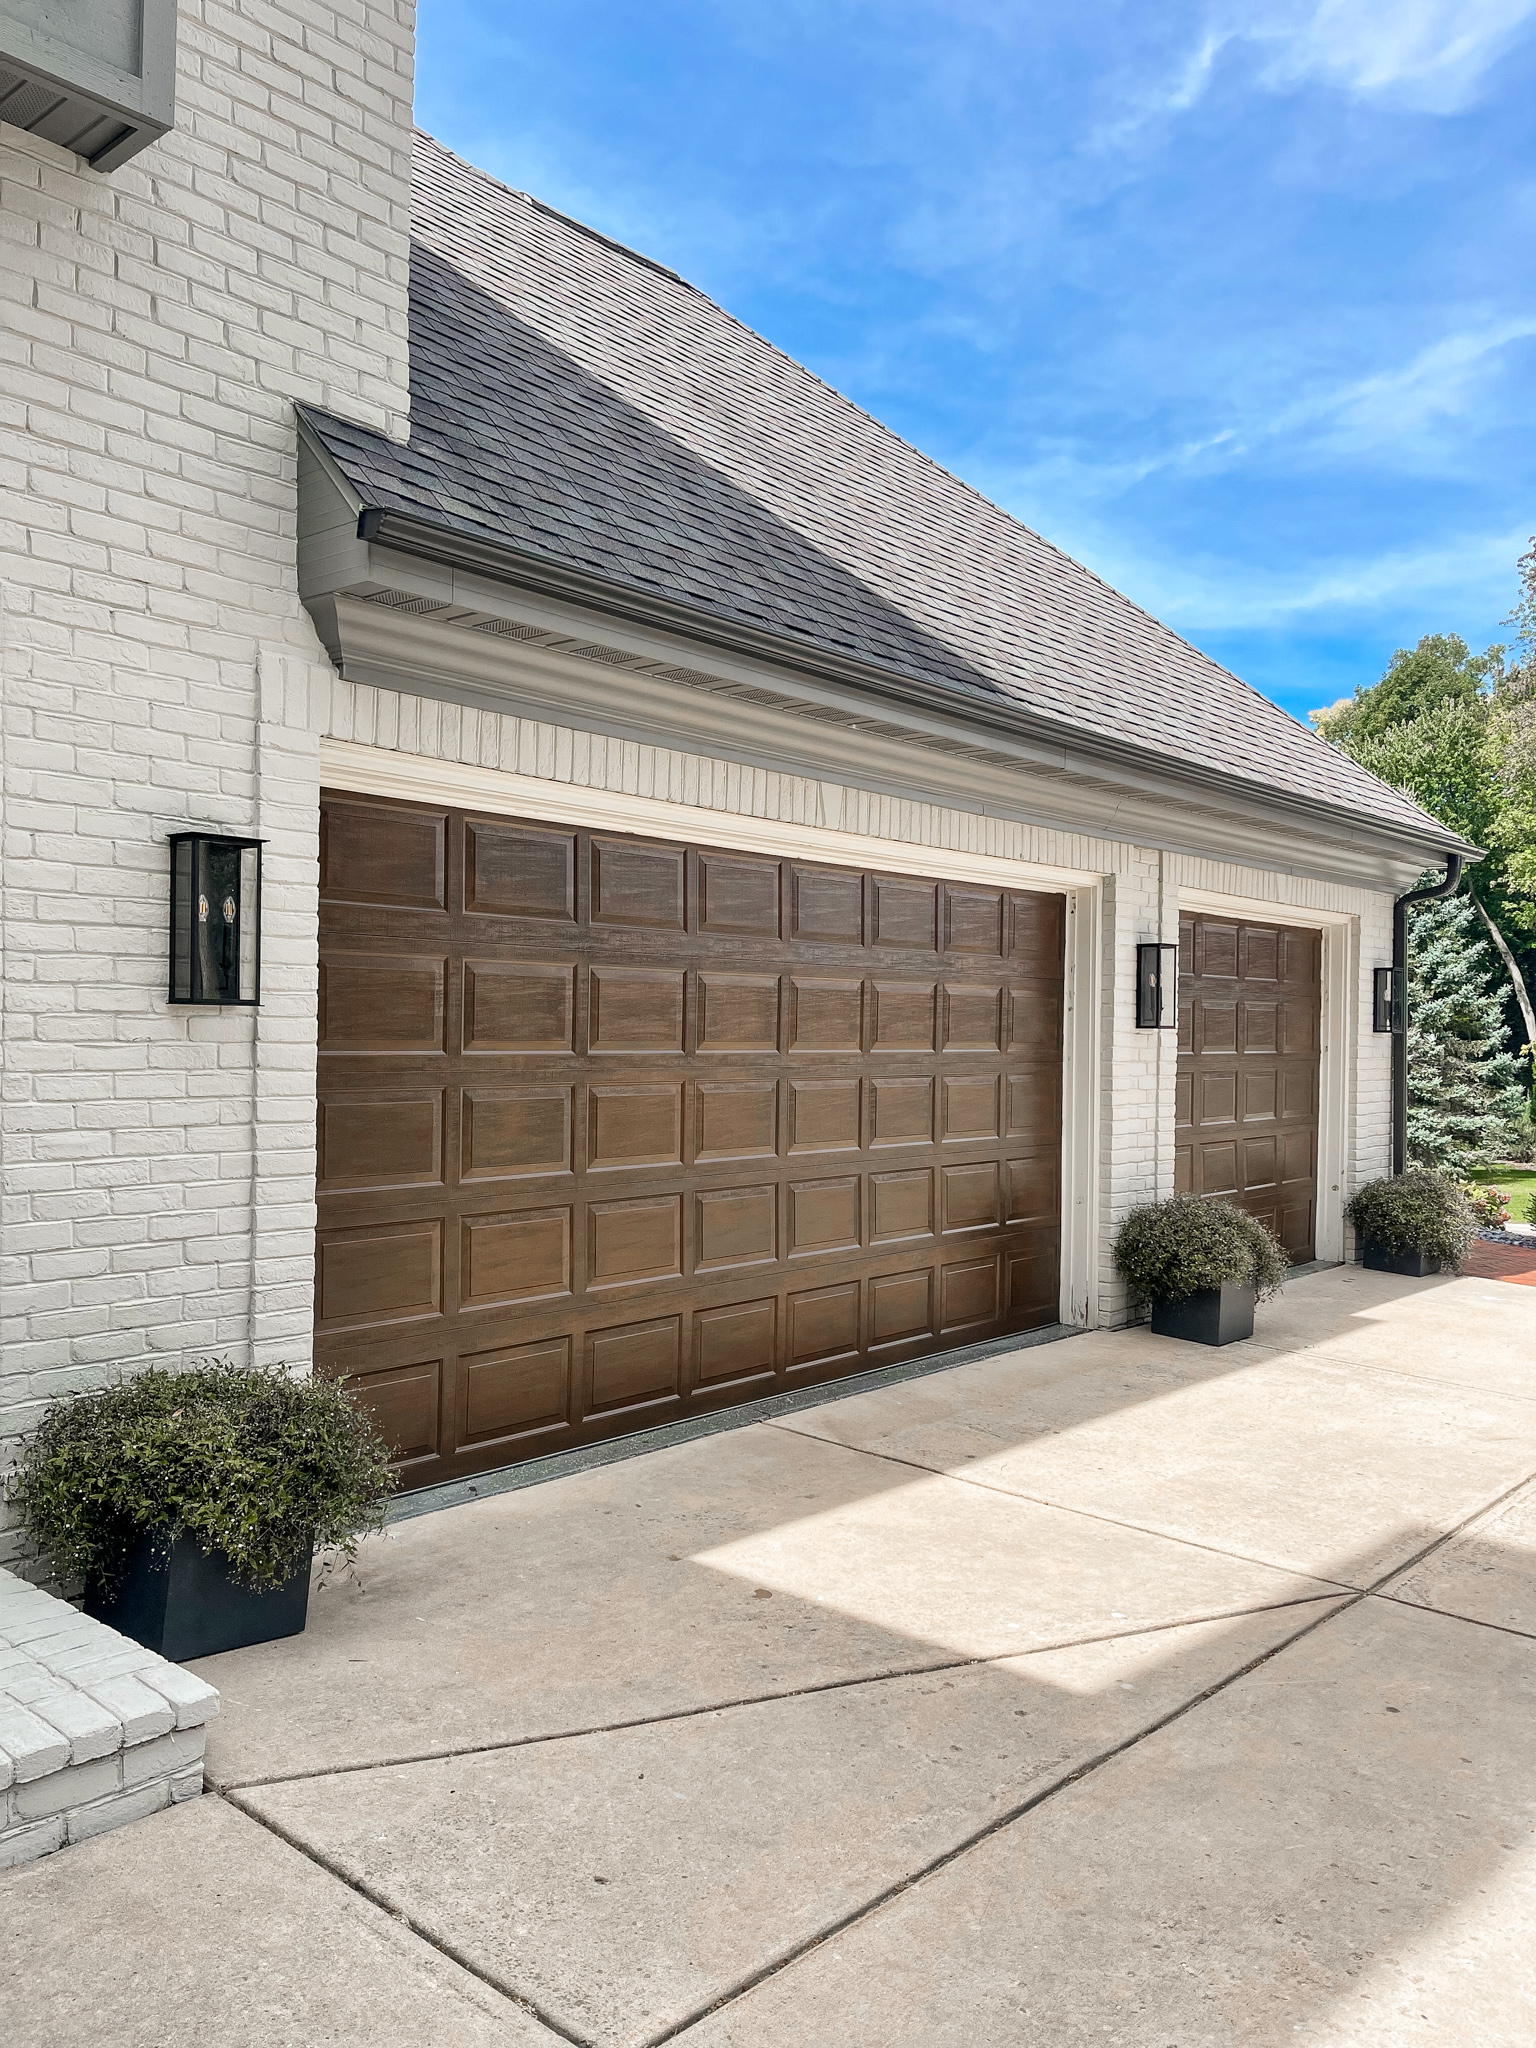
Does it look like wood? I am really thrilled with how this project turned out!