
Hanging a grid gallery wall (the easy way)
Processed with VSCO with a6 preset
I have been busy brainstorming steps to give my entryway a jolt of design inspiration. It is on the top of the list as one of the most neglected spaces in the house. I’ve gone back and forth with many options from a long DIY bench, to a large focal piece of art… or maybe an eclectic gallery wall. The possibilities were exhausting.
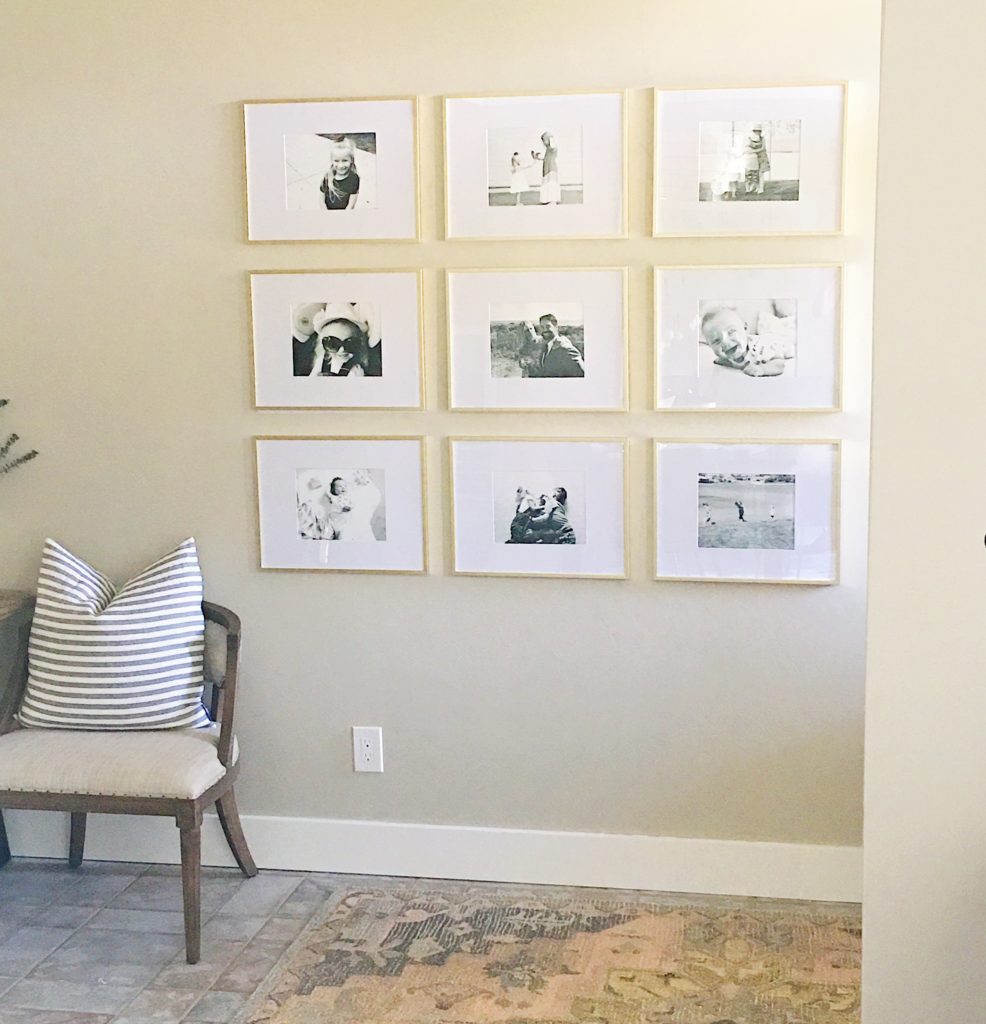
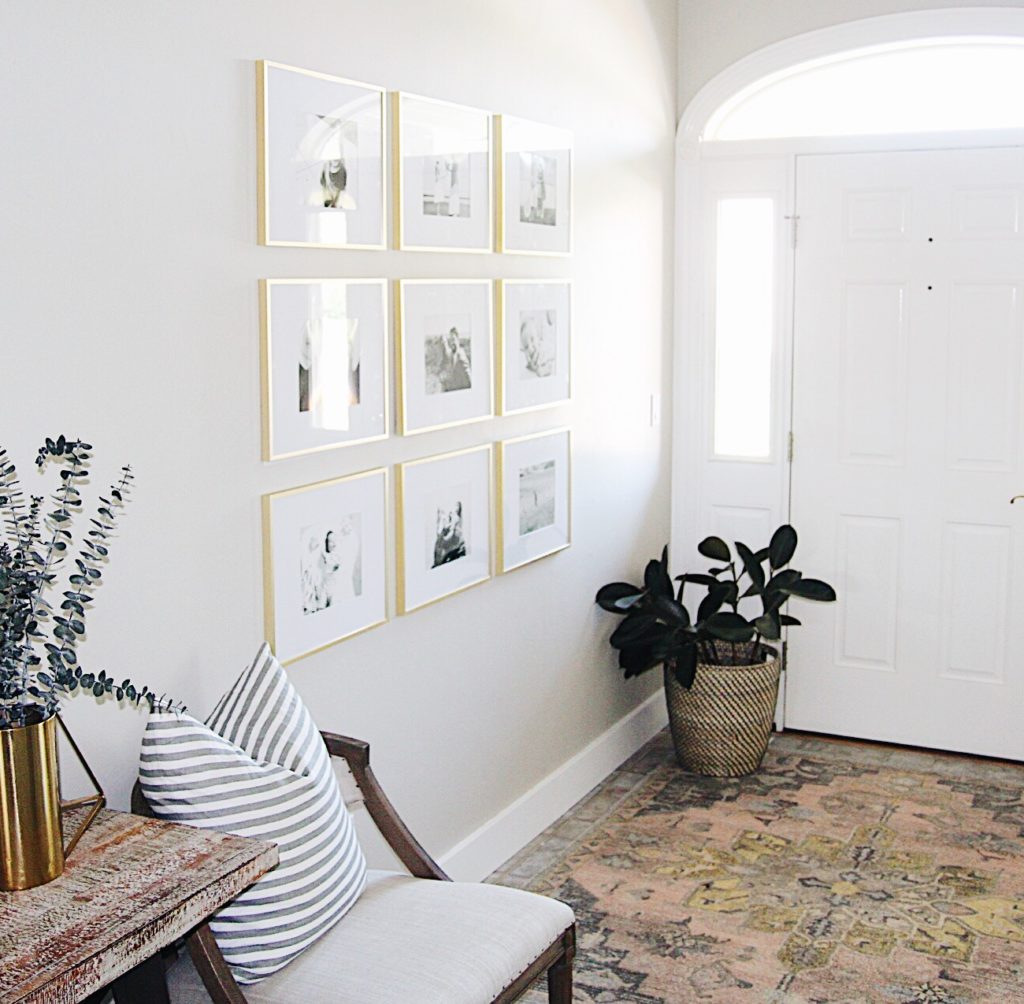
When I saw this gallery wall over at Classy Clutter, I knew I had my answer. I immediately checked the stock for these frames and placed a “pick up at store” order for 9 of the 11×14 brass frames. (FYI: The product info link for any of these frames on the target site does not work, but if you “add to cart” from the search page, you can get them to show up in your cart.)
Update: these frames are 15% off right now… I got them at 10% off just 2 days ago, so there you go!
I think the hardest part about hanging this gallery wall was choosing the photos! However, I knew I wanted a finished wall by the end of the weekend, so I made some selections, did a quick black and white edit and sent them off to the printer.
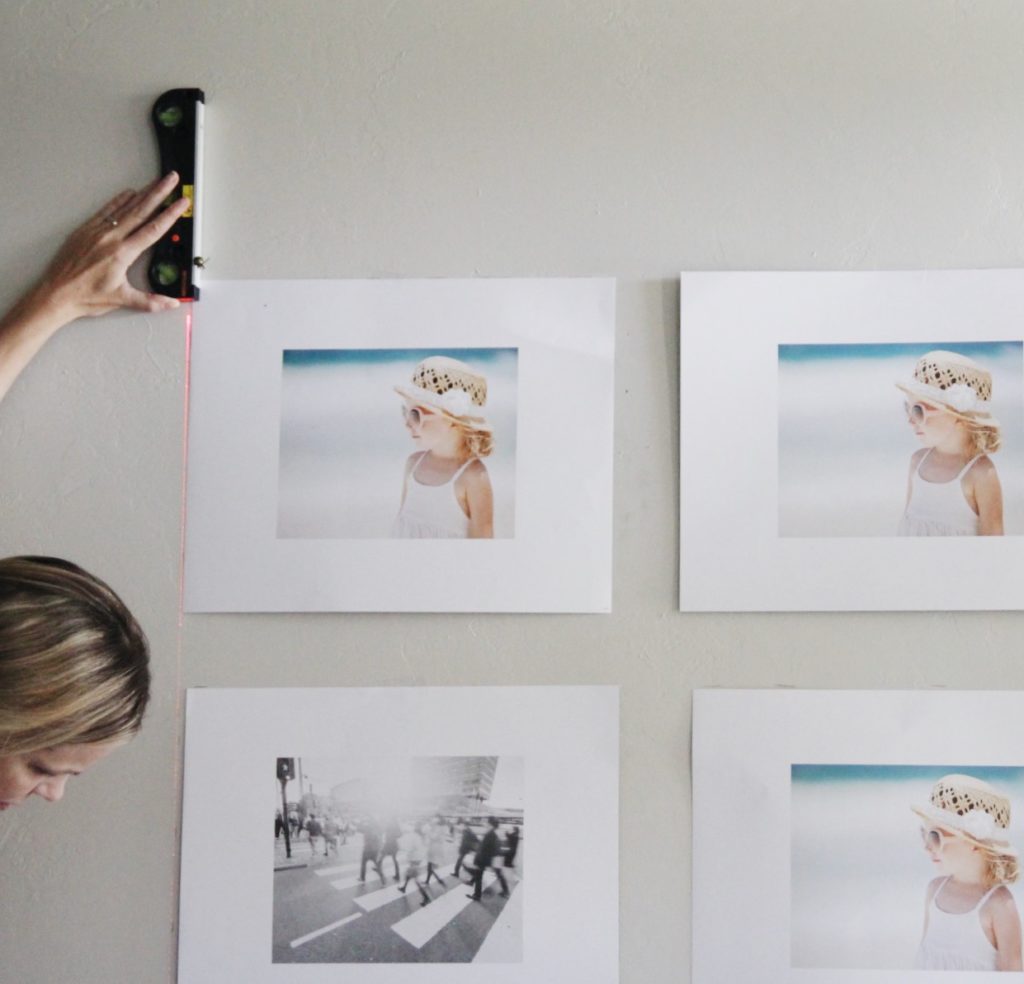
I like to use the insert sheets of the frames to first put on the wall so I can get a true visual of placement and in this case, spacing. I decided on a good height to start the top row and used a rough 3″ to place them into a grid. (Don’t measure exactly now, you can do that later!)
Processed with VSCO with a6 preset
Once you are satisfied with the overall design, it’s time to measure! I used a tool that I recently picked up and I’m not sure how I functioned without… a laser level. I started on the top left and made small marks all the way down my line of pictures.
Processed with VSCO with a6 preset
Then… the horizontal row. This takes approximately 30 seconds and is extremely accurate without any fuss.
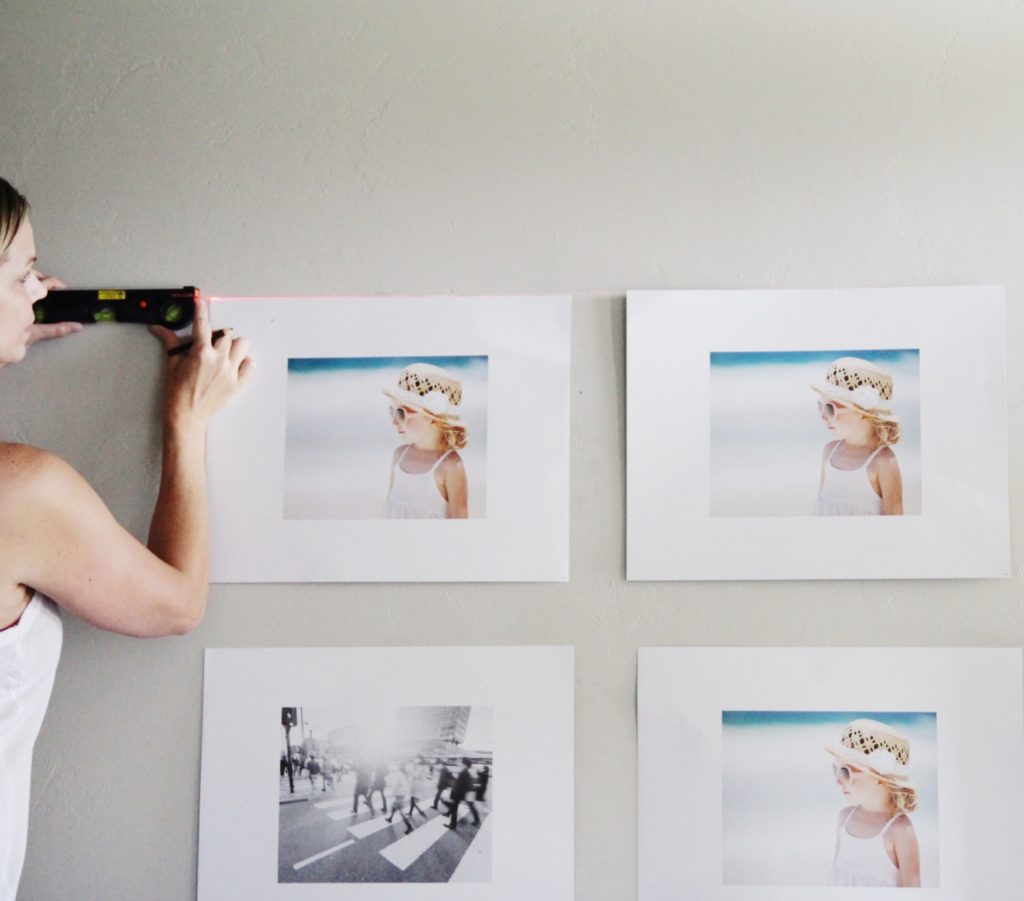
I repositioned the first photo on the top left to ensure it was level and plum. Then I got out the measuring tape and measured 3″ (this is personal preference) and repositioned the middle top photo using the level marks I had created. From this photo, I shot another line down in the middle to establish the 2nd column. I repeated this the next column and then moved down to establish the rows.
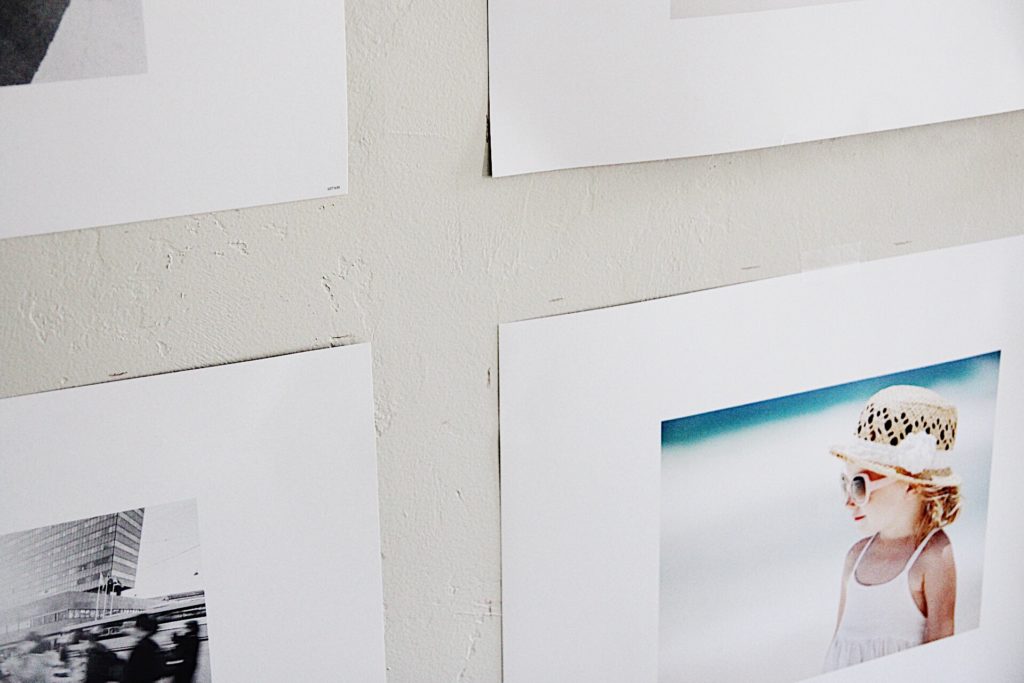
Using this method only requires measuring a few times to get an extremely accurate result. After making all of my marks with the level, I repositioned the inserts to match up with the new level lines exactly.
Processed with VSCO with a6 preset
Let’s talk about getting these beauties onto the wall. The first thing I noticed when I got the frames home was the lack of an “easy” hanging mechanism. If you are hanging just one, these brackets would work fine, but if you want them all to line up perfectly, measuring the 2 hole placements (that are slightly different on each frame!) would be a nightmare. I also love command strips for a hole-free hanging experience, but those would not work either for these frames because the frame is too narrow. See below:

I debated on a few different processes including making a template for each frame but opted for the easy route. I found a nail in my nail picture hanging kit that had a slight head on it that would fit into the groove of the frame easily.
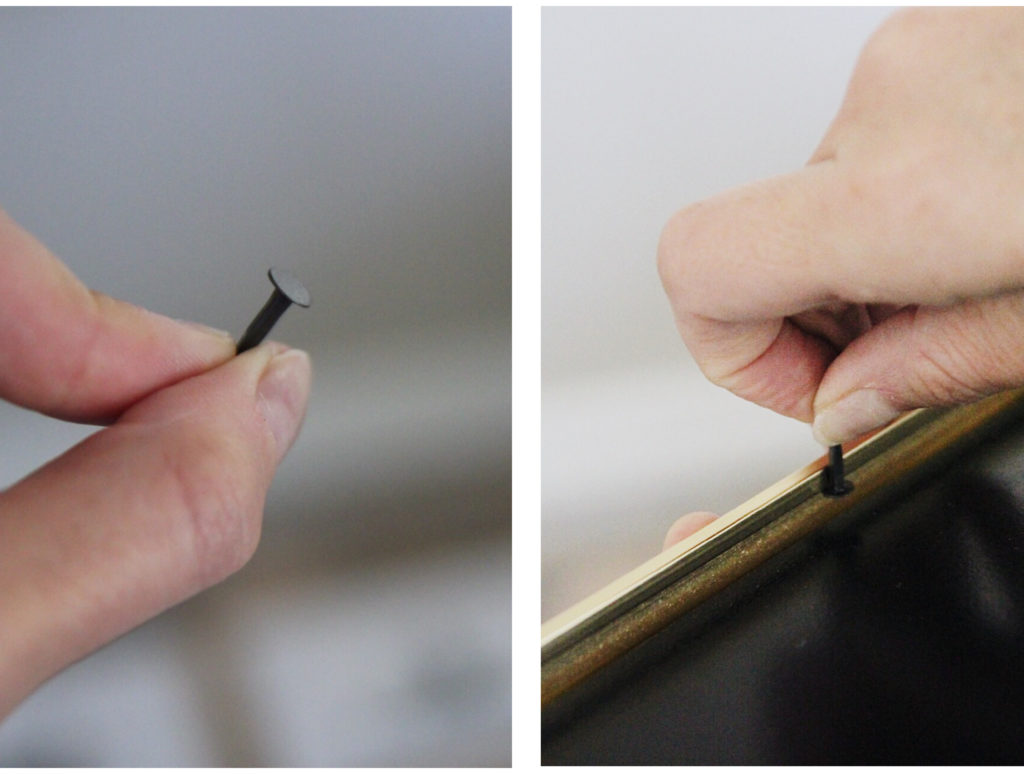
I made sure to ensure each frame insert was level (again) before carefully nailing 2 small nails at the very edge of the positioned insert.
Processed with VSCO with a6 preset
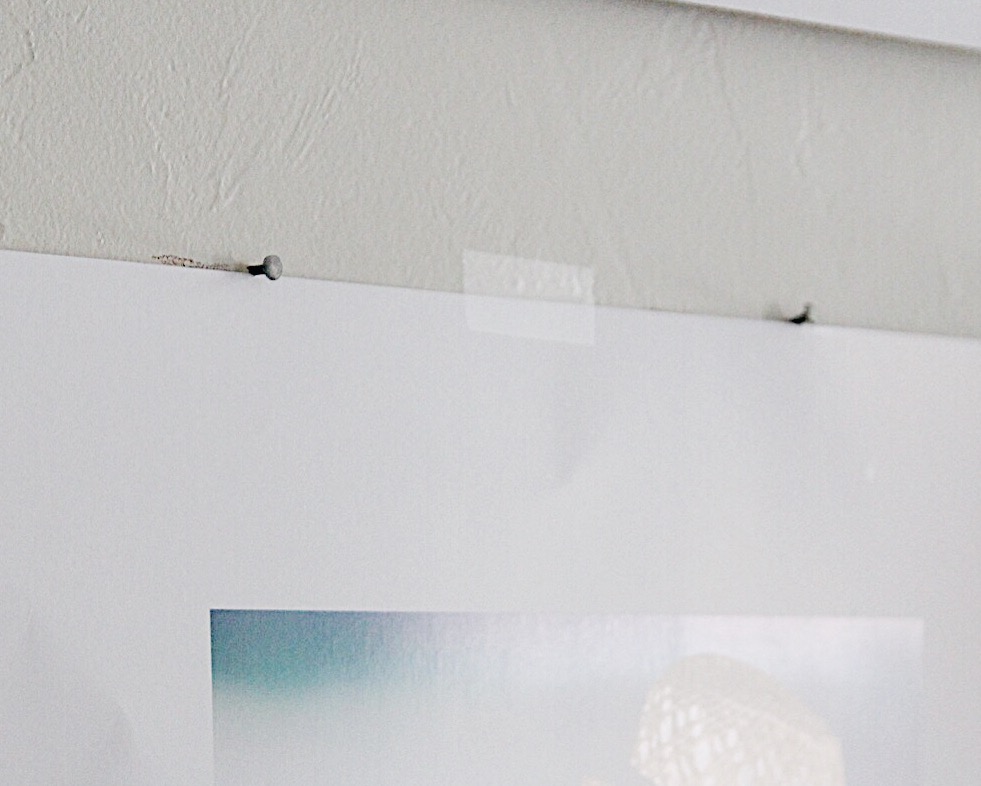
Voila! The Frame sits securely on these nails, even allowing for small adjustments to the left and right so you can line up your frames perfectly.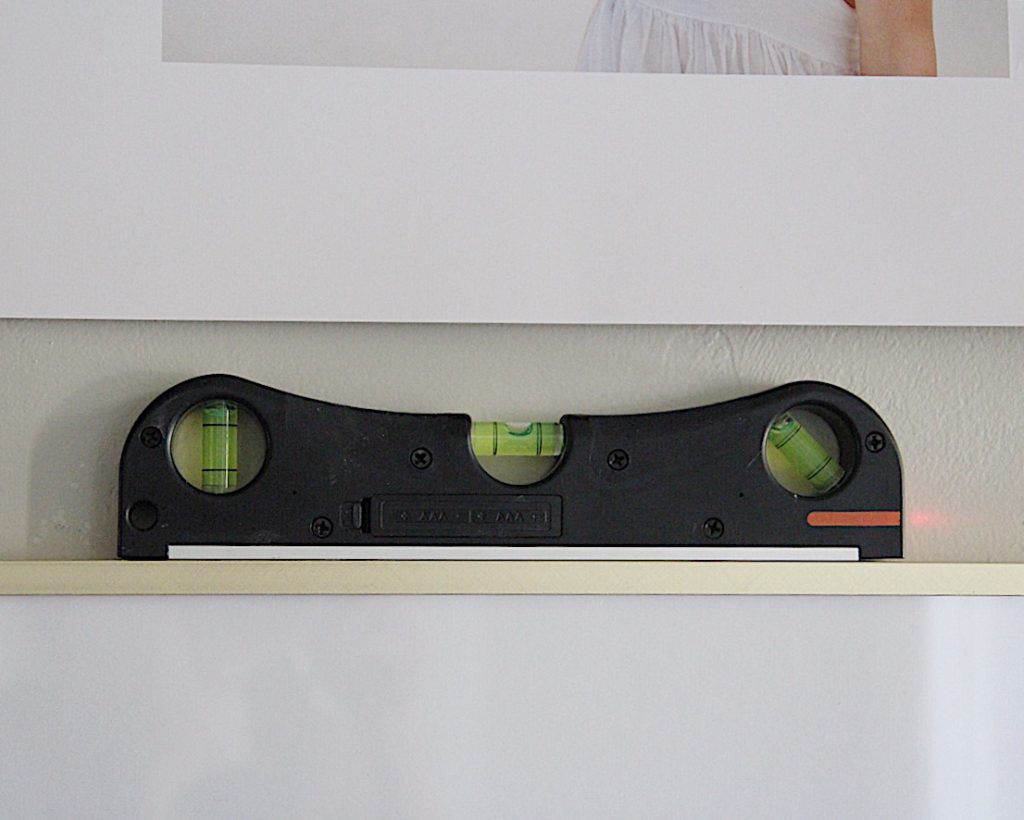
All in all, this was a pretty easy project and it took no longer than a couple of hours from start to finish. Most of this was deciding where I wanted things to go and debating over the hanging mechanism. I would have gone a different route with a different frame, but this was a good option for this particular frame. With all nine frames, I only had to make one minor adjustment to have 9 perfectly level frames that were spaced evenly and accurately. The only con for this is that you do end up with 18 small nail holes… but they are small and hopefully this gallery wall isn’t going anywhere too soon!
Processed with VSCO with a6 preset
