
$15 Floating Frame For Canvas Art
Related blog posts:
–GUEST BEDROOM & OFFICE
–SKIM COAT LIKE A PRO
–GUEST BEDROOM & OFFICE ROOM REVEAL
–BOARD & BATTEN: ORC WEEK 4 & 5!
–GUEST BEDROOM: NEW WINDOW TRIM & WALLPAPER
All Supplies featured in this post are in my Amazon Store!!
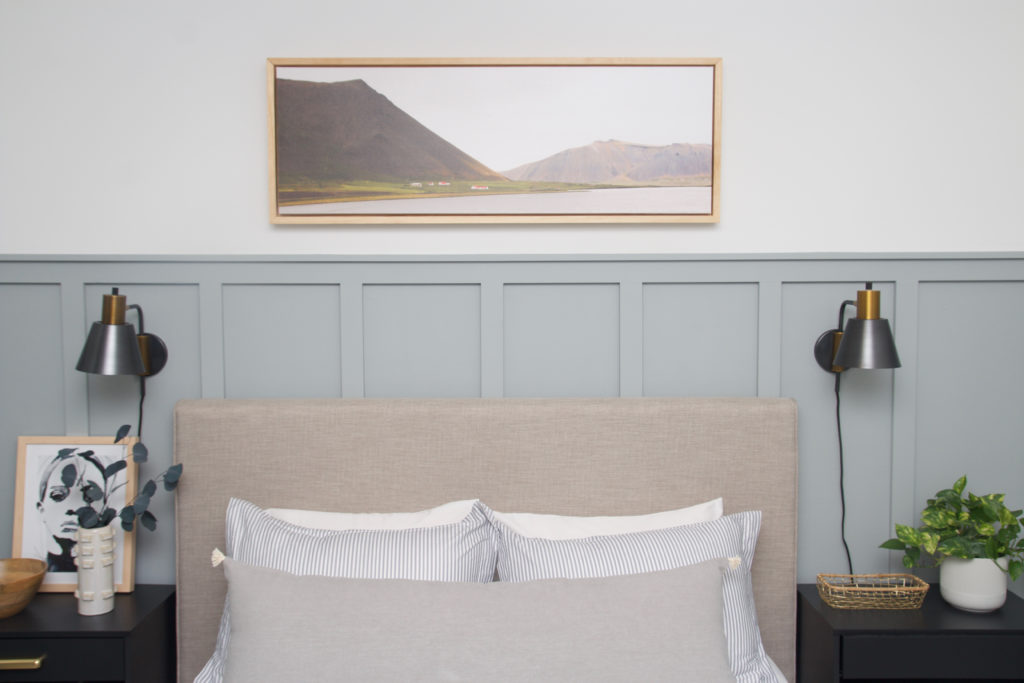
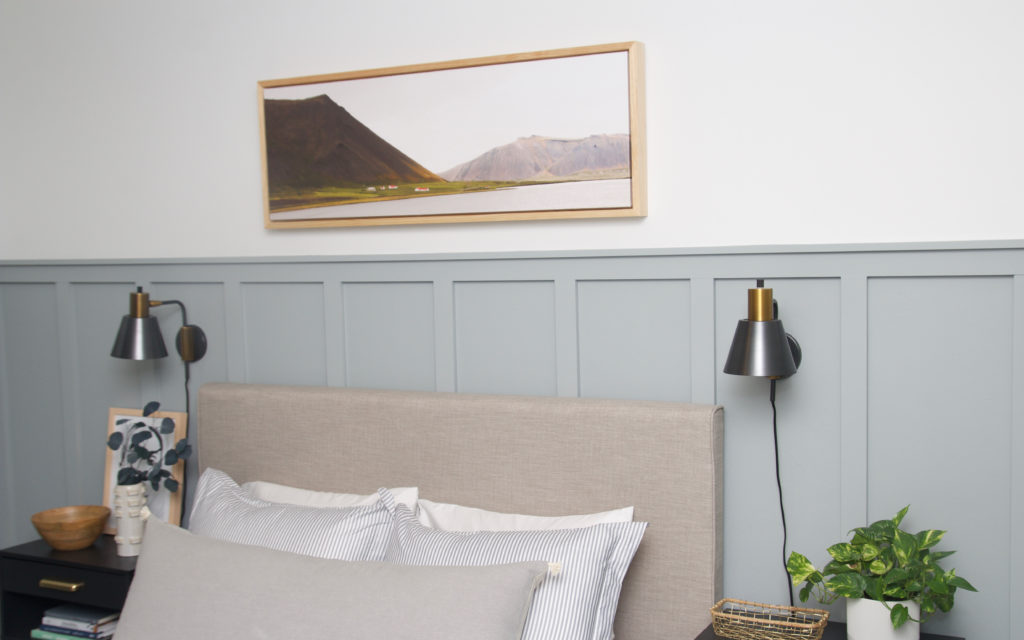
Who doesn’t love a piece of custom artwork? The right art has the potential to take a room from good to great in the time it takes to drill a hole in the wall. The trick is finding the right artwork… shape, size, texture, color. It all matters!
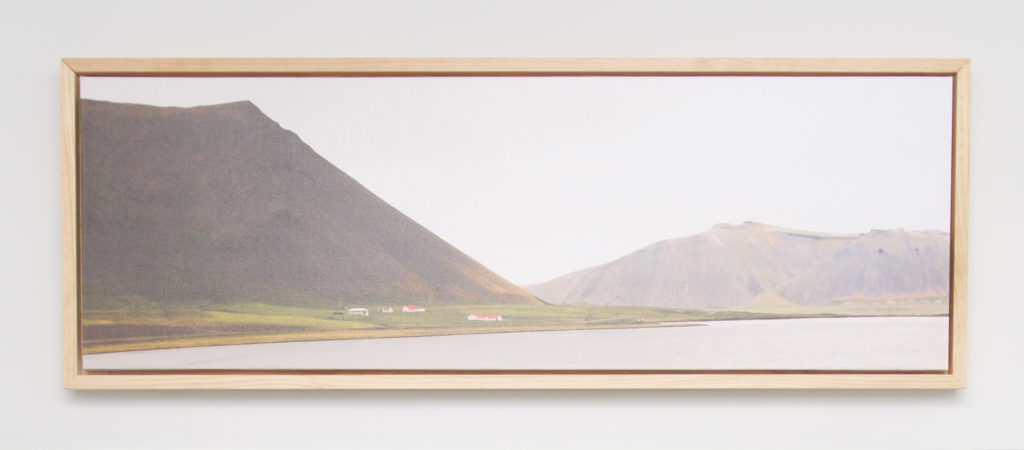
After scouring my normal spots for affordable art and coming up short, I turned to my favorite source for easy and beautiful art, Jenny’s Print Shop! When I am looking for artwork to fit in a space, I try to focus on a color palette first. For this piece, I was also looking for something that I could easily crop into a more pronounced landscape piece. The great thing about digital art is that you can print it in whatever size works best for you! I landed on the FJORD print and was able to immediately download it – another reason I love her shop, instant gratification! I uploaded the print into the Costco printing website and chose the 16”x48” canvas size. The ordering tool allows you to easily crop what portion of the print you want and preview it before submitting an order.
While I waited the few days for the canvas to arrive, I started putting together a plan for the framing. We all know framing can get expensive, especially for a piece of art this size. I felt confident that I could build something that would really make this a statement piece for the entire room. I am so happy with how it came out!
Are you ready to dive in and make your own?
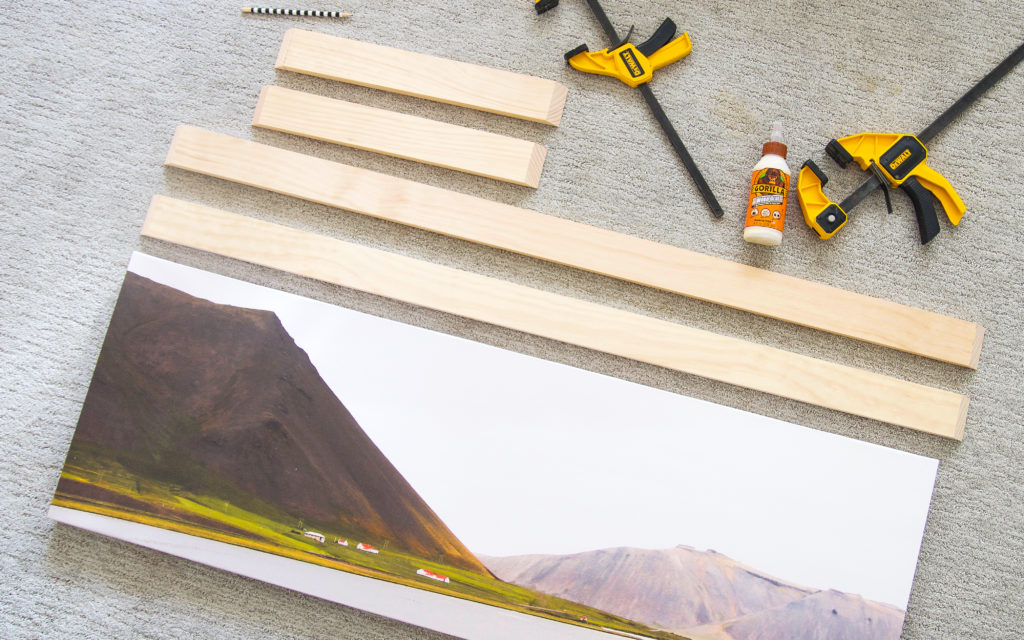
Here are the materials you will need for this project:
- 1×3 select pine for actual frame (assuming 1” or thicker canvas)
- 1×2 select pine for inside mount (I chose 1×2 to help with overall weight of frame).
- wood glue
- measuring tape
- miter saw or mitre box
- clamps
- brad nailer (not 100% needed but recommended for a frame this size)
- pencil
- frame holder (also optional)
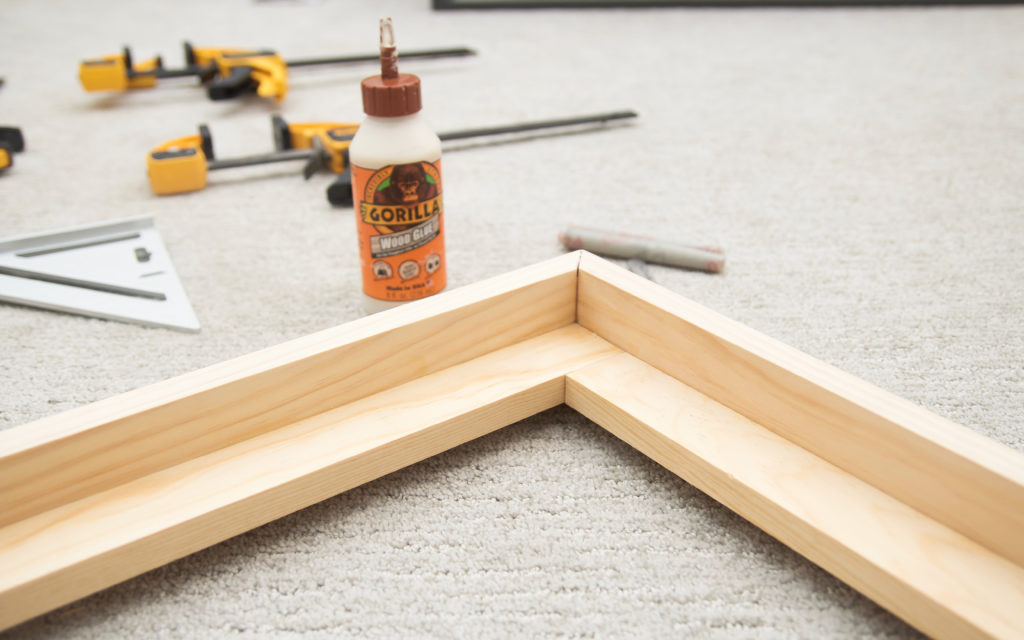
STEP 1: Cut your frame pieces.
Using 1×3 pine, cut each side of the frame using a 45 degree miter cut on all sides. The measurements for each side should measure 1/2” longer than your canvas on the inside edge. This will allow for a 1/4” gap between your canvas and the frame.
STEP 2: Piece your boards together for a dry fit around your canvas to ensure accurate cuts.
STEP 3: Assemble your frame on a flat surface. Generously apply wood glue to all of your mitered edges and join your sides together. This part can be tricky with larger pieces of wood that will want to move around on you. After a few failed attempts, I concentrated on 2 corners at a time while using clamps to hold them together. I used my nail gun and added 2-3 brad nails for extra support. However, I do not think this would be necessary with a smaller frame.
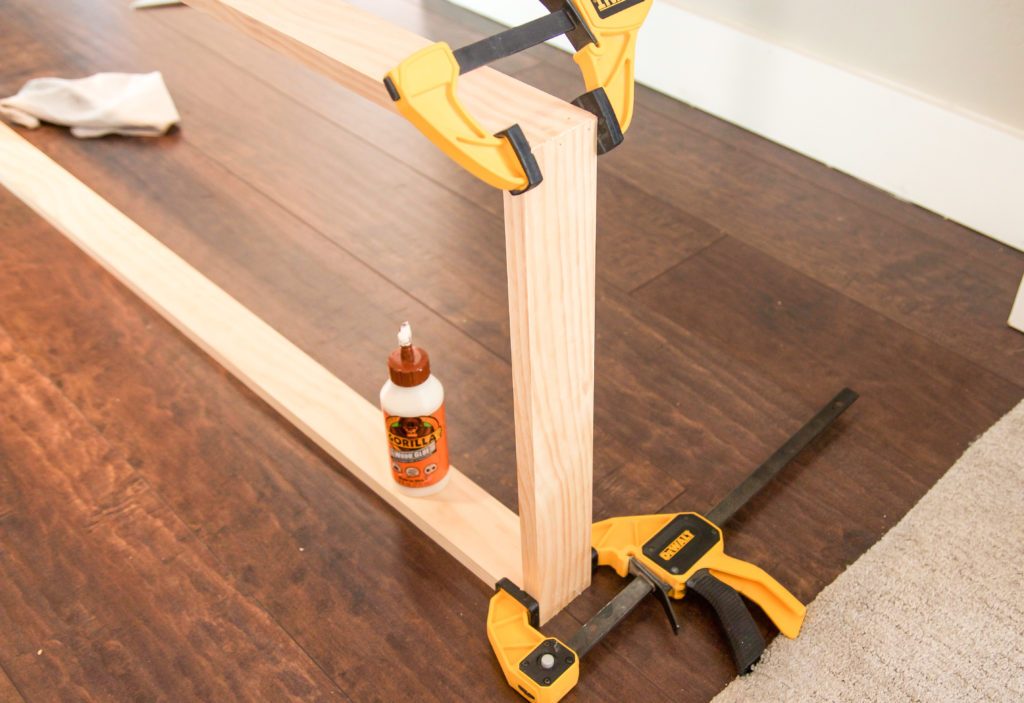
Having an extra set of hands for this step is highly recommended!
Note: there are several tools out there that would make this step easier. This one in particular is one that I might choose to invest in if I were to do another project like this.
Let corners dry and cure for at least 1-2 hours (preferably more) before moving onto Step 4.
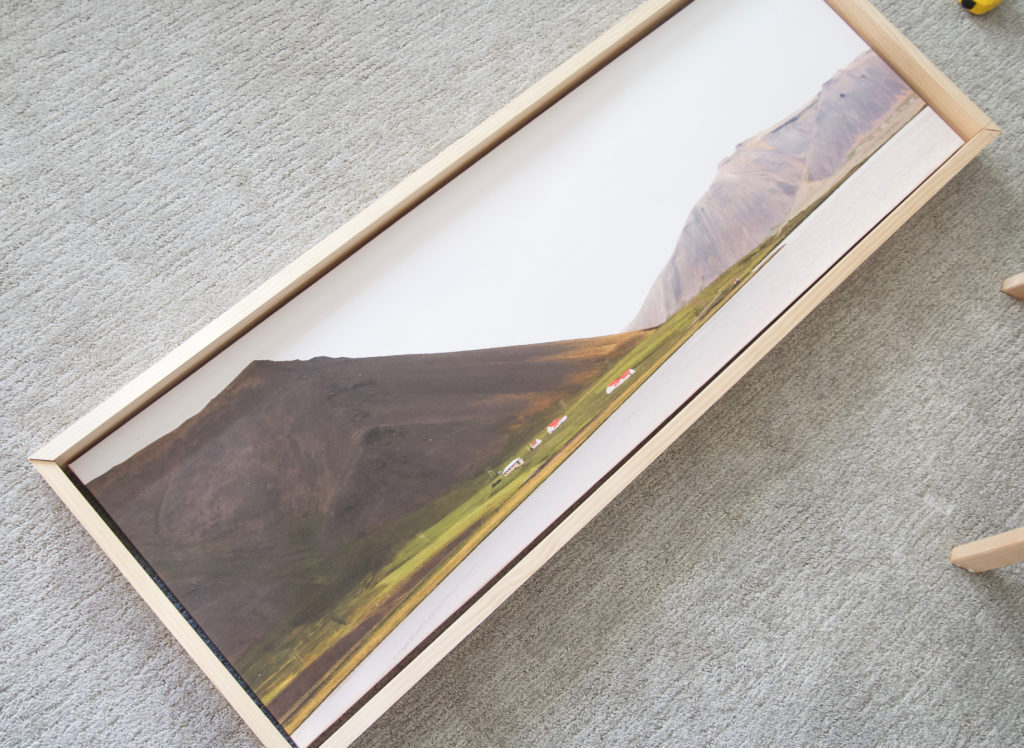
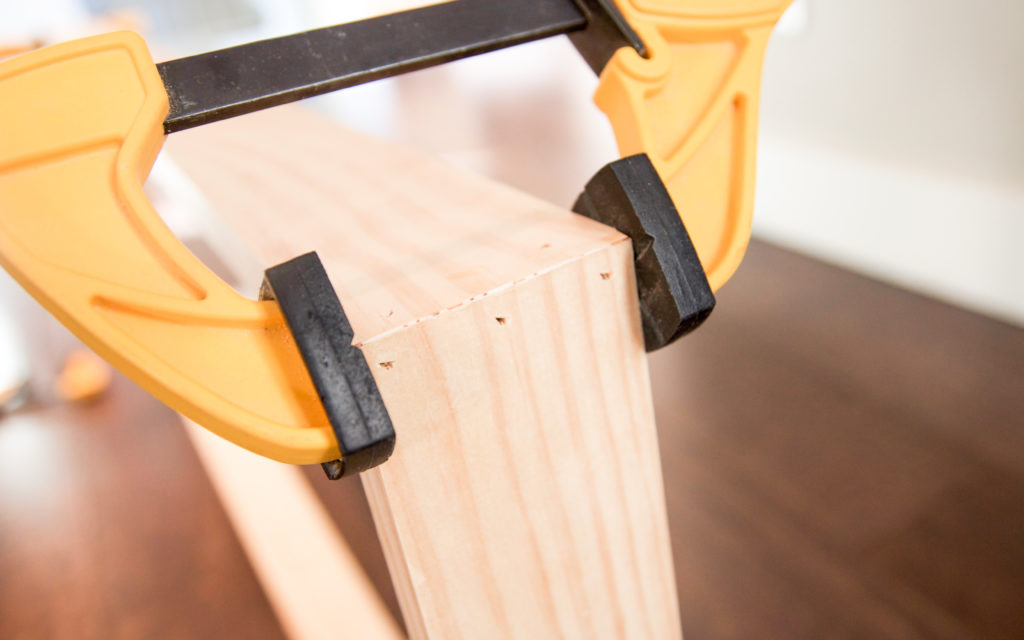
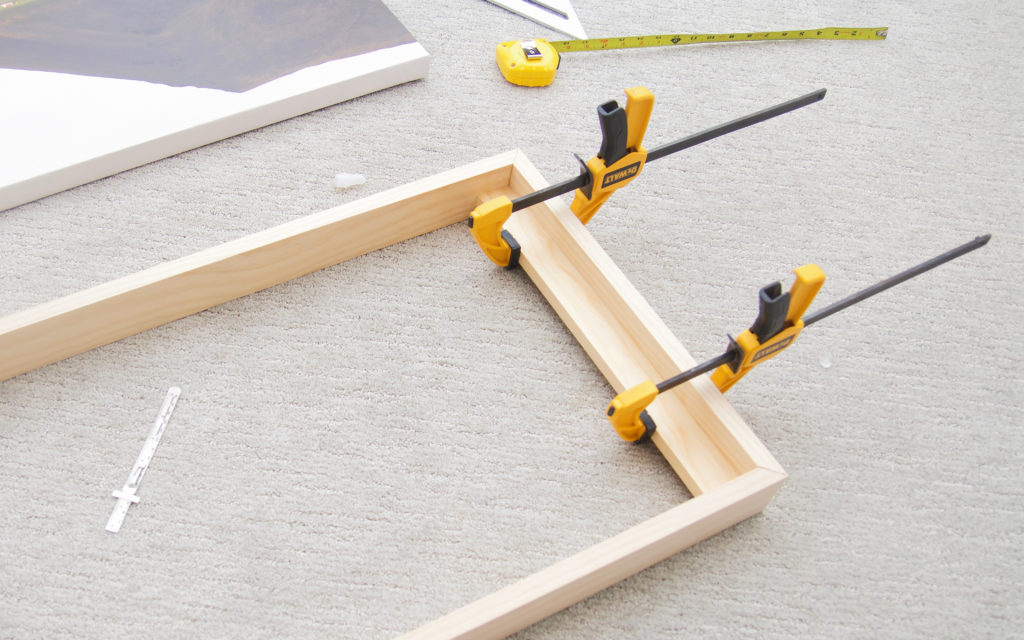
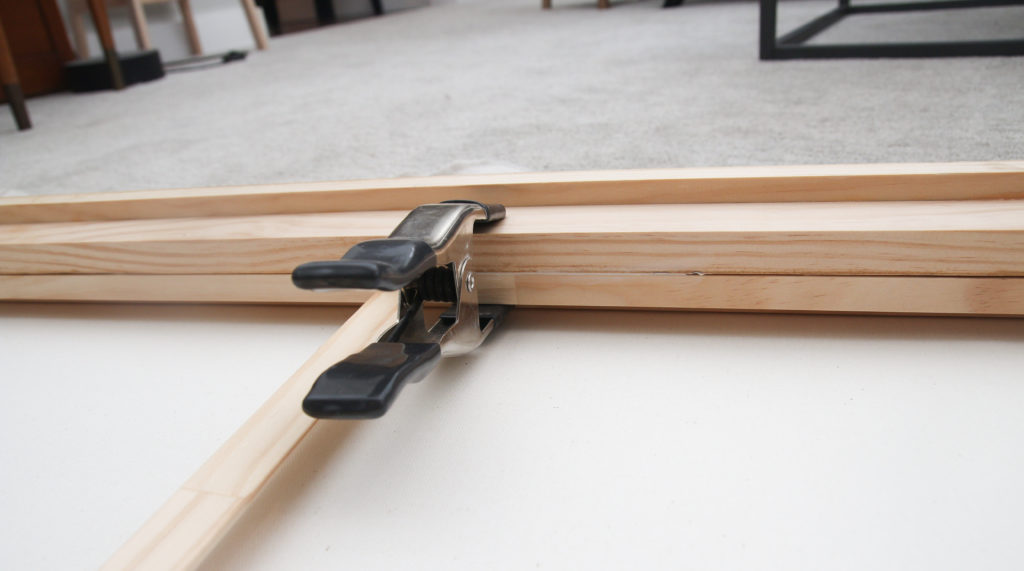
STEP 4: Cut your inside mount pieces. These are the boards that your canvas will be attached to. Work on opposite sides and measure the interior width of your frame. Cut each board to this exact measurement using a straight cut. I used wood glue and clamps to attach opposite sides at the correct depth.
The depth of your canvas will determine where you attach these pieces to your outside frame.
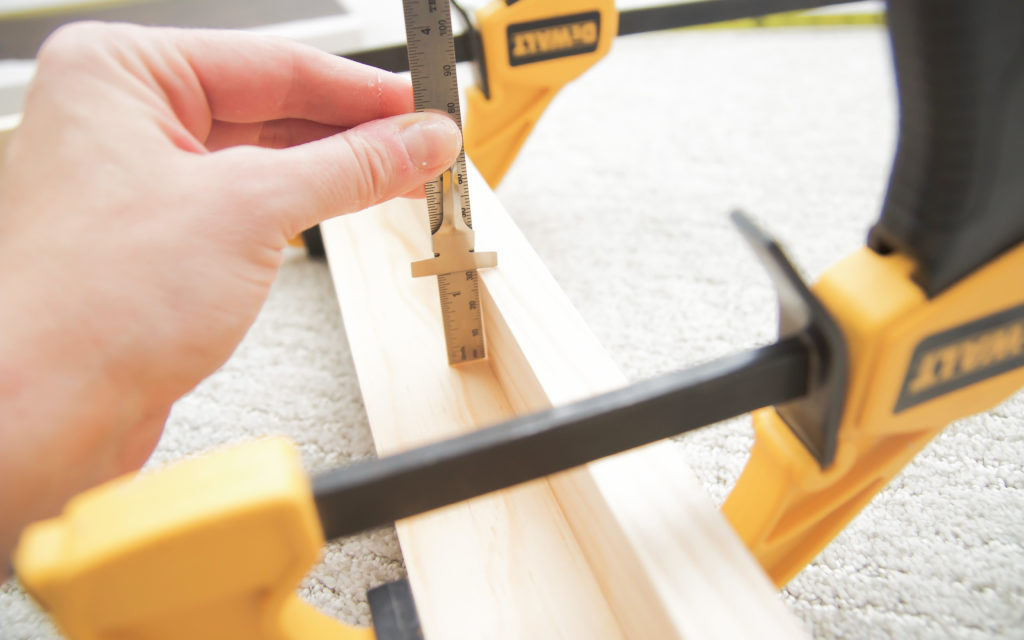
The canvas I am using measures 1 1/4” so I attached the interior support boards at a depth of 1 1/4″ – you can go slightly over this amount if you want a little bit of room. (An option for mounting this later is command strips so if you are using this route, you will want to add 1/8″ to the depth.) Allow to cure for at least 30 minutes. Repeat with the remaining sides using 2-3 clamps to ensure consistent depth.

Here is a close up of the inside corner after attaching both inside pieces.
STEP 5: Finishing Details! At this point, you can decide if you want to stain or paint your frame.
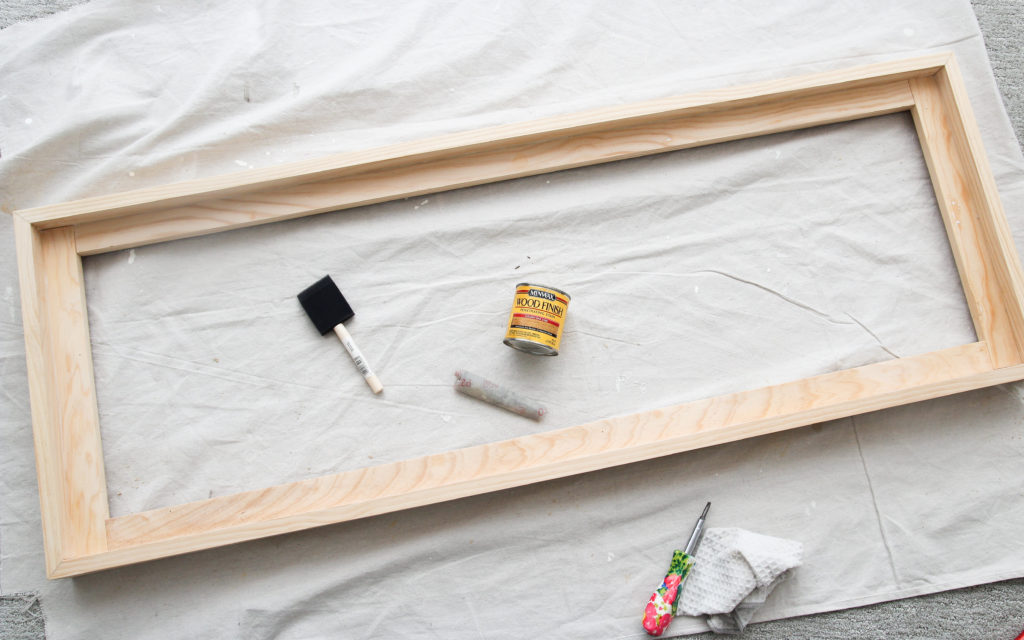
I chose to apply one light coat of Minwax stain in Golden Oak. (Picture above is before stain) I had tested it on the top first and really liked how it brought out a little more richness of the wood without changing the overall tone and color.
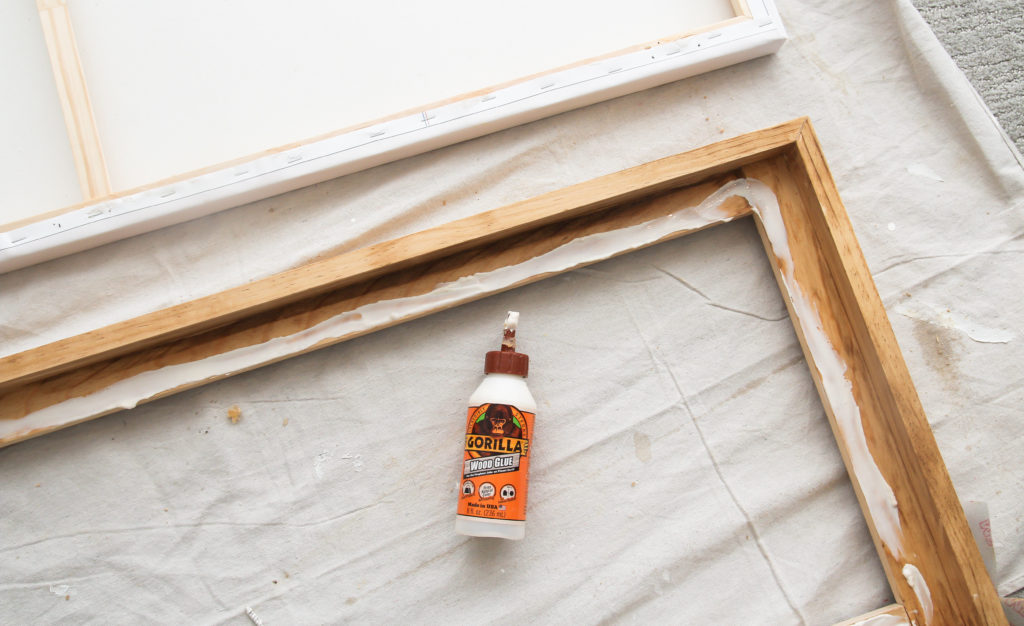
STEP 6: Mounting canvas to frame. I determined this step can be done a few different ways. The first option for a very temporary solution is to use command strips. This would allow you to easily swap out the canvas later on if that was your goal. (I actually used this option to take a quick picture!) The second option would be to simply use wood glue and clamps since there is plenty of surface area of wood to wood contact. I applied a generous amount on the frame itself, positioned the canvas on top and again used clamps to hold in place. Make sure you line up the canvas evenly before attaching permanently!
This plan and material used allowed the frame and canvas to line up perfectly in the back although I did not plan for that!
I am so excited to have this artwork finished and hanging in our new guest bedroom. I hope this tutorial inspires you to go create your own custom frame and put the finishing touches on a space in your own home!

I really appreciate this tutorial. Thank you!
You’re welcome! I hope you get to use it!
Great tutorial. Love the painting.
Thanks Nicole! Jenny’s print shop is the best!