Hey There!
Thanks for stopping by the MPS Blog. Here you'll find all the nitty gritty, behind-the-scenes details of the projects you see on my Instagram. Grab a cup of coffee and take a look around. Happy DIYing!
I'm Jennifer Gizzi.
Browse by Category
design
sourcing
diy TutorialS
moodboards
SHOP OUR HOUSE
gift guides
Search the Blog
Refresh Your Outdated Tile With Paint!
September 18, 2019
Related blog posts:
–TRANSFORM YOUR BATHROOM VANITY IN A WEEKEND!
–GUEST BATHROOM
–BATHROOM MAKEOVER – MOOD BOARD & PLANS
–Tile Painting Q & A
This post is in partnership with Rust-Oleum.
Most supplies for this project are available in my Amazon Store!!
Update: Rust-Oleum has rebranded this product and it is now called
Rust-Oleum Home Floor Coating so the cans pictured below will be different but it is the same product!
Sometimes tearing everything out of a room and starting fresh just isn’t an option. In fact, it’s rarely an option. I am a huge fan of taking the power of paint to transform a space. Usually, we think about painting the walls of a room – but what about painting your floor?
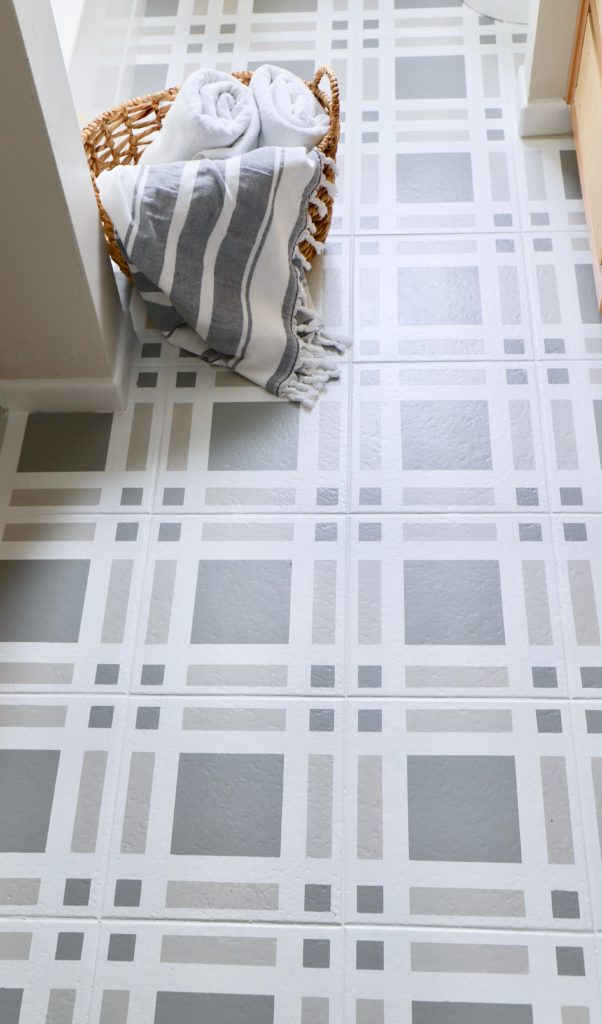
Flooring can be one of the hardest and most expensive things to replace in a room but can also make the biggest impact! When Rustoleum reached out to me with their new RockSolid Home line – I jumped at the opportunity to refresh my dated bathroom tile. This product is a 2 part floor coating system and is designed to coat most floors: bare concrete, wood, vinyl, linoleum, porcelain tile and in my case… ceramic tile.
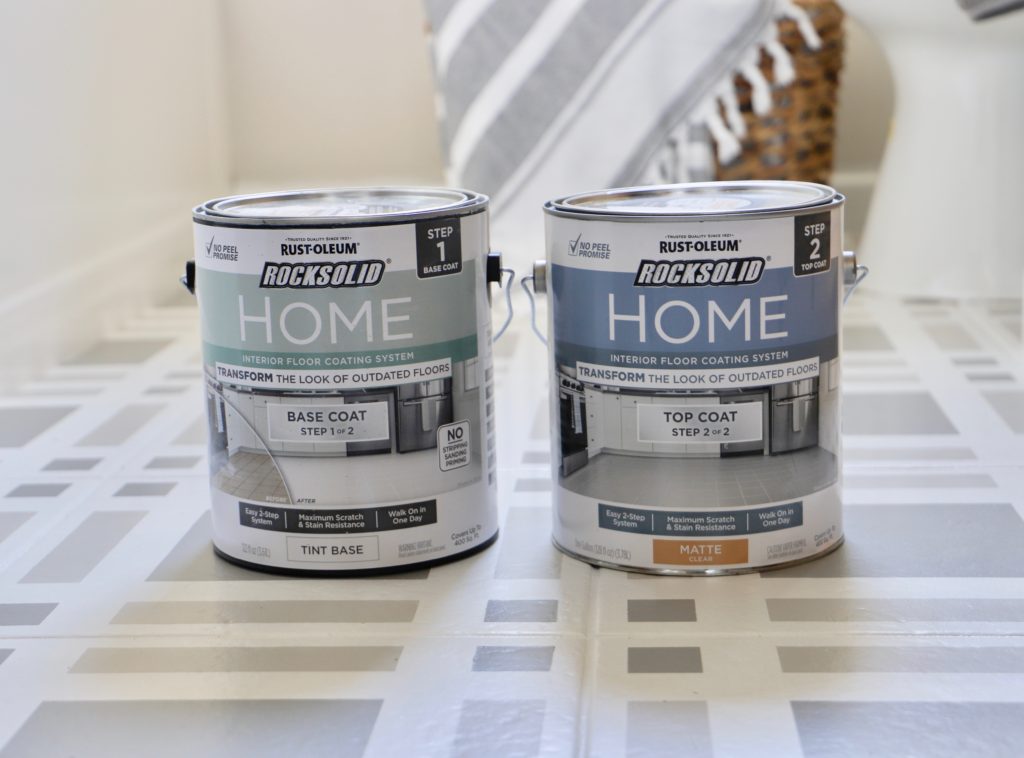
This one change immediately led to plans for a complete cosmetic makeover that I shared the details on here. I was anxious to get these floors painted first as I knew they would set the stage for the whole renovation.
Let’s see where we started!
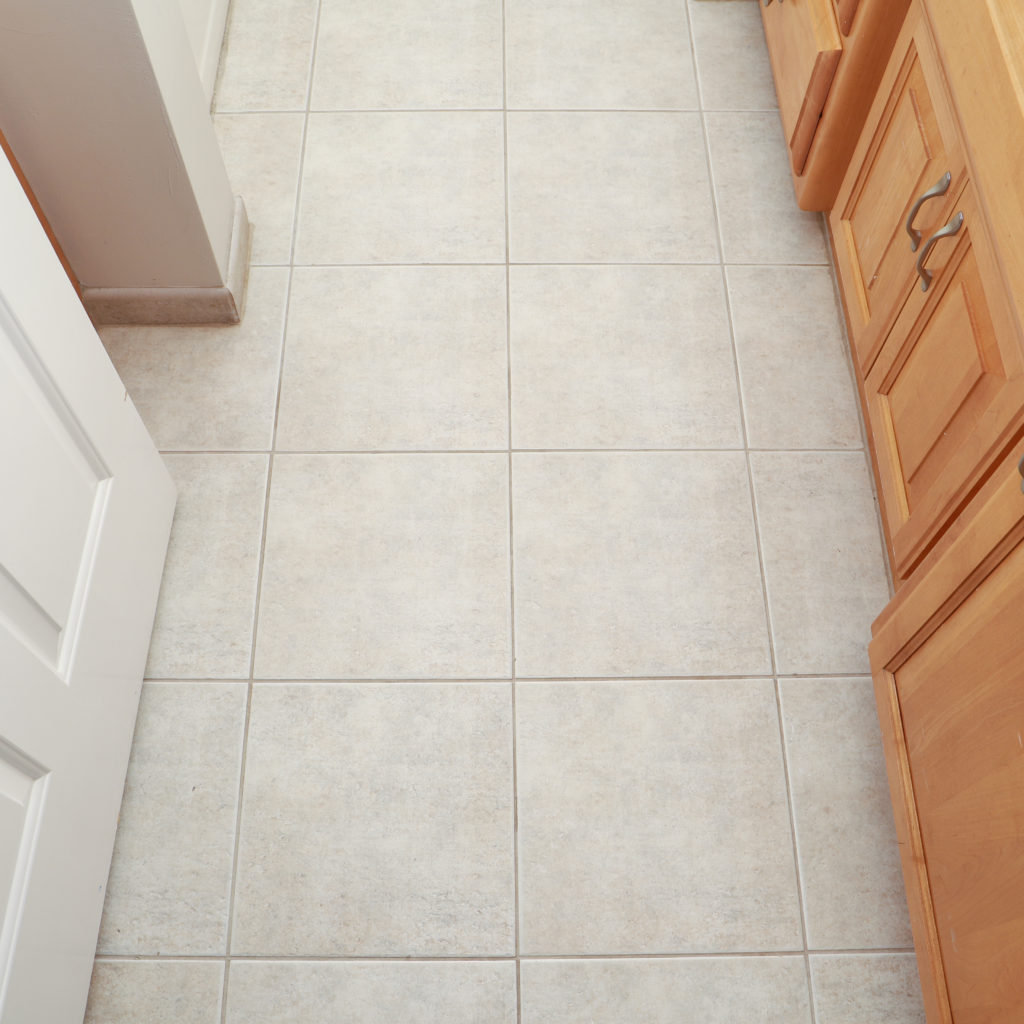
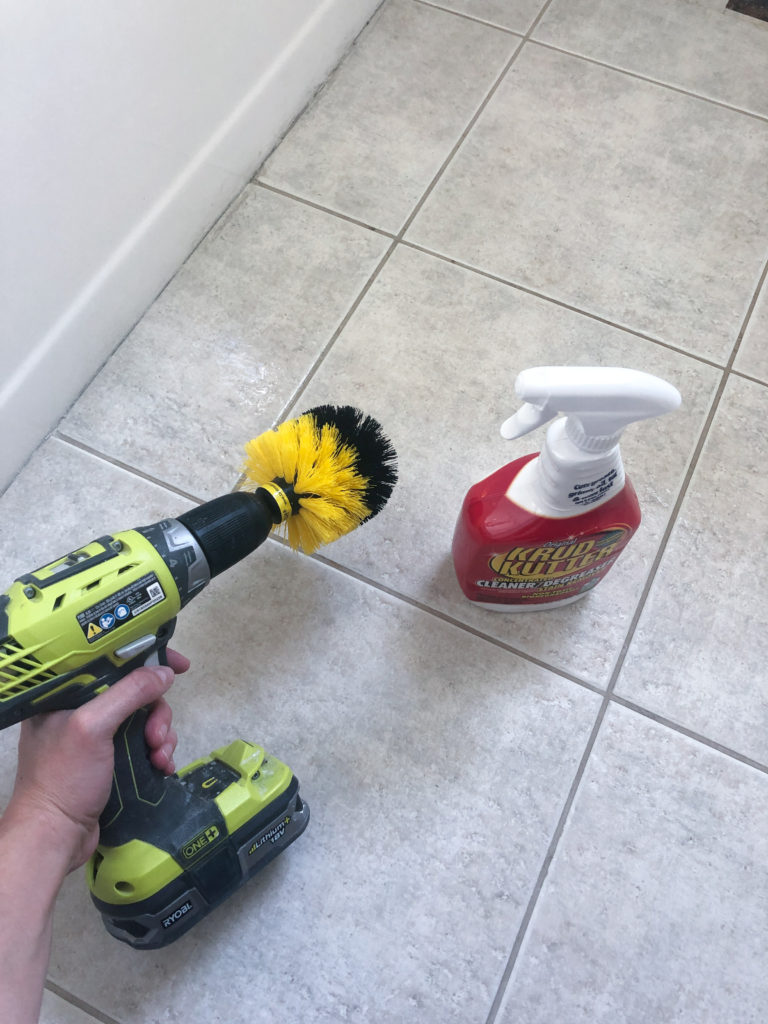
Prep is always the most important part of any project. Luckily, this required very little. The main prep work involves cleaning. After an initial clean, I used Krud Kutter on the entire surface to ensure starting on a clean dirt-free surface. I also used these handy drill scrubbers to make this job extra efficient.
After cleaning and taping off any edges, I used the Base Coat in white for my first coat. I used a 3/8″ nap roller (try to use this exact size nap). This is the most important step that binds the paint to your surface and requires the longest dry time – 6 hours for the best adhesion to the floor. The instructions stated only one coat was necessary, but I found that 2 was going to be a must for even coverage. For tile, I would suggest painting right into the grout lines.
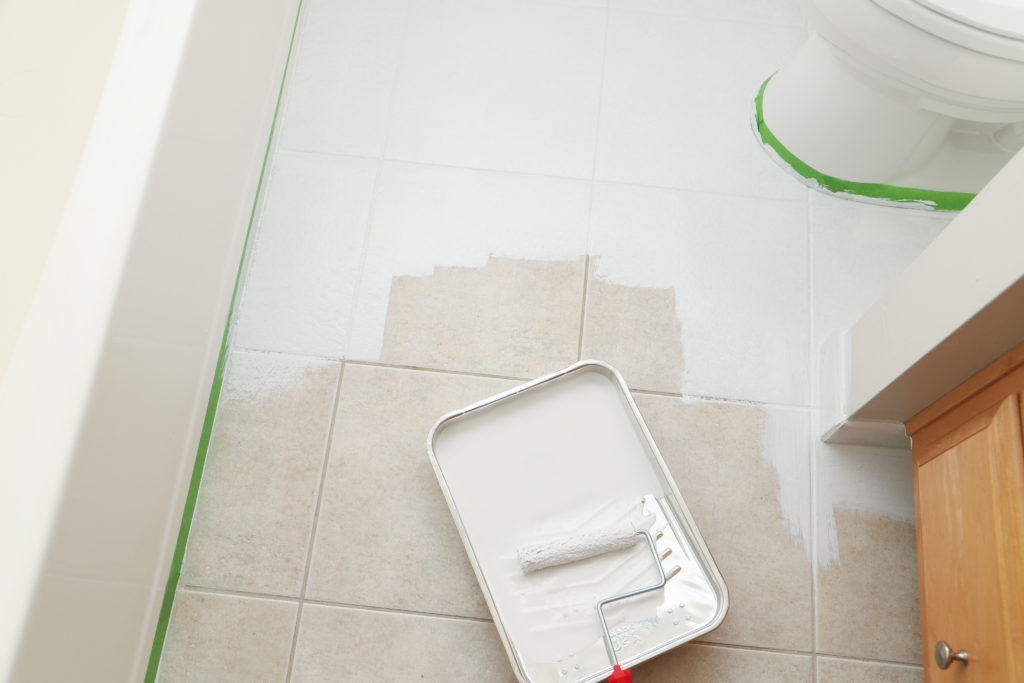
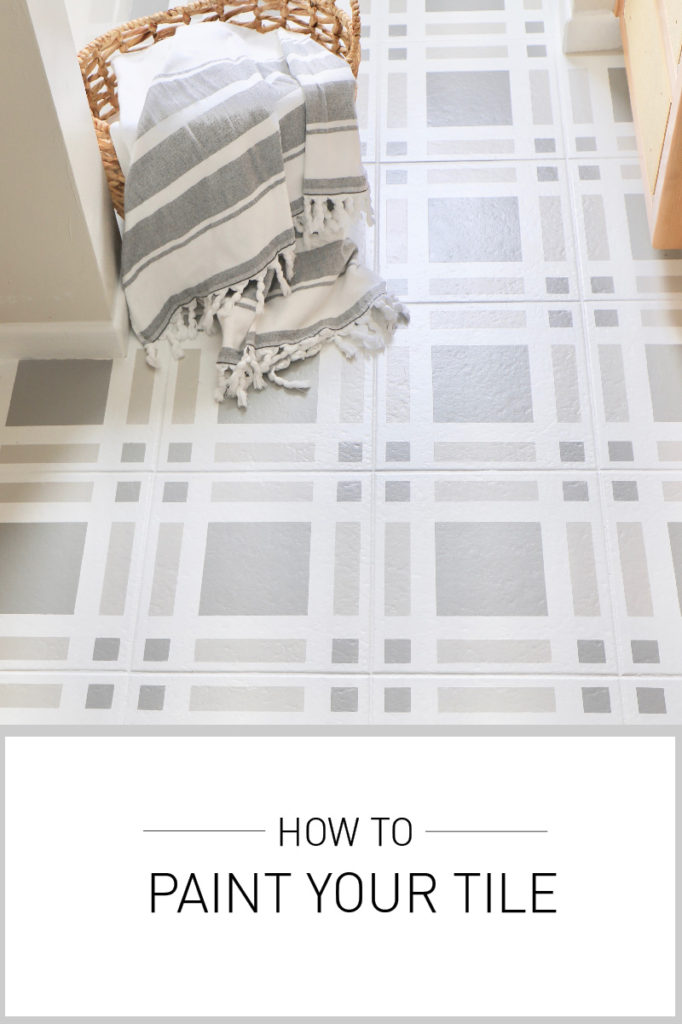
After 6 hours, I painted a second coat of white. At this point, if you wanted a solid floor, you could wait 1-2 hours, paint your top coat and be done! I found a cool cement tile as inspiration and did my best to see if I could recreate it by using some painters tape to draw out a pattern. Many people use stencils to create patterns but I’ve found them to be messy and hard to work with inside irregular areas such as bathrooms.
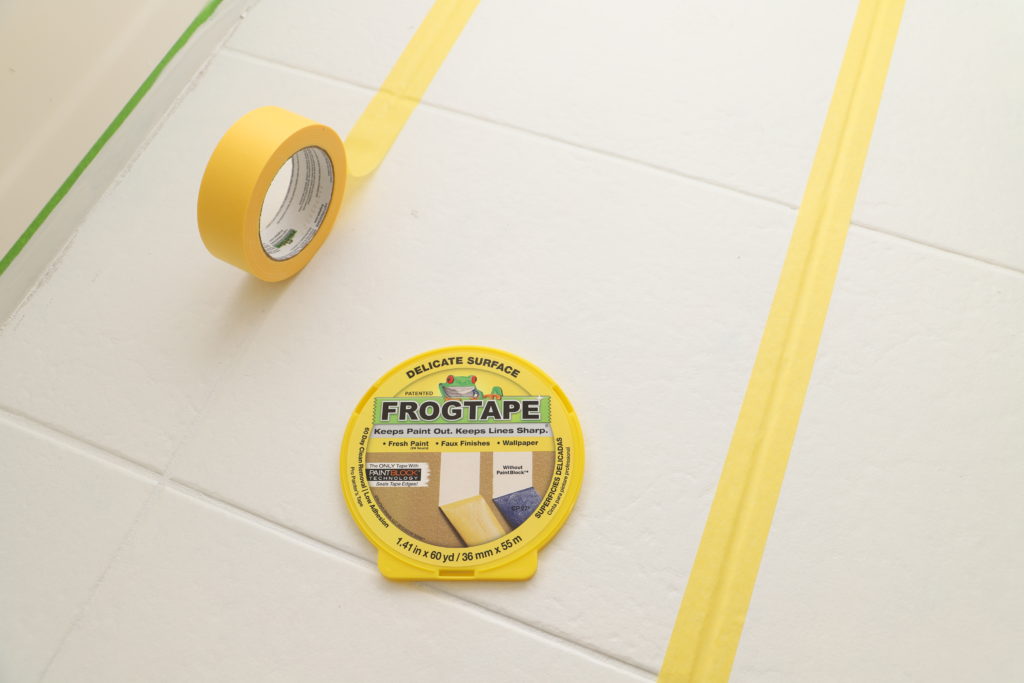
I used the delicate FrogTape (yellow for easy identification) and started by taping all the grout lines. I then used a small piece of painters tape every 10-12″ to space out a second line on each side of the grout lines in both directions. I found using these spacers was much easier than trying to measure. Note: All painter’s tape is not created equally. Frogtape has paint block technology and is the only tape I’ve found to be reliable for a project like this where you want to avoid bleeds at all cost. I also strongly advise the delicate version, (not the regular) for this particular project.
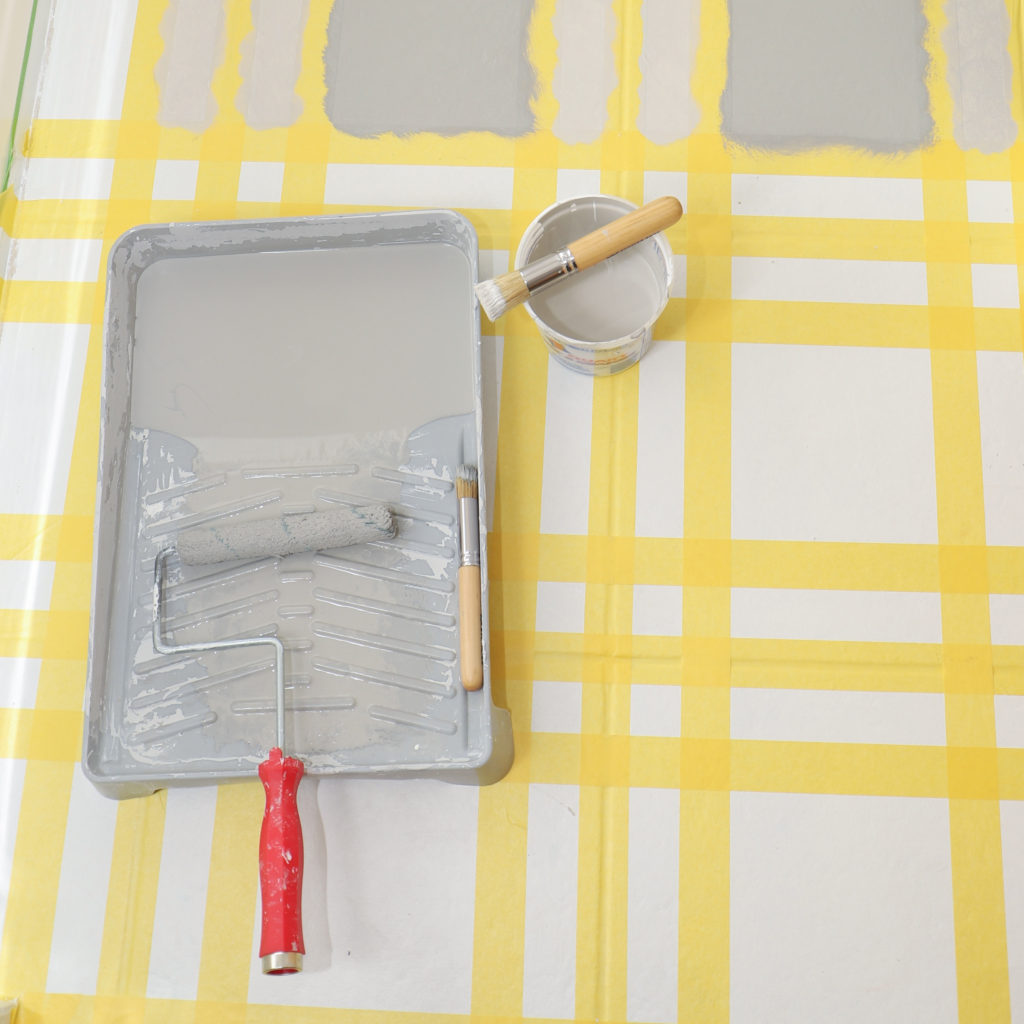
After I had my pattern in place, I used Windsor Grey in the Base Coat to paint a portion of my pattern and a diluted version of Windsor Grey for my second color. To get this lighter color, I mixed about 2/3 white with 1/3 Windsor Grey. I thought this was a great way to get 2 different colors from one can!
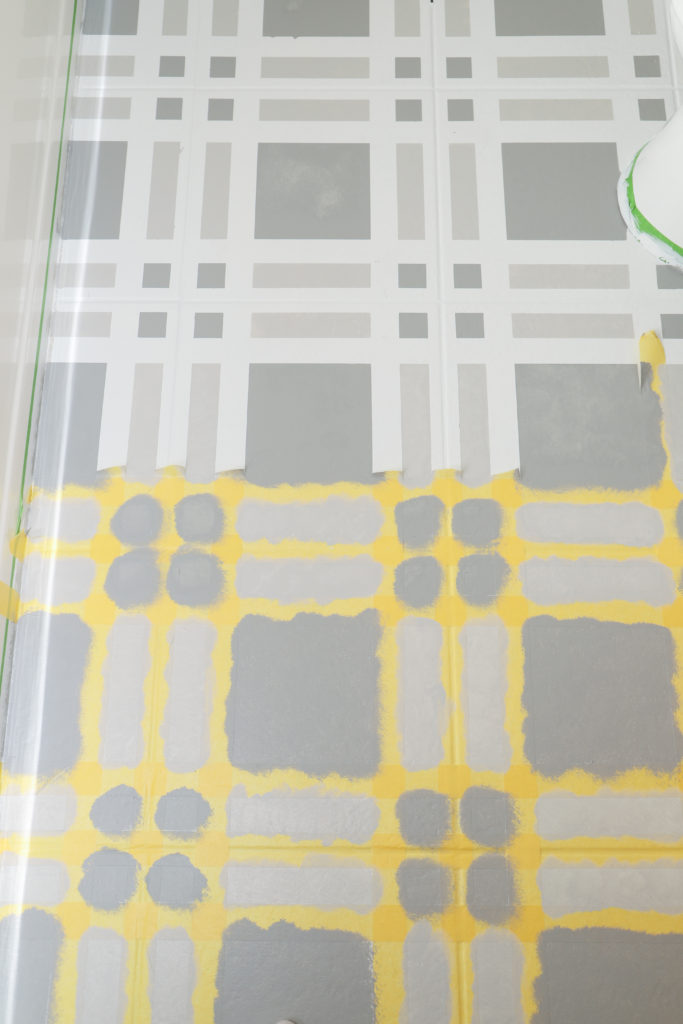
I started by using a small roller but quickly moved to a stencil brush to get these smaller areas. I used a blotting technique to get the most even coverage. This process only took about 30 minutes per coat, waiting for about 1 hour between coats.
I’ve always found that FrogTape needs to be pulled up when the paint is still wet to avoid dried paint from sticking to the tape. I did the second coat of my pattern colors in small sections and then immediately pulled up the tape as I went. (I ended up using scissors to get clean cuts between sections.)
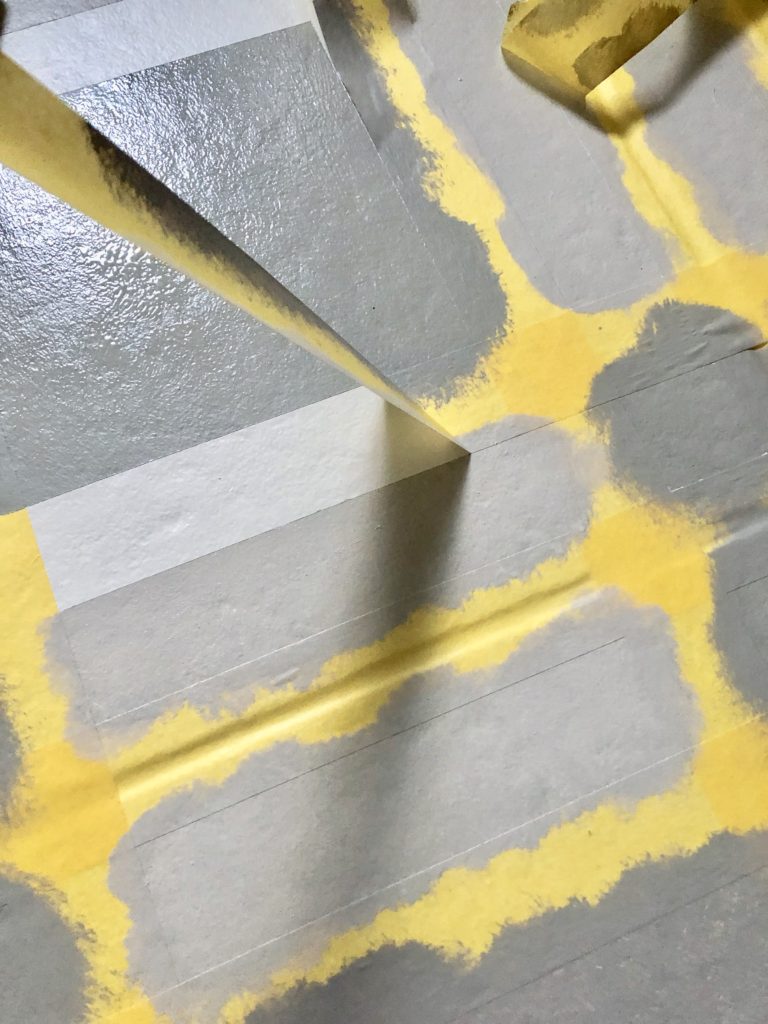
As you can see from the above image, the delicate FrogTape I used made crisp lines and I didn’t have any touchups at the end… this made me so so happy!
The top coat comes in semi-gloss and matte so you can decide which finish you like better. I always prefer a more matte finish so I chose that option. To apply the top coat, you need a 1/4″ nap roller. This process was very simple and quick – maybe 5-10 minutes total to cover my bathroom floor.
Now you wait. I waited about 12 hours before walking on it and had no issues – but it is recommended to wait for 24 hours before foot traffic. I’m a rebel like that but you might want to wait the 24 to be safe.
My husband caught me staring at the floor several times over the next few days. It turned out even better than I would have thought!
Overall, this was a beginner level DIY that made a HUGE impact in my bathroom. I could not be happier with the process and results. Below I outlined a few common questions that I received while giving this tutorial on Instagram.
If you don’t see the answer to your question, make sure and leave a comment and I’ll get back to you!
Happy painting!
COMMON QUESTIONS:
Q: How do I clean the finished floor?
A: Mild soap and water – nothing abrasive. You can also safely use a steam mop.
Q: How soon can I use my floor after painting it.
A: It is ready for foot traffic 24 hours after the top coat… and full cure time is 7-10 days.
Q: Can I use this for a shower?
A: Not recommended: Rustoleum makes a tub and tile kit that can be used for this purpose.
Q: Where can I buy it?
A: Currently, it is in This Home Depot only and there are 6 states that do not carry it yet due to VOC restrictions. It should be nationally available by Spring 2020.
Q: Can I have a custom color or tint?
A: There are 18 colors only.. however, I created my second color by mixing 2 colors together.
WIFE, MAMA, DESIGNER, RENOVATOR, & PASSIONATE DIY EDUCATOR
I'm Jennifer Gizzi.
Let's create our dream homes together.
Navigate
home
about
blog
courses
shop
Social
Youtube
Legal
Terms & Conditions
Privacy Policy
© 2021 Making Pretty Spaces