Hey There!
Thanks for stopping by the MPS Blog. Here you'll find all the nitty gritty, behind-the-scenes details of the projects you see on my Instagram. Grab a cup of coffee and take a look around. Happy DIYing!
I'm Jennifer Gizzi.
Browse by Category
design
sourcing
diy TutorialS
moodboards
SHOP OUR HOUSE
gift guides
Search the Blog
How To Hide The One Connect Box For Your Frame TV
March 30, 2022
The tutorial everyone has been waiting for!
Where the heck do you put your Frame One Connect Box when you don’t have a cabinet to hide it in?
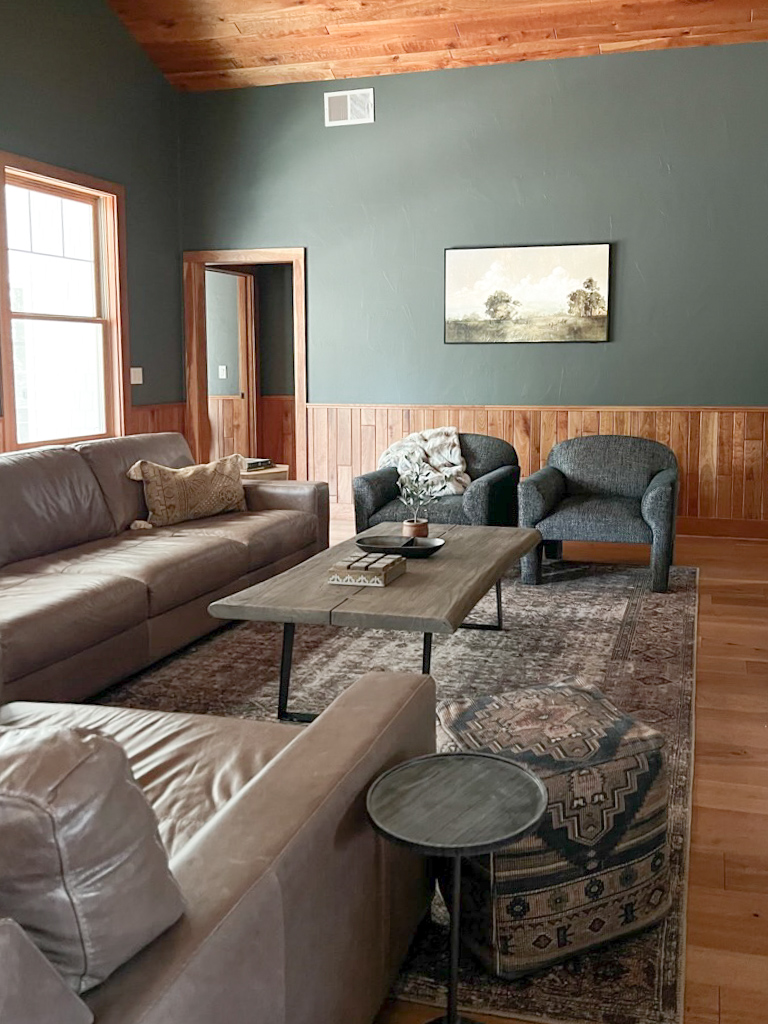
Our cabin great room (see below) only had one wall or location where we could install a TV. This location also didn’t give me many options to place a console or cabinet. Since the Frame TV requires a box to house all the “smart” features that the Frame TV offers, this left me with very few options!
What is the Frame One Connect Box?
First things first… if you have a Frame TV – you know exactly why I’m writing this post. If you don’t, you might be wondering what the heck a One Connect Box is.
All Frame TVs come with The One Connect Box. It provides a single connection hub for all cables in one place so the signals can be brought to the TV via a One Connect Cord (the small clear cord dangling from the TV below).
You can connect all your favorite input devices such as cable boxes, Apple TV, gaming devices, and more via the ports that are on the One Connect Box. Instead of having multiple wires connect to your TV – they all connect to the box. And then the box connects to your TV with one small clear cord.
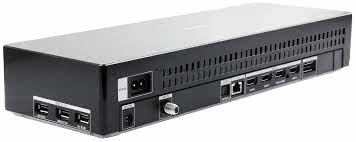
- (4) HDMI inputs
- (1) Optical Digital Audio Out
- (1) Cat 5 Ethernet Port
- (1) Coax Input
- (3) USB Input
- (1) Ex-Link
For my application, I knew I wouldn’t want to connect anything to the One Connect Box. I would only be using the built-in Smart TV applications. This is the reason I am able to hide it behind the TV with limited access. If you want to plug multiple devices into your Frame TV – this might not be the solution for you.
Installation
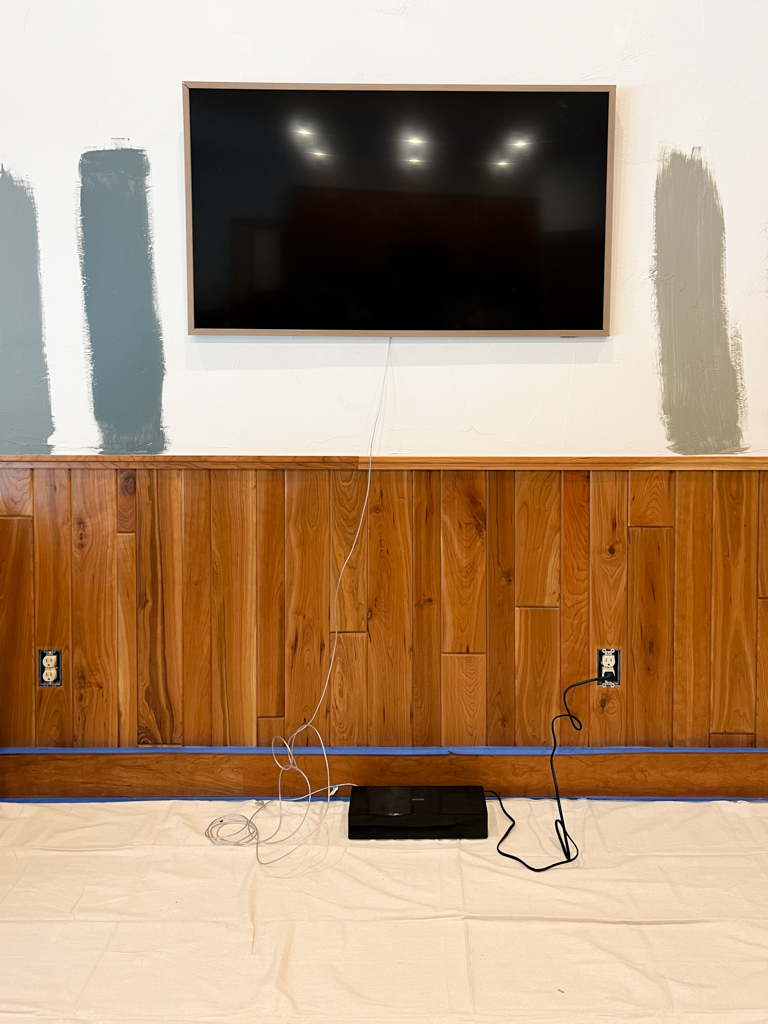
Okay back to how I’m hiding my One Connect Box. You can see below that the TV is installed but the One Connect Cord is left dangling from the box – with the box on the floor. You could easily run the wire behind the wall and store the One Connect Box in a console. I have used this method several times! However, for this location, I don’t have room for any type of cabinet or console.
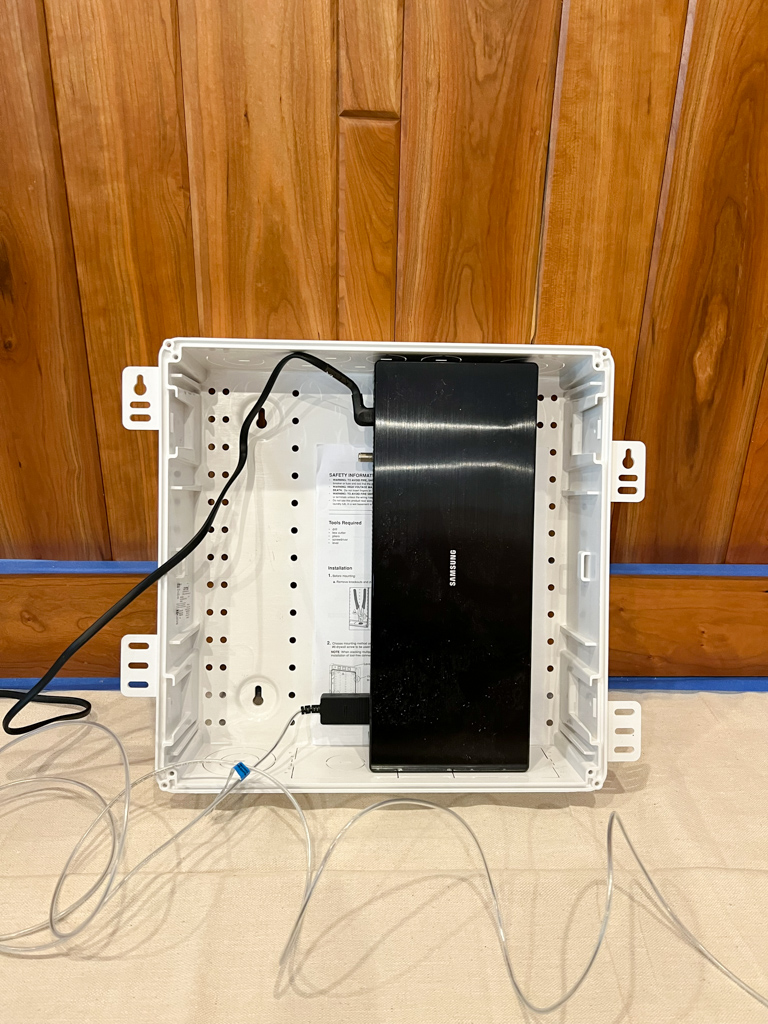
I found a 14″ recessed media box that is designed to mount into the wall to house different media components. I ordered one and hoped for the best. The box fits perfectly on its side with plenty of room for cords.
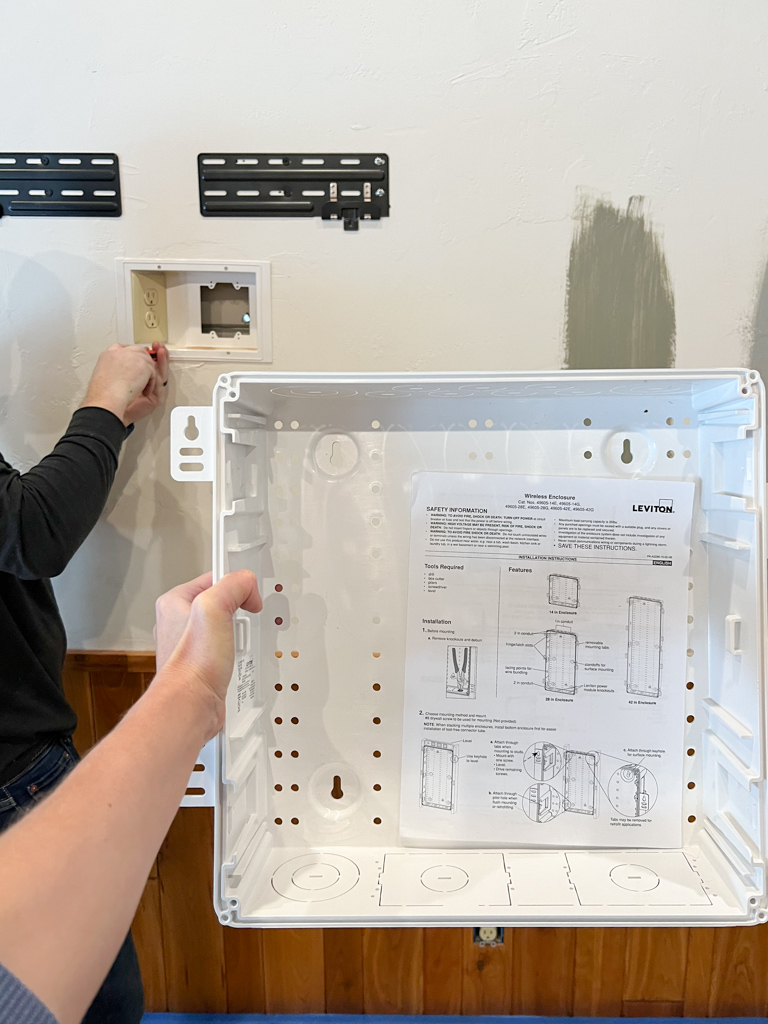
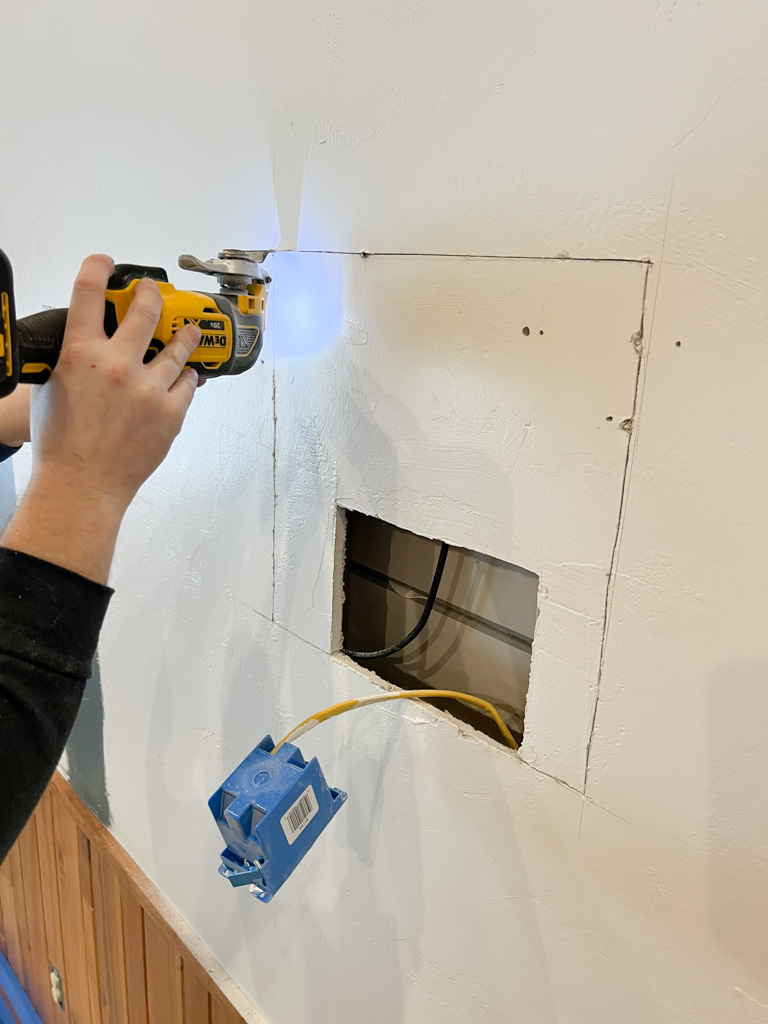
The next step was to cut the drywall to house the recessed unit. It’s designed to fit between 2 studs so we found the location of the studs and used a multi-tool to cut a clean square. It’s important to note that you’ll need electrical brought up to plug the Frame TV box in. This location already had an outlet but you should be able to easily bring one in with an open hole in the wall.
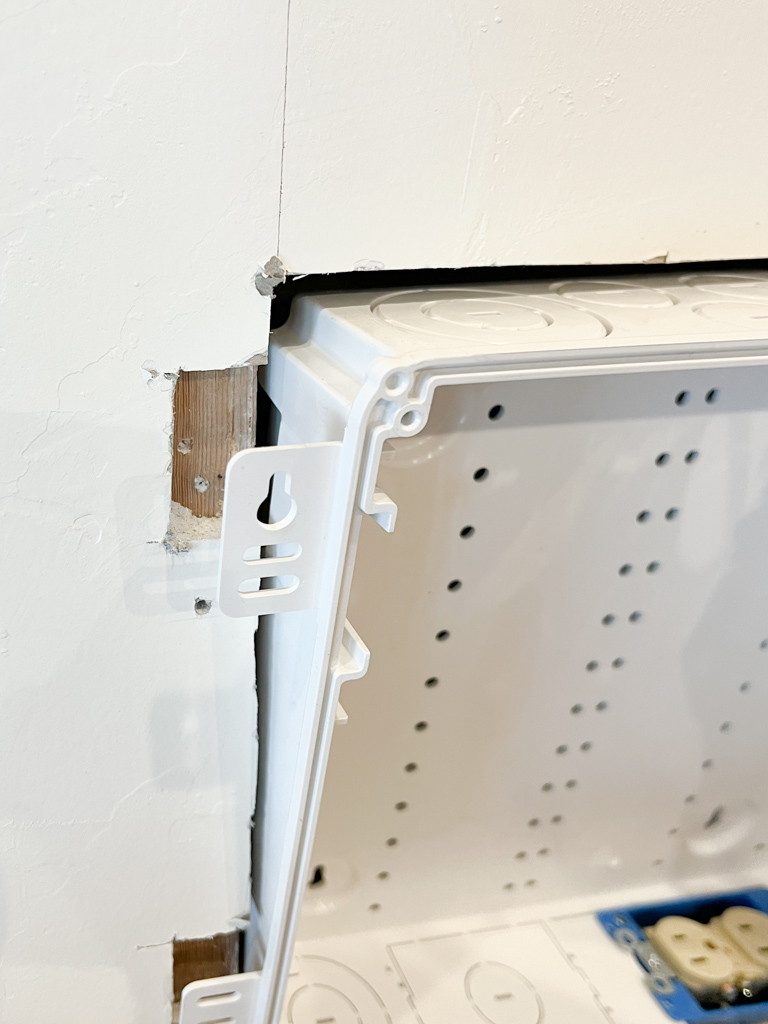
We notched out a little extra room in the drywall for the tongues to mount directly to the studs.
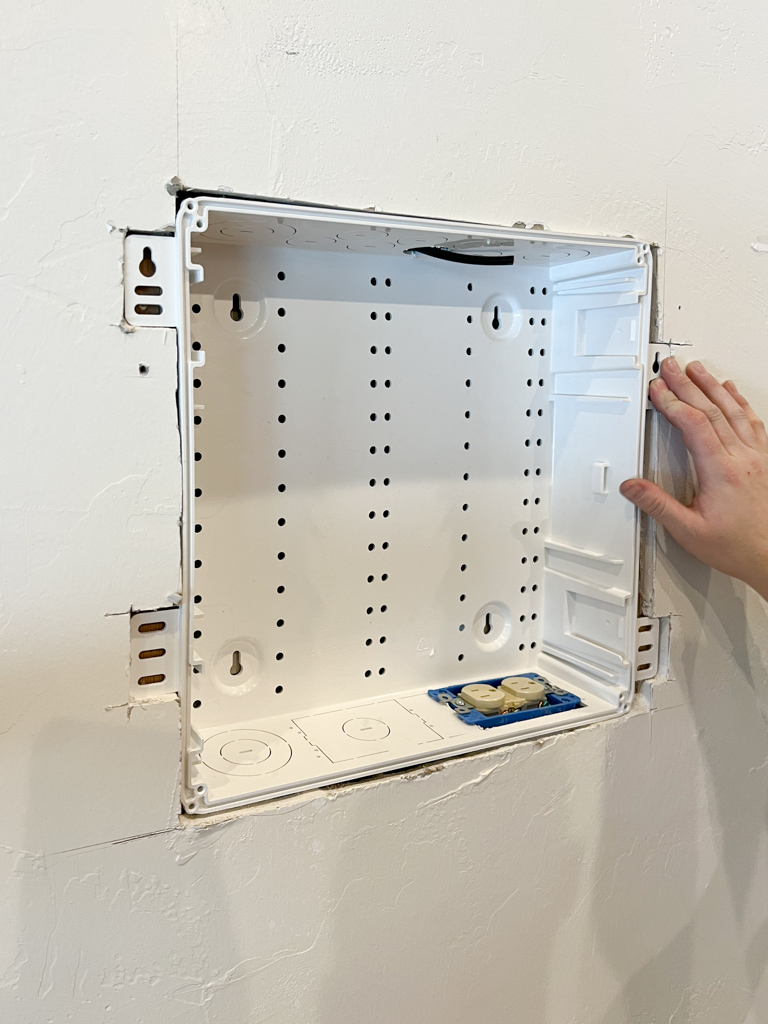
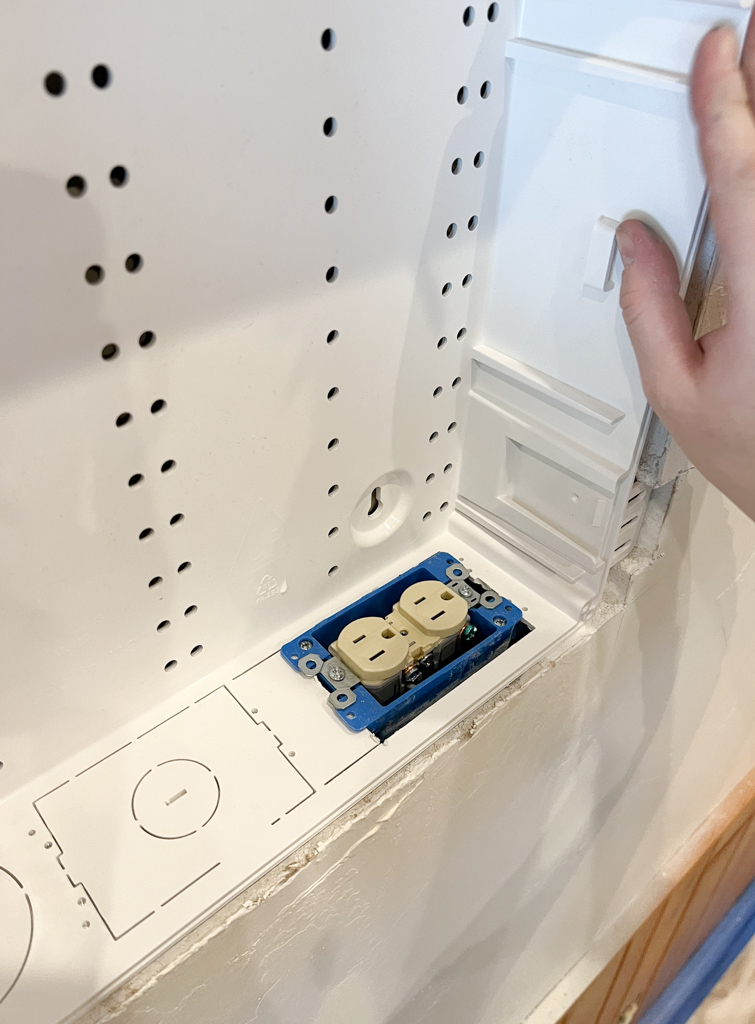
Here’s the box all plugged in recessed in the wall. You can easily tidy your cords here at this point too!
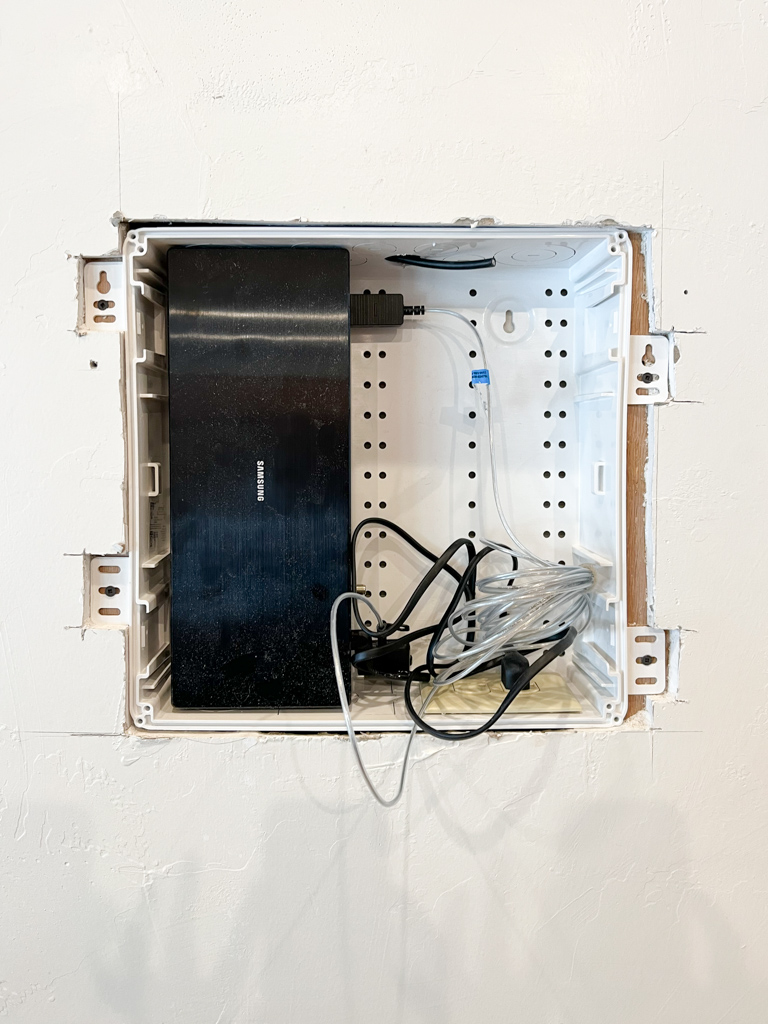
The next step is just to hang the Frame TV! There is one small clear cord that attaches from the TV to the One Connect Box. We plugged that in first and then tucked it into the wall box before mounting the TV.
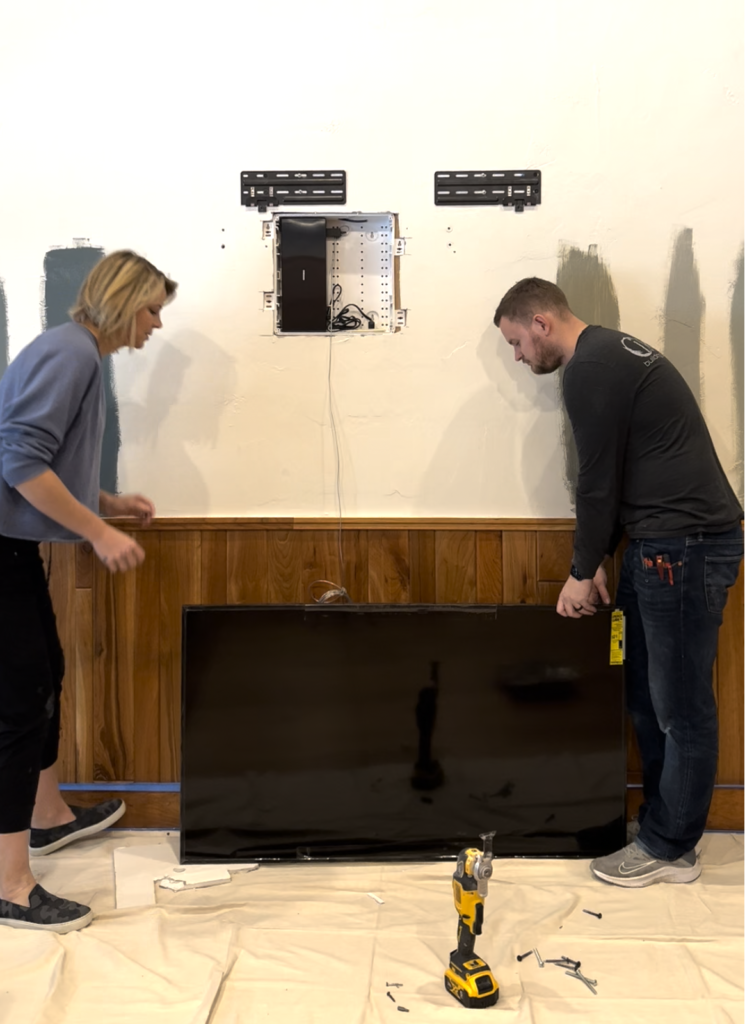
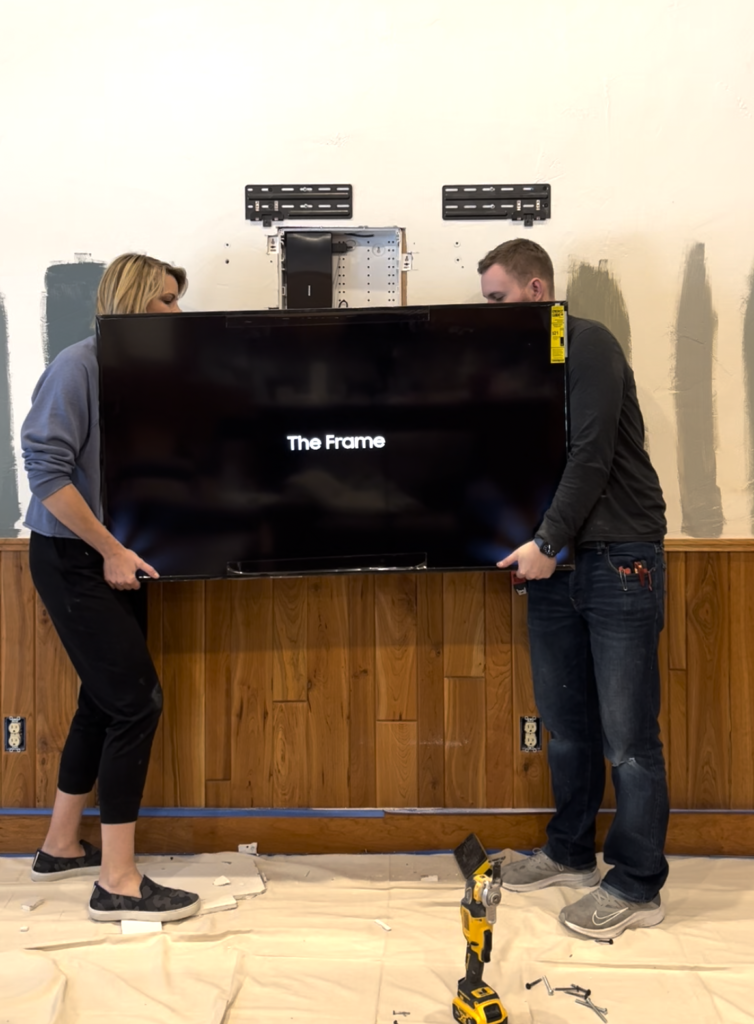
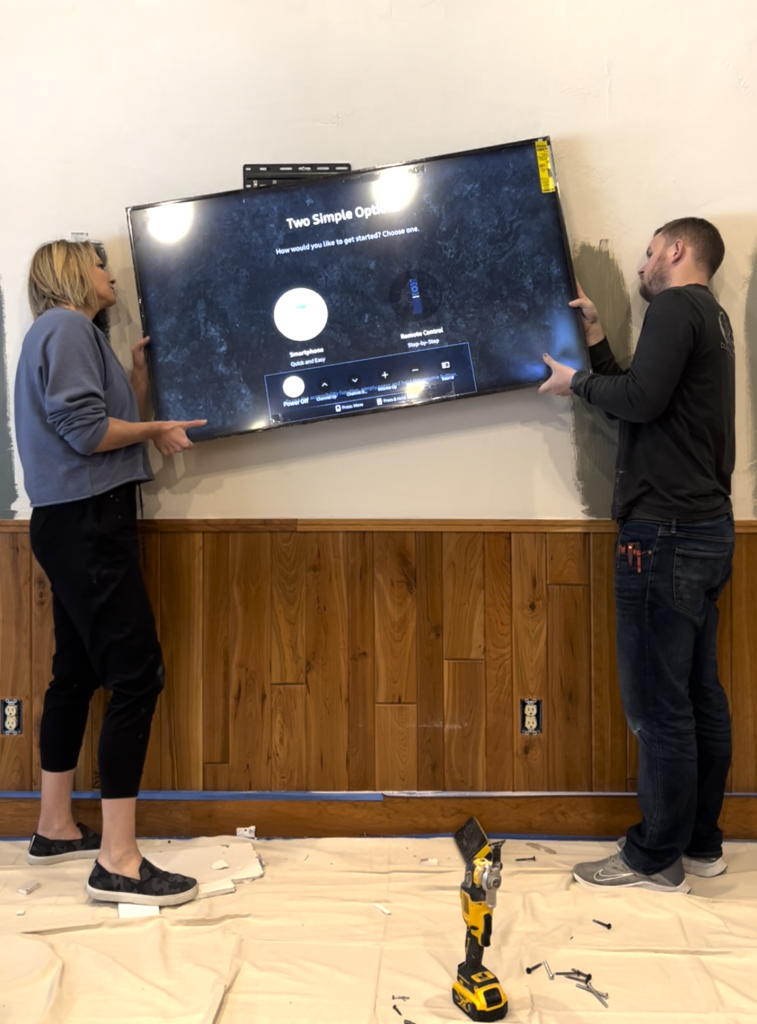
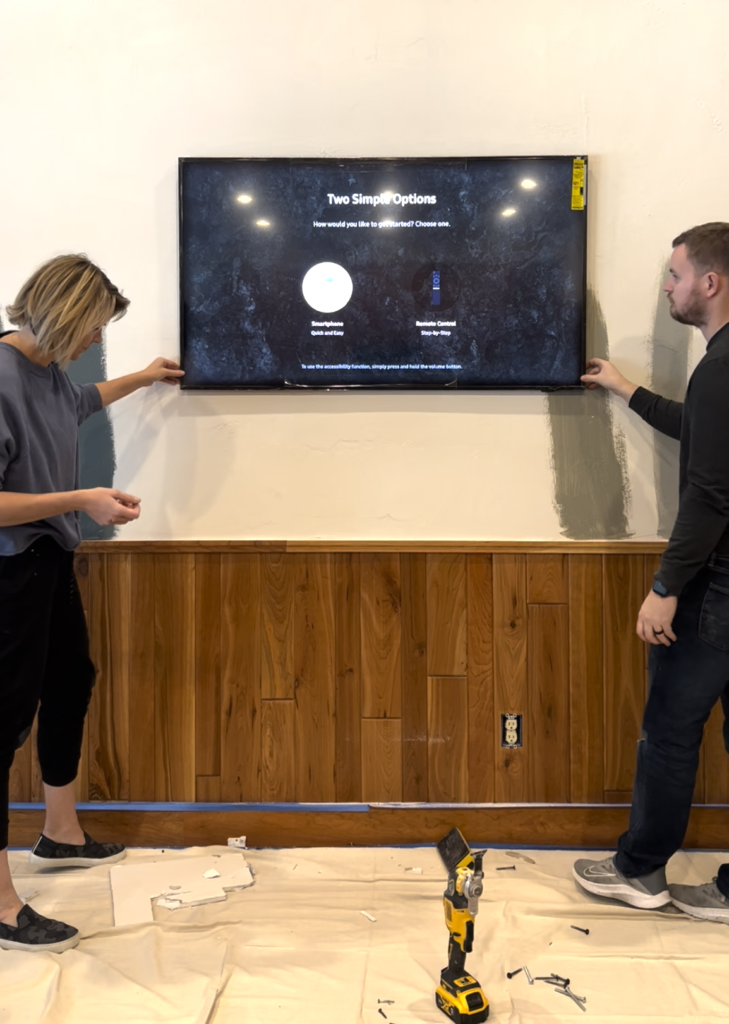
And just like that… the One Connect Box is hidden!
It’s also important to note that the Frame TV remote uses IR to power the TV on and off – the rest of the functions use Bluetooth. This is the reason the box can be hidden and the remote still be fully functional!
Hope this tutorial helps! Feel free to leave any questions below.
Sources
14″ Recessed Media Enclosure Box
Samsung Frame 50″ TV
DecoTV Frame
WIFE, MAMA, DESIGNER, RENOVATOR, & PASSIONATE DIY EDUCATOR
I'm Jennifer Gizzi.
Let's create our dream homes together.
Navigate
home
about
blog
courses
shop
Social
Youtube
Legal
Terms & Conditions
Privacy Policy
© 2021 Making Pretty Spaces