Hey There!
Thanks for stopping by the MPS Blog. Here you'll find all the nitty gritty, behind-the-scenes details of the projects you see on my Instagram. Grab a cup of coffee and take a look around. Happy DIYing!
I'm Jennifer Gizzi.
Browse by Category
design
sourcing
diy TutorialS
moodboards
SHOP OUR HOUSE
gift guides
Search the Blog
Creating & Planning For a Budget-Friendly Mini Kitchen Makeover!
January 13, 2021
The kitchen! The heart of the home. In our last home, I waited over 5 years to tackle our kitchen and I vowed not to do that in this home. We spend the majority of our time in this space and even though we aren’t ready to tackle a full renovation (which will involve moving exterior walls)… it’s been at the top of my list to make this space as enjoyable and functional as possible.
Here’s a quick look at the design board…
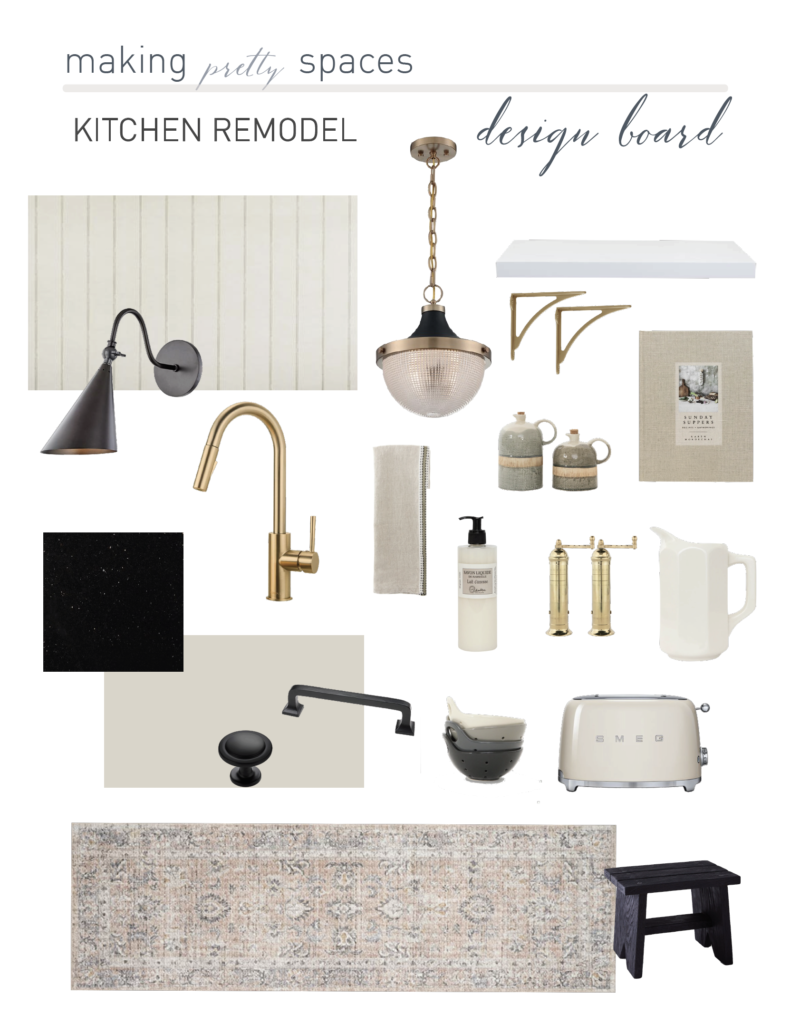
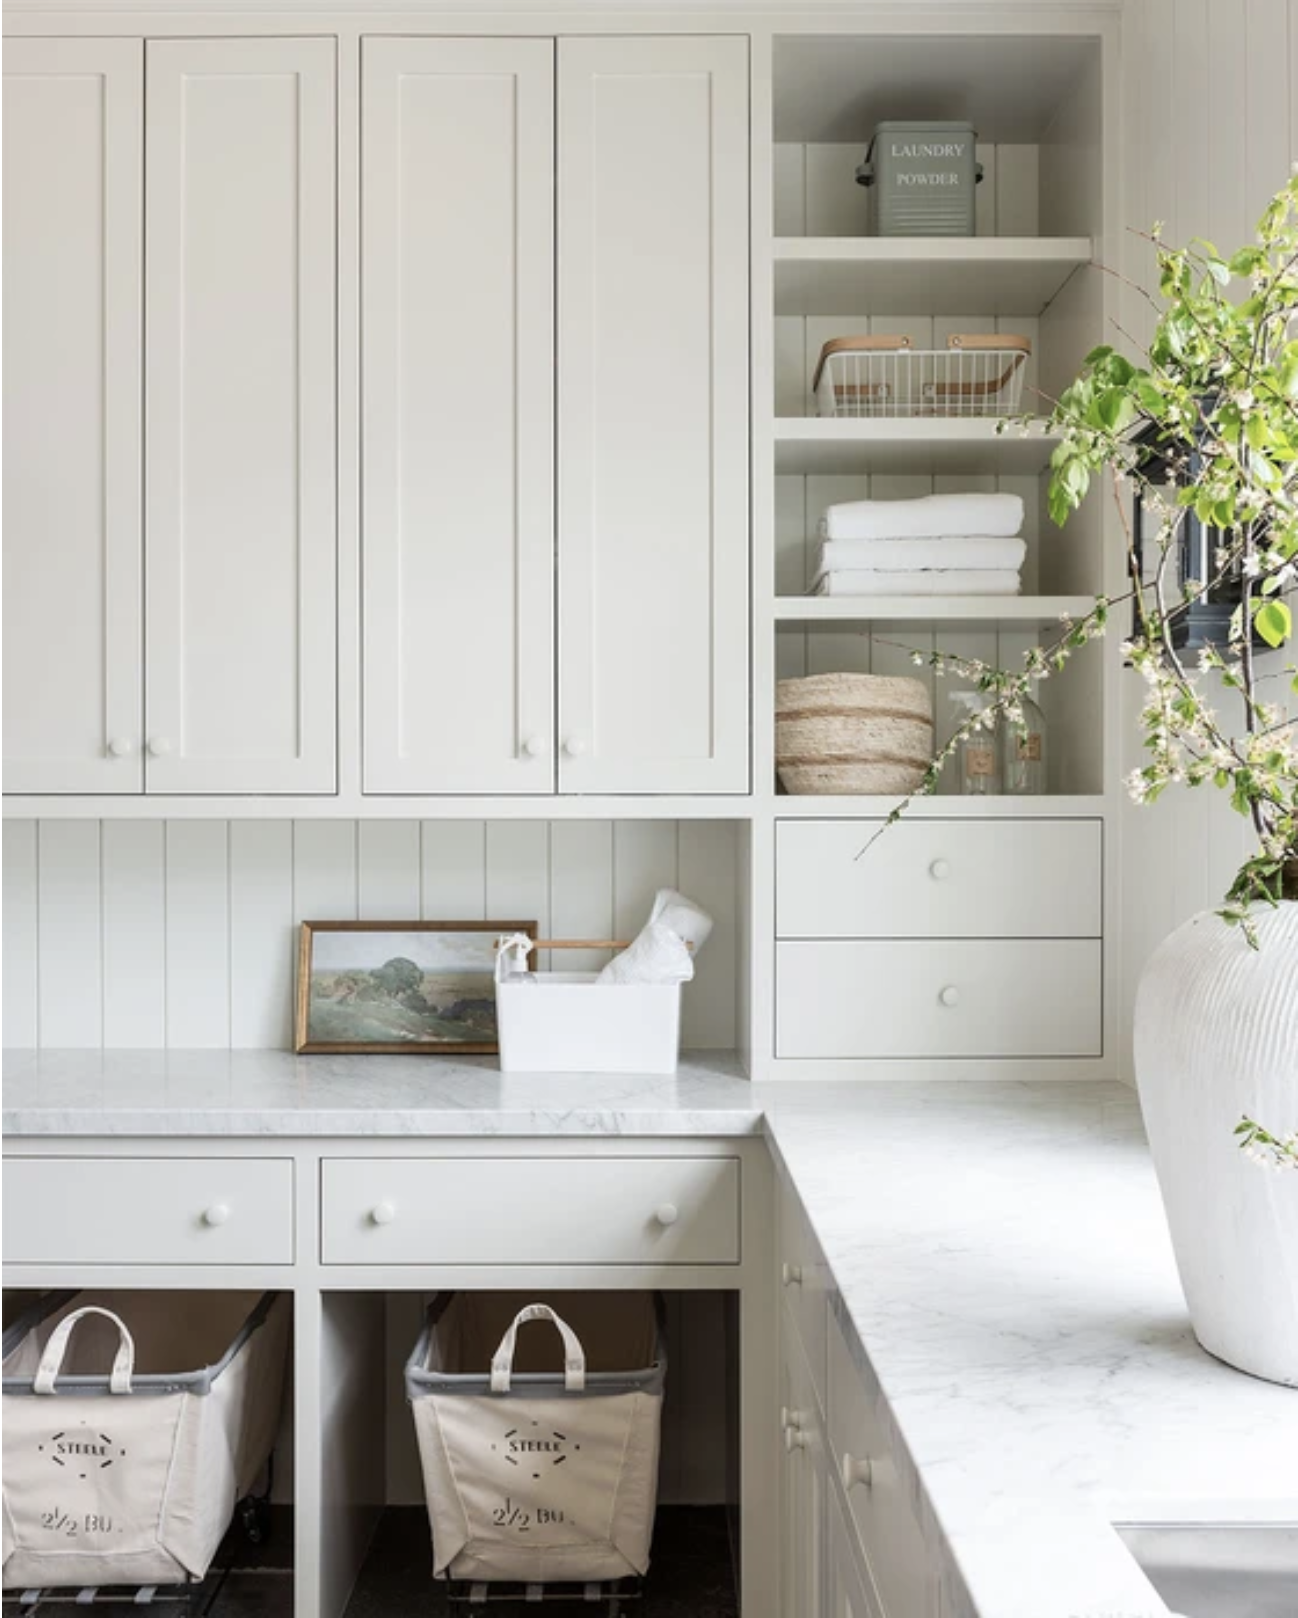
The first decision I needed to make was whether or not to paint the cabinets. White isn’t terrible so I did go back and forth on this… but in the end, I decided that I am going to paint them in a neutral greige color called “Natural Cream” by Benjamin Moore. This is the tone I’m leaning towards when we fully renovate, so I thought it would be a great opportunity to live with it a while and see if I love it!
Here’s a laundry room via Studio McGee painted in natural cream.
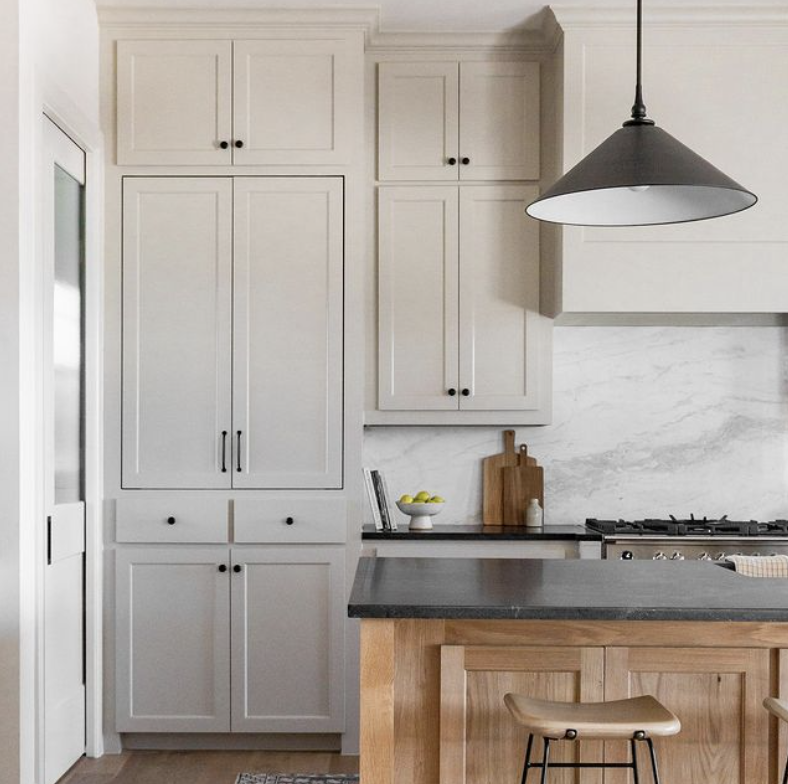
Another paint color I considered was Revere Pewter. I’ve used this color quite a bit over the years and love the warmth it can add. I’ve also seen it lean purple in certain lights and my kitchen is lacking natural light so I decided against it in the end.
Here’s a kitchen from Brett and Kara using Revere Pewter that’s lovely with warm wood tones.
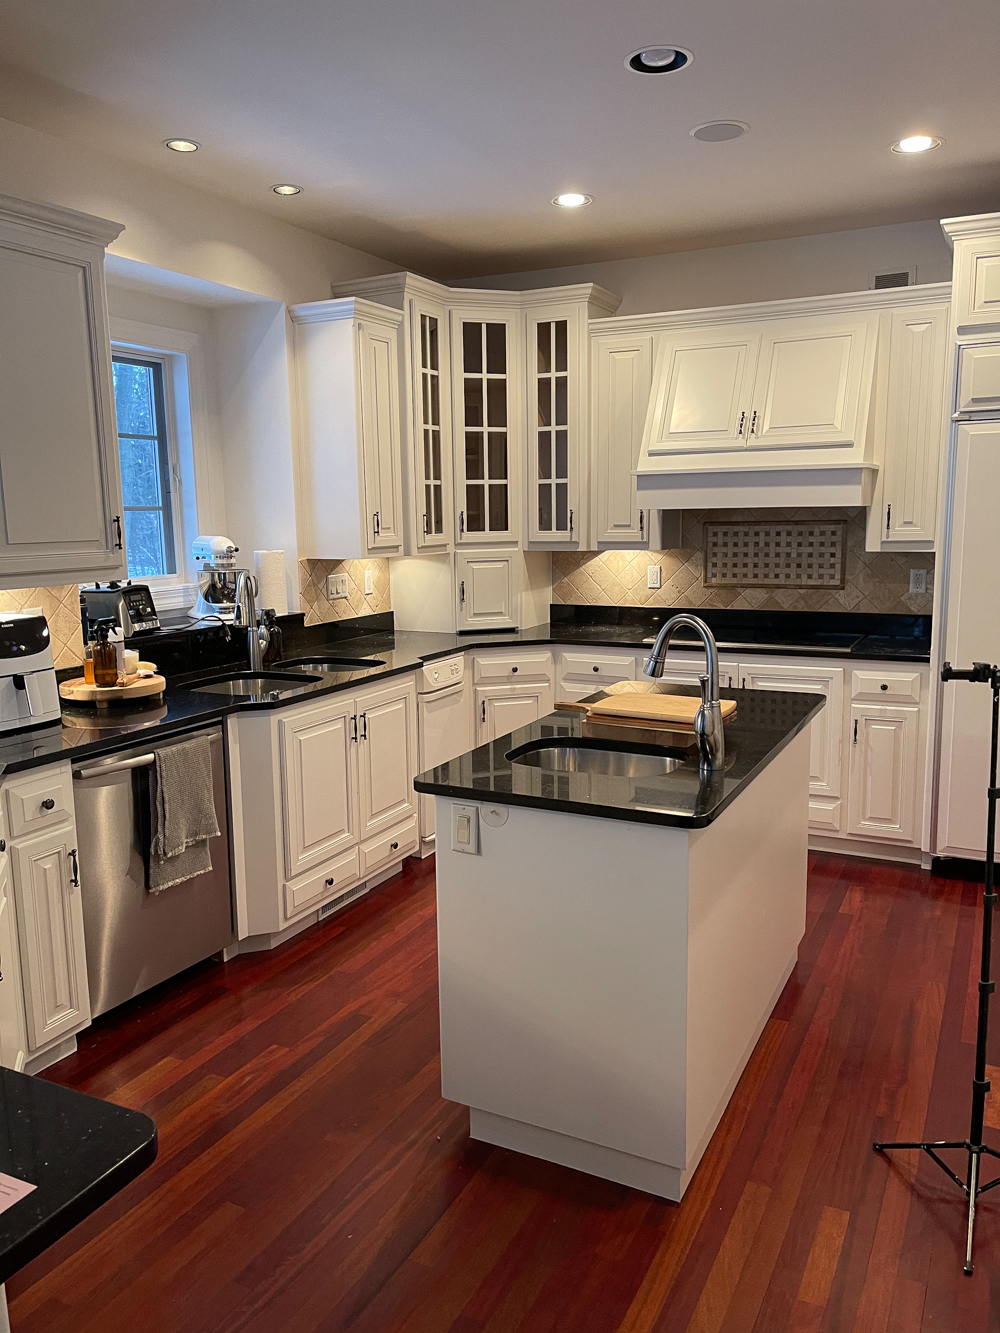
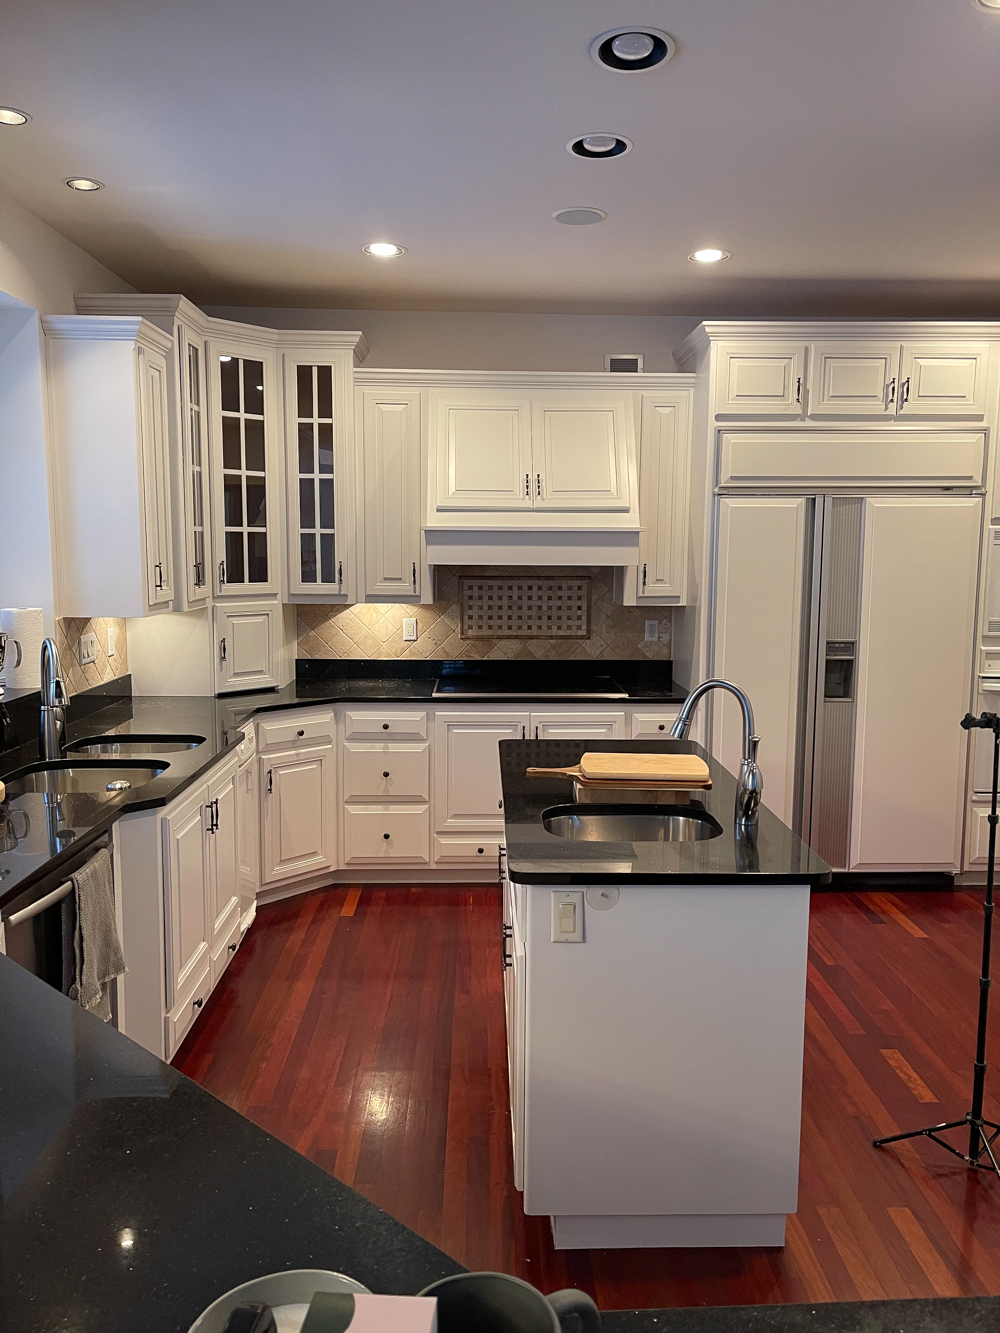
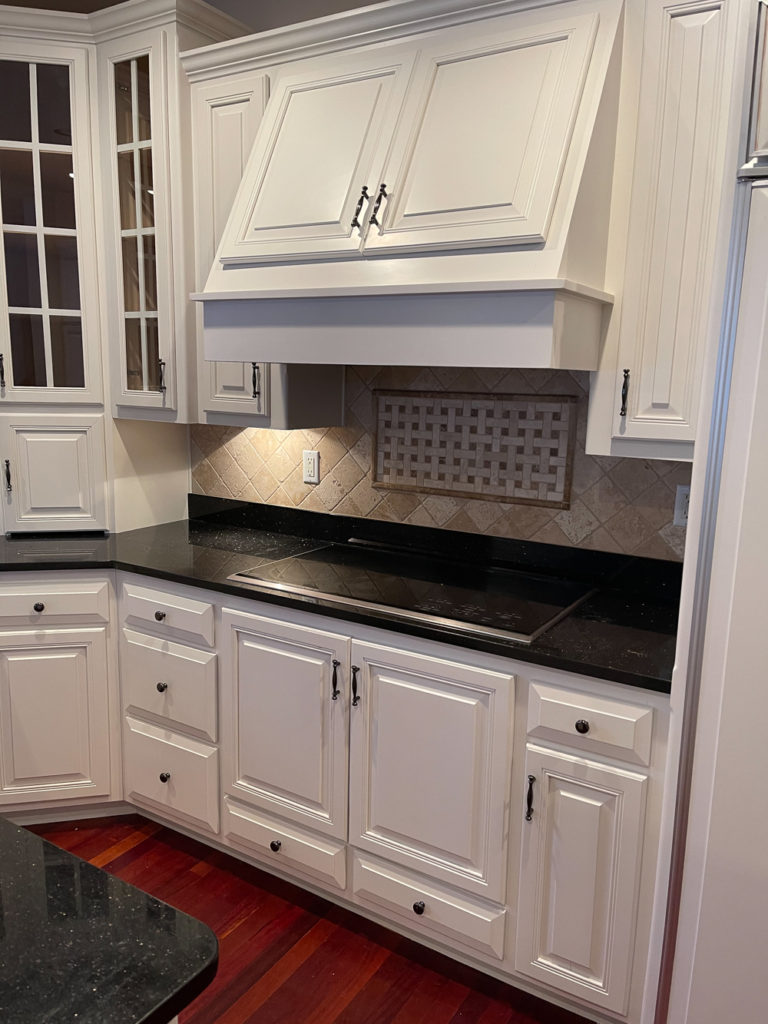
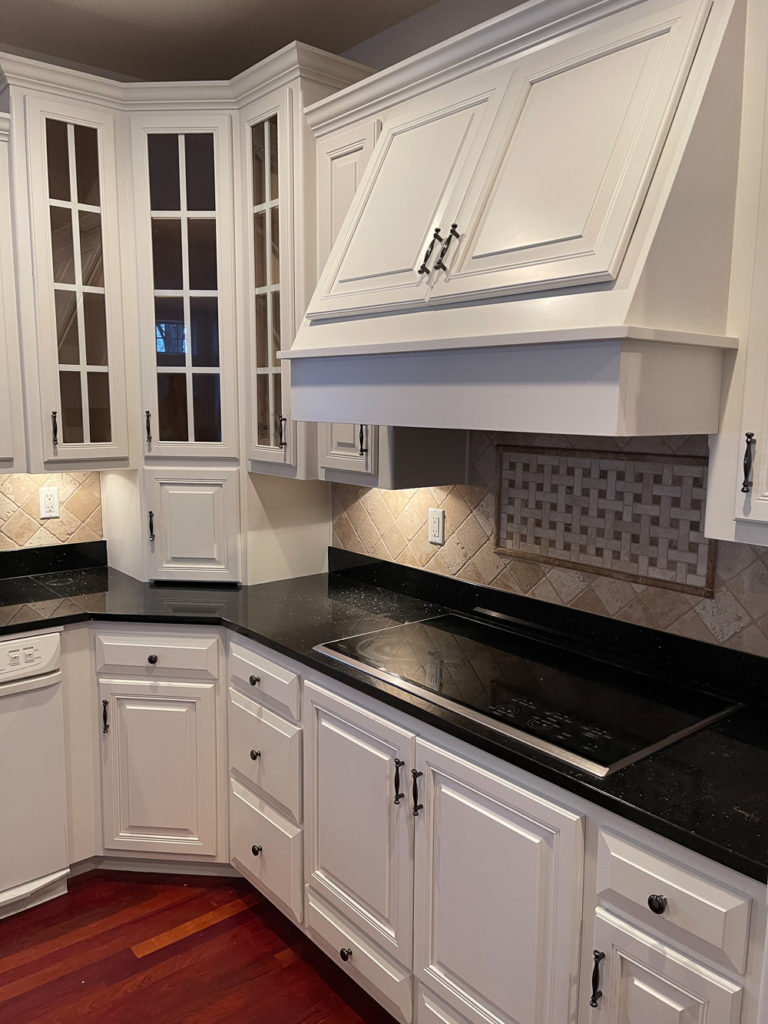
I’m competing with my orange wood tones as you can see below. I won’t replace these floors until we fully renovate this area so I had to take these into consideration when picking a paint color.
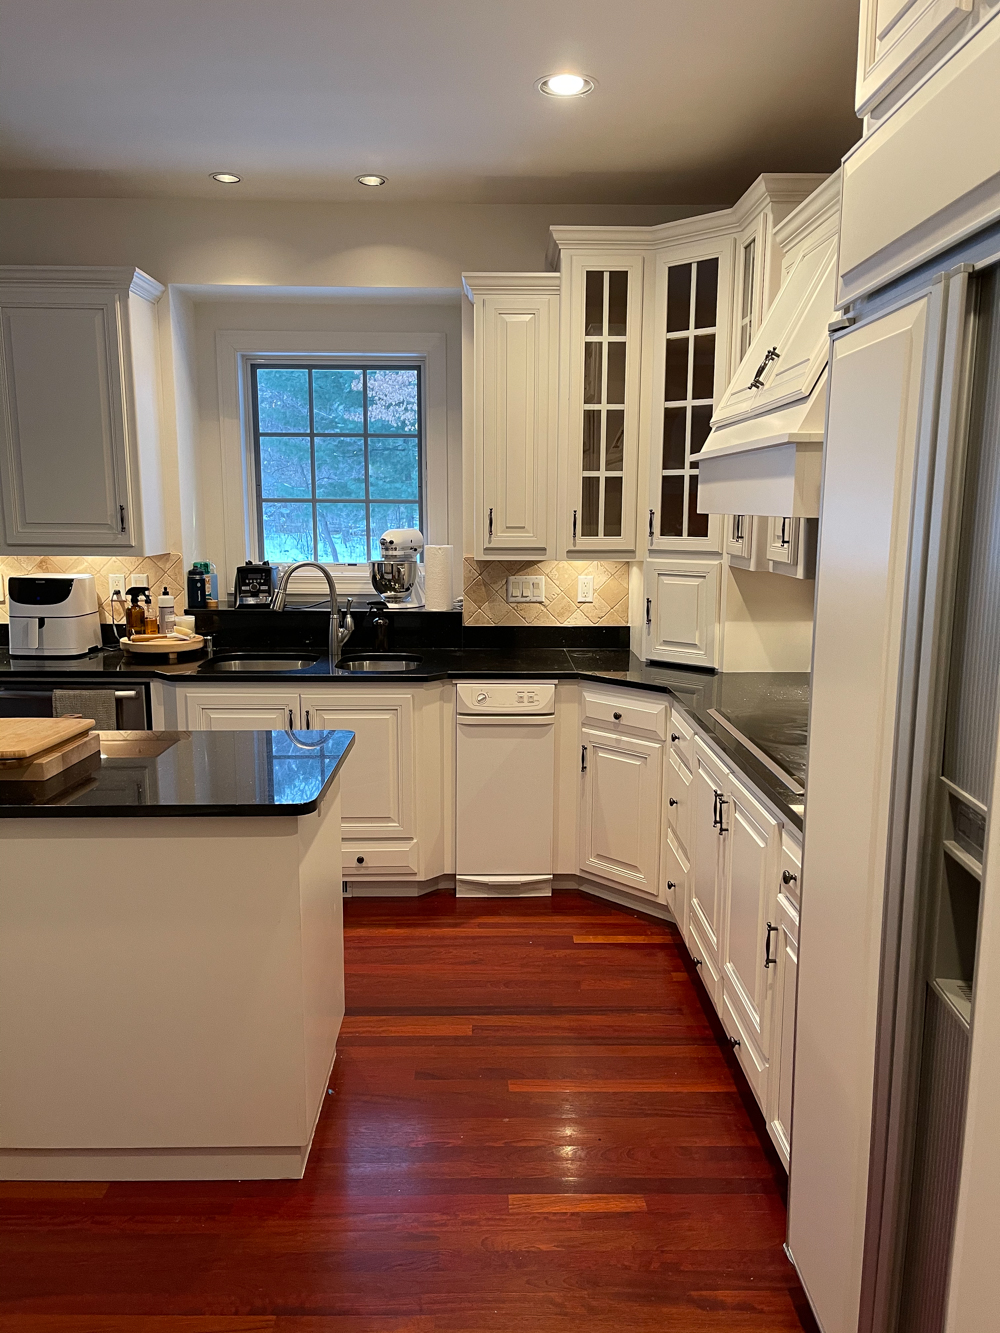
The biggest change and reason I wanted to move forward with a quick renovation is this hood. It is very low and does not make for a well functioning cooking space. I can’t count the number of times I’ve bumped my head on this! I will not be sad to see this go…
I had open shelves in my last home and really ended up loving them even more than I thought I would. I will be removing all the upper cabinets including this corner hutch and hopefully replacing it with a simple open hutch that functions better while still letting this room breathe.
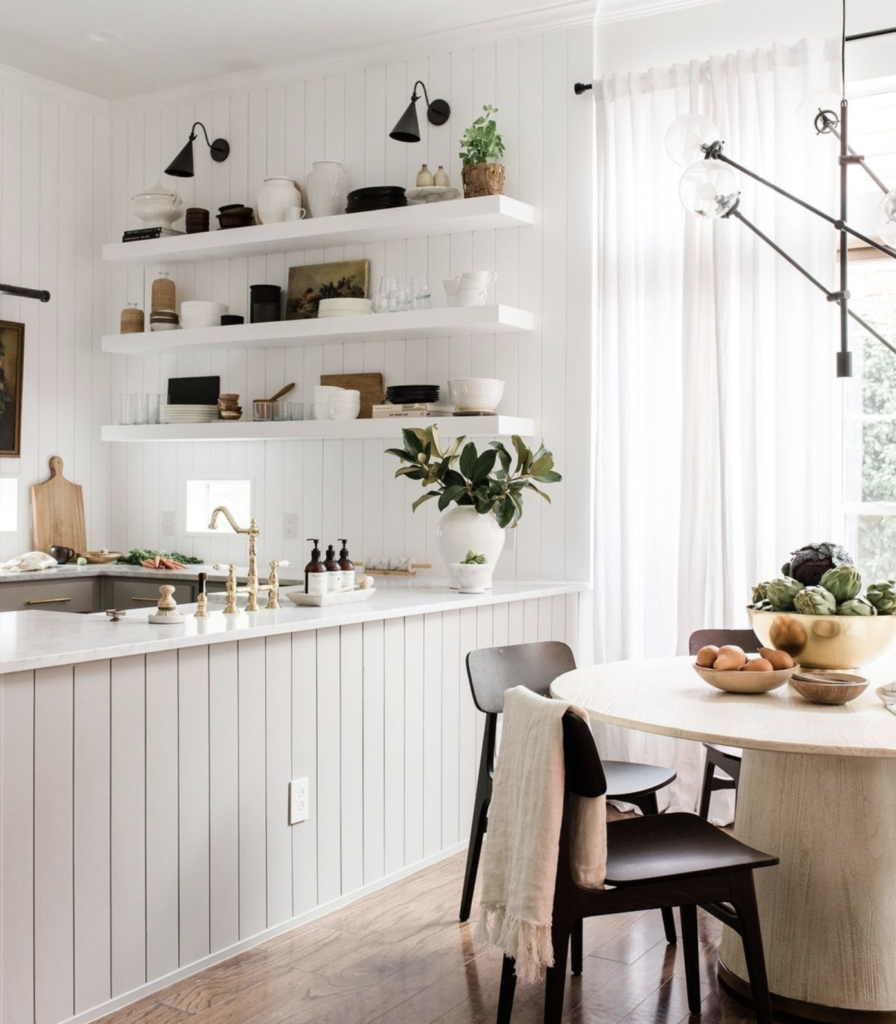
In place of tiling, which can be costly and time consuming, my plan is to add a shiplap backsplash and some simple floating shelves. The Identite Collective has a kitchen will all shiplap everywhere and it’s gorgeous!
The goal for this Phase 1 Renovation is to stay on a tight budget of $1,500 and create a beautiful and functional space we want to cook in! I’m including only the building materials and fixtures in that budget and I already own quite a few accessories that will pull the space together in the end.
I’m giving myself 2 weeks… I hope that I can teach a few things along the way and inspire anyone following along to make small changes in their own home! Let’s go!!
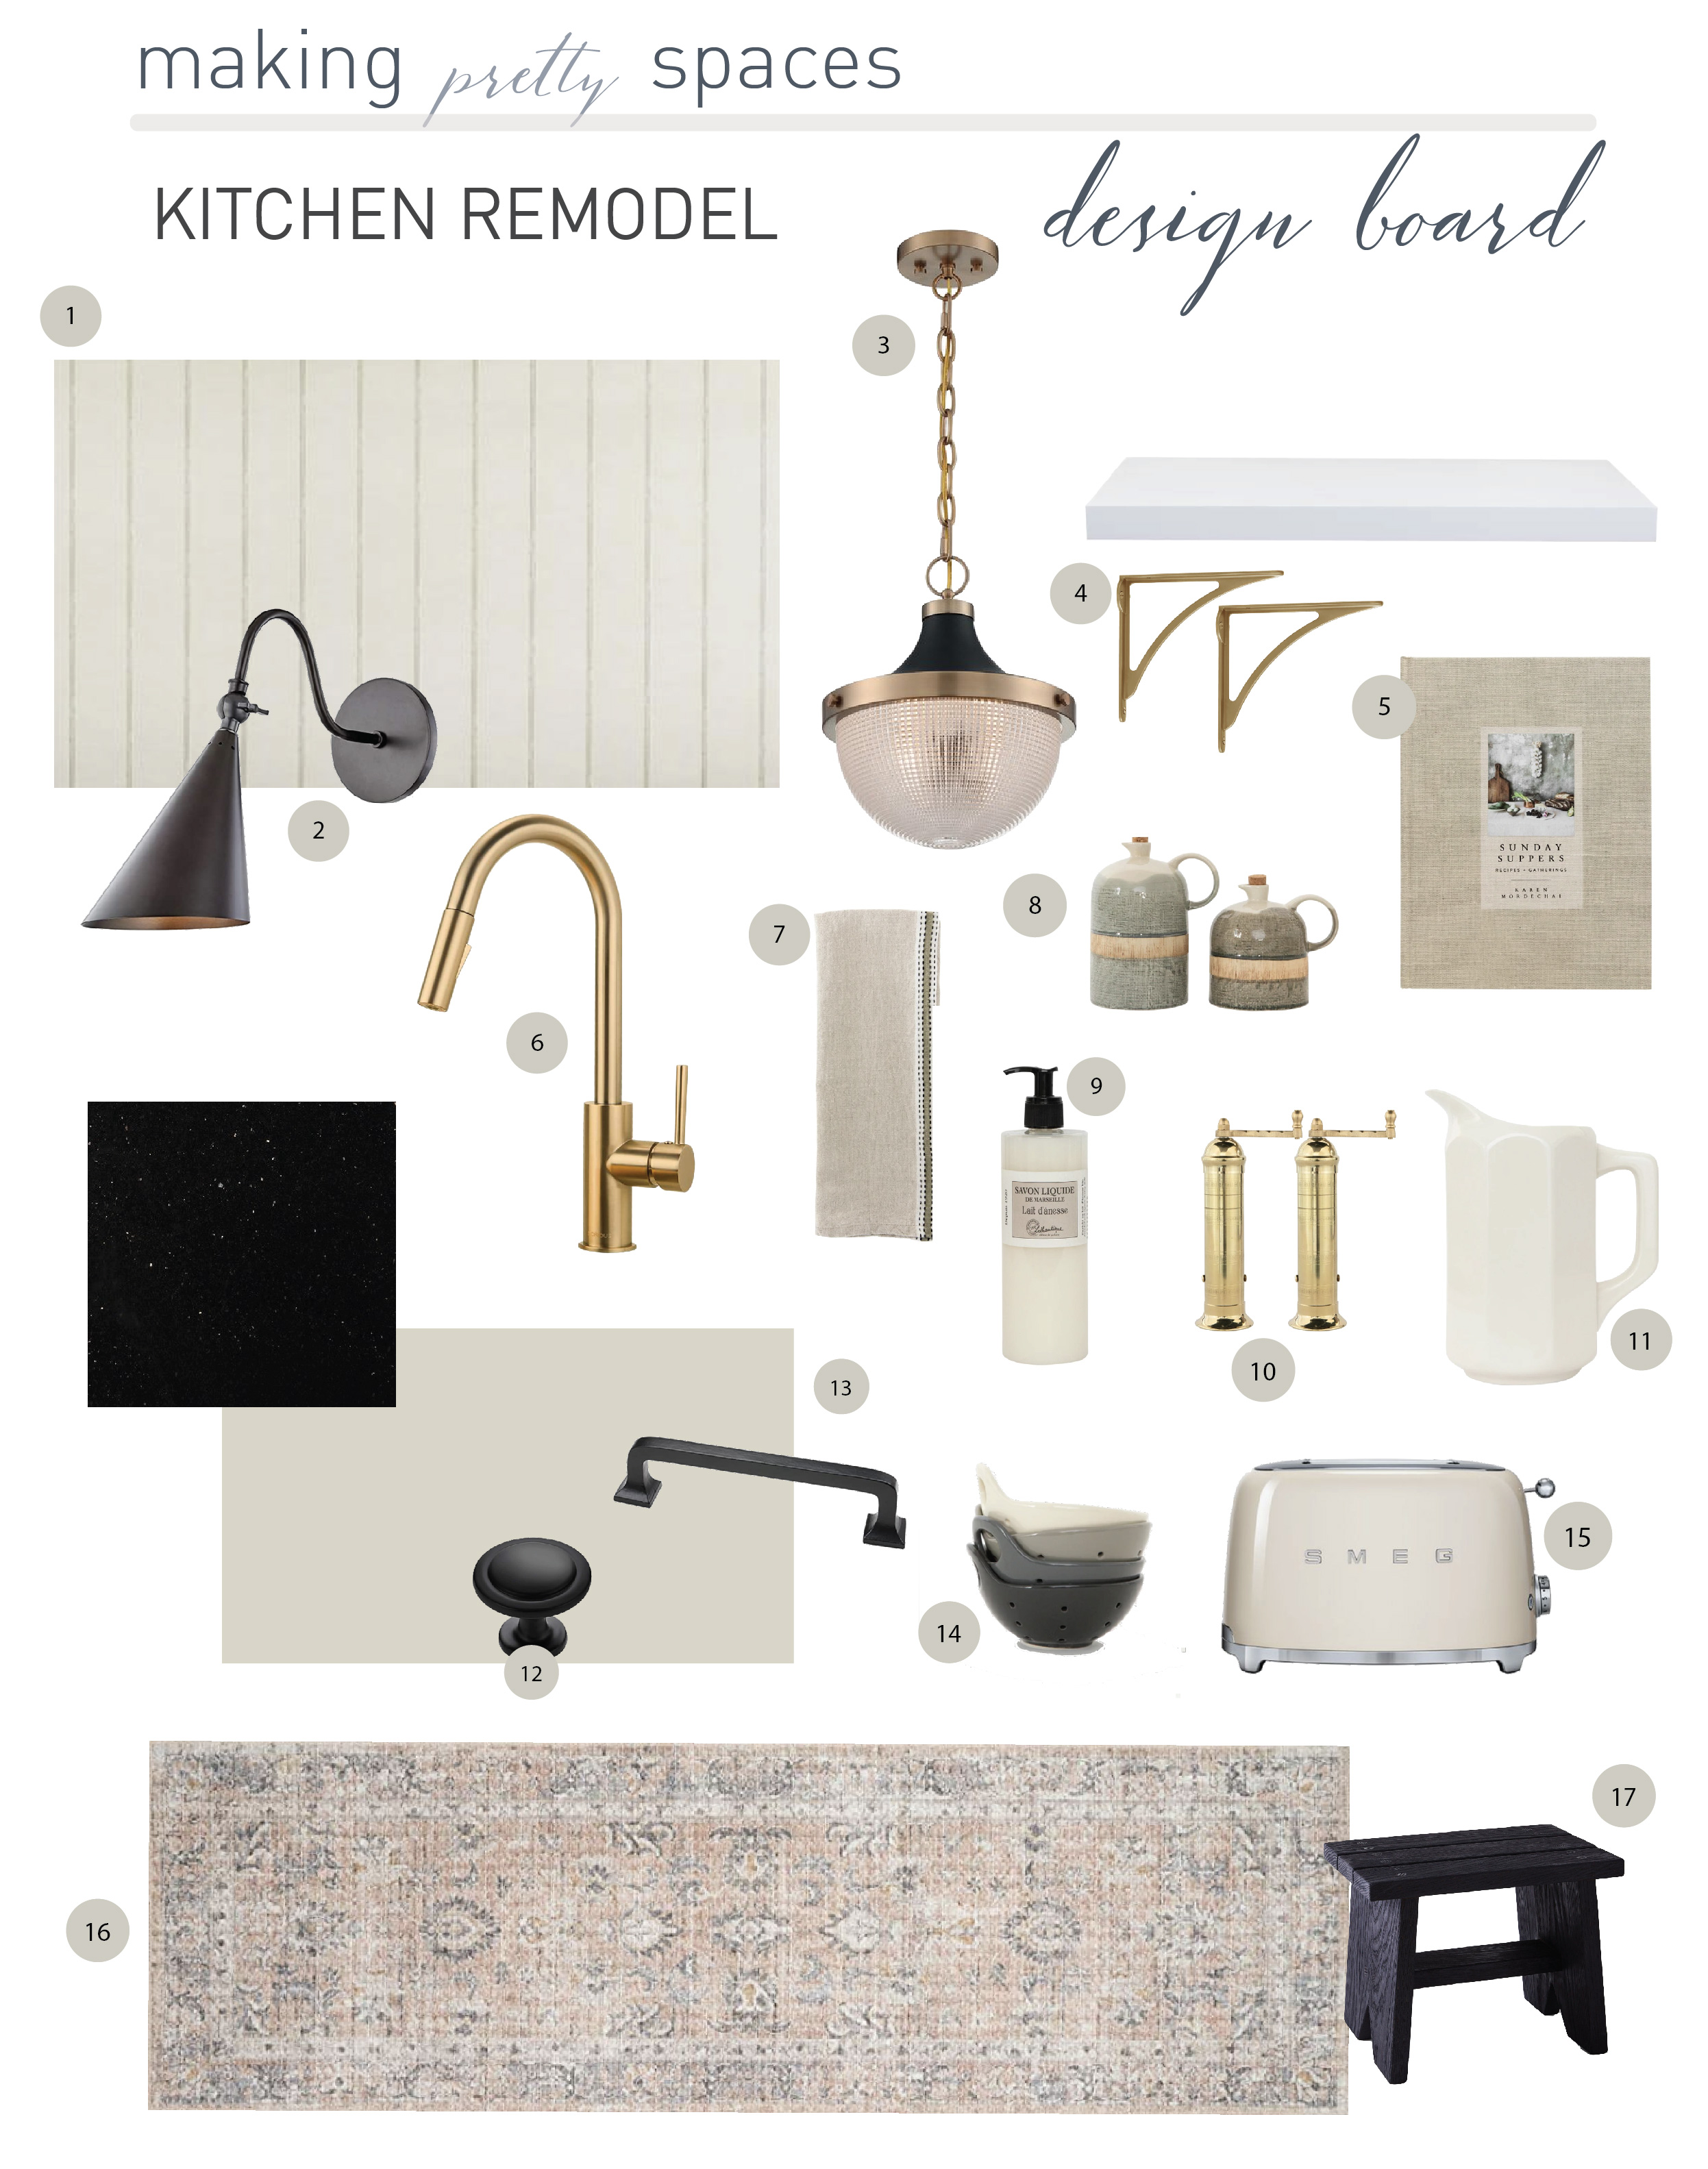
Sources:
5. Cook Book
6. Sink Faucet
8. Ceramic Jugs
10. European Brass Pepper Mill
12. Cabinet Knobs
13. Cabinet Handles
15. Smeg Toaster
16. Loloi Runner
WIFE, MAMA, DESIGNER, RENOVATOR, & PASSIONATE DIY EDUCATOR
I'm Jennifer Gizzi.
Let's create our dream homes together.
Navigate
home
about
blog
courses
shop
Social
Youtube
Legal
Terms & Conditions
Privacy Policy
© 2021 Making Pretty Spaces
I can’t wait to follow you on this project! I love your design. How did you decide to use shiplap? I know your taste is not to farmhouse… I struggle with shiplap as well because I also prefer a more modern aesthetic.
You can always make shiplap more modern… with paint, modern fixtures, etc!
I think shiplap can very modern depending on how you use it!
Hi Jennifer! I love love love the plans! I’m going through the same budget reno myself right now. I think we have the same granite (black galaxy), so I’m excited to see that our design plans are similar so I’m not way off base, haha. Can’t wait to follow along!
Awesome, I’m excited to see it come together and share!
????